Category Archives: DIY Projects

Garage born and raised projects that are done because no one else seems to be able to build it like you would. In another words, you did it yourself and it rocked!

Understanding Headspace

by Woodsbum

This discussion has come up many times between myself and my friends once we started building ARs and putting old military rifles back together. The fact is that many explanations are just overly complex in the way that they present it or the polar opposite. Somehow there doesn’t seem to be any middle ground on this subject. Luckily, Hornady has put together a long list of videos that cover a multitude of subjects on their YouTube channel. Their hour long video on headspace is really what every reloader should watch to ensure that they fully know what is going on. Even though I grew up reloading there were many things in this video that helped me to make more sense out of the whole process.

ENJOY!!!

  • Share on Tumblr

How I Use a Lanyard Hole

by Woodsbum

Many people have different uses for lanyard holes on a knife. This is how I use a lanyard hole more often than any other.

Especially with bushcraft knives, sheaths are made to cover most of the handle. There is usually just a little bit showing to allow you to pull the knife out. When you have large hands or are wearing gloves, this can be a pain in the rear end to deal with. It is easier than many other retention systems such as snaps, straps or toggles. Here is how the normal bushcraft knife looks in its sheath. This pictures does have a leather lace started in the lanyard hole.

SPL Knife in a Skab Leatherworks sheath

SPL Knife in a Skab Leatherworks sheath

As you can see, there isn’t that much available handle to get bear sized paws on. I build myself a leather “toggle” as I call them. This is what it looks like when I am done.

Ready for use

Ready for use

As you can see in the pictures, I not only have a good deal of leather to use in pulling the knife out of the sheath, but I can also use that leather to allow me to choke down on the handle for chopping. Since it slides to create a larger loop if desired, I have also been known to wrap my wrist so I can loosen my grip when carving or processing firewood. Although many of you see this knot and already know how to tie it, I figured I would give those that don’t a little tutorial.

The first thing I do is pass the lace back in upon itself to make a loop. It should look like this.

The start

The start

I then wrap the free end around the bottom of the loop to build something similar to a noose. When you get the desired number of wraps just pass the free end back through the top of the loop and slide everything together to make a tight knot.

Start of the wrap

Start of the wrap

Make sure you keep everything tight and slide the free ends down upon itself to make the cleanest knot possible. You don’t want the knot coming loose.

Finished

Finished

I have seen people put epoxy over knots like this, but I don’t recommend it. If you keep everything tight and clean there should be no issue during use. Sometimes knots do slide loose. If that happens to you, then just retie it. It really isn’t a big deal.

Over the years I have seen a multitude of different knots used. It really doesn’t matter how you put this together, in all actuality. The big thing to remember is that the lanyard hole on a knife can be used. So many people just ignore them and complain when they have problems drawing their knife or with their knife slipping while chopping. Remember that these knifes are tools like any other tool. Use them and their features as intended when needed.

Good luck!!

  • Share on Tumblr

Roast Wild Duck

by Woodsbum

In continuing with my wild game recipes, I have included this one for roast wild duck to the list.

Start off by plucking the feathers and cleaning it properly. The wash the duck thoroughly and dry it.

Use your favorite bread crumb dressing, but just ensure you use more onion for duck than you do for turkey. The onion brings out the flavor of the bird much more. Also it is important to note that the dressing helps to soak up a lot of the greasy texture from the meat.

Once stuffed, sew the duck up and line your roaster it is important to salt and generously pepper your duck. I also like a touch of sage. Then place some strips of bacon on the bird and cover.

Heat your oven to 300 degrees for about 30 minutes, then lower your heat to 250 and bake for about 3 hours. Continually baste to keep it moist.

I usually do between 4 to 5 wild ducks in a single roaster. Adjust your cooking time based upon how many you cook at a time.

Use the drippings to make a gravy as if you were making turkey gravy. The gravy goes quite well with red potatoes. Although I don’t like dressing, the bird seems to cook better and less greasy with the dressing so I highly recommend you don’t go without it.

  • Share on Tumblr

Rawhide Mora Sheath

by Woodsbum

It has been several months of me procrastinating, but I finally got motivated for long enough period to finish my friend’s knife sheath. Believe me when I say that it was not an easy feat. We are in the middle of the rainy season and I still have a lot of new Netflix series unwatched, not to mention some Captain Morgan Reserve that isn’t going to drink itself.

Lack of motivation and inebriation opportunities aside, I did get the sheath finished. For this build I did a few things differently. Instead of making a complete leather liner I cut out the plastic from the original sheath and then used leather for the top portion to make it snug. The first attempt didn’t work as well as I had anticipated so I ended up having to take it all apart and trim the thickness of the liner. Interestingly enough, the inner liner didn’t have to be stitched once I had the old one wet formed and waxed a little. It really holds its shape well.

Rawhide Mora Sheath

Rawhide Mora Sheath

In future builds I might do something similar from now on. If I take the leather I am building the liner out of and wet it, form it, and bind it to keep it in shape, and then wax it when it is done I can easily just use rawhide over the top as an exoskeleton of sorts. This keeps the rawhide smooth and allows it all to stay tight without the liner binding up on me after the rawhide constricts during drying.

You can see how I forced the over layer to constrict and thus hold onto the main sheath by shear friction.

Side View - Notice the forced shrinkage.

Side View – Notice the forced shrinkage.

A few things that I have discovered about rawhide:

  • You can adjust the shrinkage of the rawhide with use of a heat gun. If you want it to constrict tighter just dry the wet rawhide with the old Warner.
  • Dying it is almost impossible, but getting it to soak up color while it is getting ready for working gives it a nice even color. I used coffee on this build but I am thinking about using some fruit juices and wine for some added shades on my next builds. I think some red wine in coffee would give an almost mahogany color.
  • The more rugged the rawhide looks the better the finished product. I like how the inner part of the rawhide is textured. It gives a very interesting and rustic look to the sheath.
  • Layers of different rawhide cuts and textures also gives it an interesting look.

I am thinking about doing something out of rawhide for my Marlin 1895 to hold a few additional rounds. I think I can do a rawhide cover with leather liner that will lace up one side and hold 8 to 10 cartridges. If I do, I will try and take more pictures of the actual build process. These last couple knife sheaths were fairly basic so a final description seemed to suffice.

As I do more projects and find soaks that will color stain the rawhide in interesting manners, I will update you. I will also do a few builds that have more pictures of the process. If you have been reading my site very much at all you know I am very bad about taking pictures. Someday this may change, but if you have any questions I can try and answer them for you here.

Thanks for looking and if you get a chance, try out some projects yourself.

  • Share on Tumblr

Gift Neck Knife

by Woodsbum

I have been working on a gift neck knife combo for my son in law’s birthday. He does not have any real field knives for camping, hunting or bushcrafting so I thought that a solid neck knife would be the best way to get him started.

When choosing a good field knife, I like to look at how harsh someone is going to be on the blade. My son in law doesn’t do a lot of woodcarving, but wants to get more into hunting. Getting him something that was lighter on the bushcraft and heavier on the camp type chores seemed like a good target. The blank I chose was a MP Classic built by Matt Paul in New York. We have several of his builds and have been very happy with them. Getting a solid blank from Matt was a no brainer since I wanted something to eventually become an heirloom. Because this was going to be my first “outdoor gear” gift for him it was very important that I do a lot of the work to get it built and ready. It might not have been important to him, but I wanted him to know that I was willing to spend a lot of time and energy in creating something that will last his whole lifetime.

When I went shopping for scales I looked for something different, but went with the classic lines of the blank. There was no real shape to the handle so something simple and elegant seemed like the right choice. I chose some paduk that had some phenomenal color and grain. For pins I used some brass stock.

Fitting the handle on a straight lined knife handle is not nearly as easy as one would think. There are no curves or shapes that you can use to hide small imperfections. Everything has to be completely straight and smooth to feel right.

Unwaxed and initial shaping

Unwaxed and initial shaping

To finish the handle I melted in some carnuba wax and polished it. For some reason the pudak soaked the wax up so I didn’t get the high sheen I was expecting. This is okay, however. The lowered gloss of the handle goes well with the sheath I made him.

Waxed

Waxed

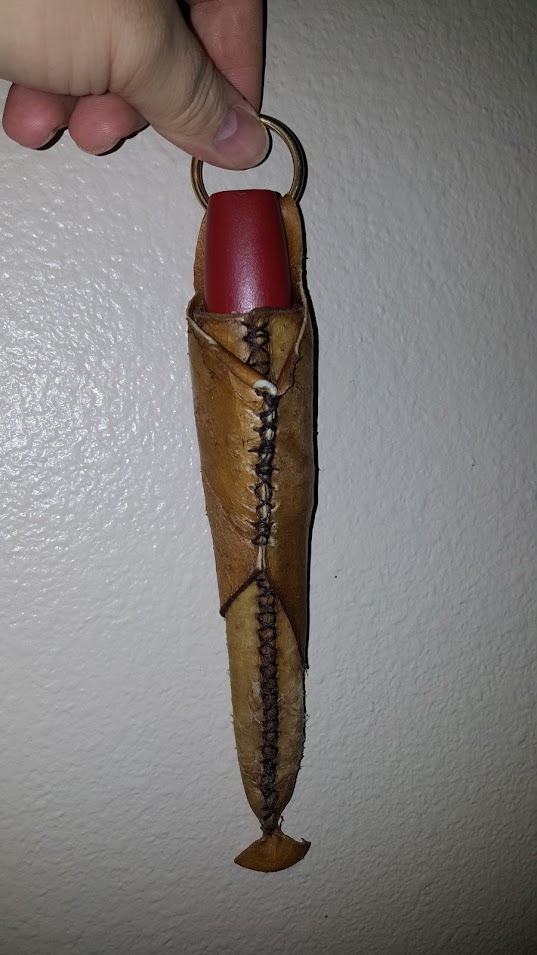
To compliment this knife I wanted a sheath that was completely different than what you would normally see. I started off by making a leather liner out of 8 oz leather. Due to my normal picture taking deficiencies, I have had to add this picture of another sheath I am making so you can see the gist of what I did. From the picture you can see that I just did a simple taco sheath without a welt.

Liner

Liner

And then I wet formed the sheath into a Scandinavian style form.

Wet formed liner

Wet formed liner

Once I got this wet formed I wrapped it in rawhide. The process involves a lot of soaking, stretching and is then sewn along the same lines as the liner. The rawhide was left overlapping the liner at the top so that I would be able to hit it with a heat gun and shrink it around the knife handle. In this picture you can see how I shrunk the rawhide to form it around the top of the leather liner.

Top of finished sheath

Top of finished sheath

The back of the sheath, like I mentioned already, is sewn along that same line as the liner. As the rawhide dried it pulled around the lines of the blade.

Back of finished sheath

Back of finished sheath

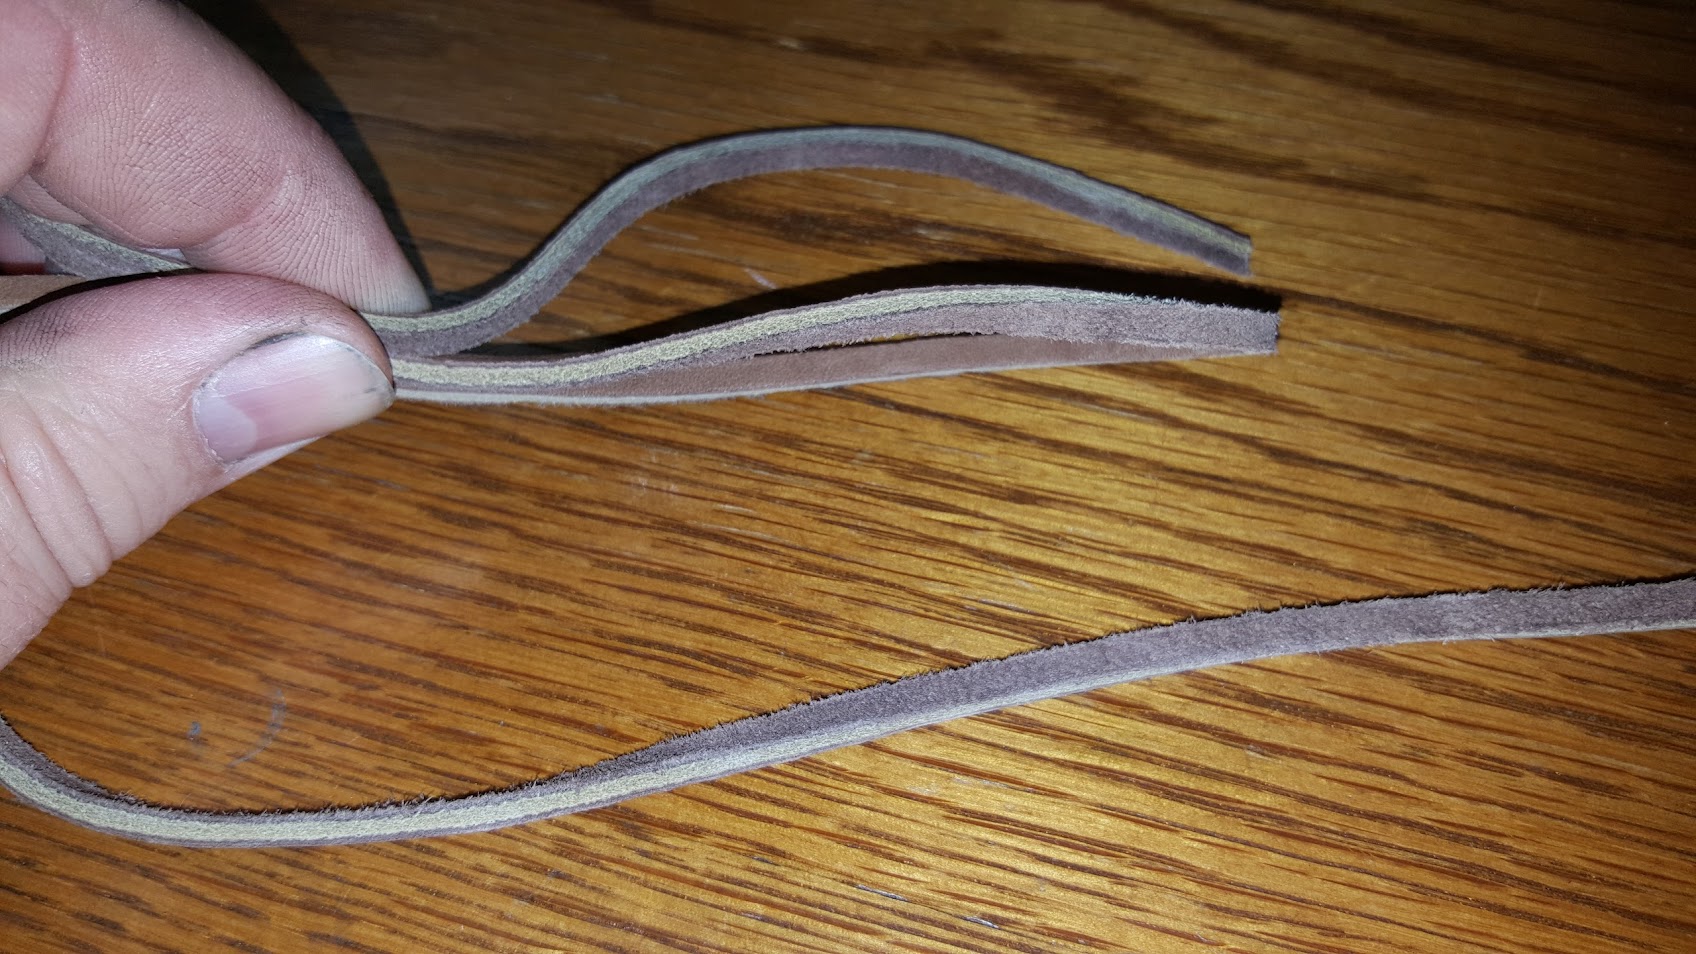
I finished up the sheath with a leather lace that I whipped onto the ring. For adjustability I added the fisherman’s knot on the side. You can also see how tightly the top of the sheath fits against the knife handle in this picture as well. This will keep water from running down into the sheath and hopefully help protect everything. To keep the blade from rusting I squirted some oil into the sheath and waxed the inside of the liner.

Top of finished sheath and knife fit

Top of finished sheath and knife fit


Hopefully my son in law likes his birthday gift. The sheath is still drying, but I hope to have it completely ready for use by the time I see him on Sunday. Lucky for me, he doesn’t read my site.

  • Share on Tumblr