Category Archives: Archery

Anything related to archery.

Pittman Robertson Act

by Woodsbum

With the amount of hate posts I see on FB concerning hunting due to the dentist harvesting a lion, I find it completely asinine. Due to a lack of education among the general population, people somehow think that all conservation programs are funded by some “Money Fairy” or by income taxes. It truly is a shame that these “do-gooders” don’t think or research a subject before they start protesting.

To help educate people a little bit about the source of funding with regard to conservation and wildlife programs, I have put together this post on one huge contributor.

The Federal Aid in Wildlife Restoration Act of 1937 (Pittman-Robertson Act) took an already existing 11% excise tax on firearms and ammunition, gave control over to the Secretary of the Interior, and had it redistributed to the states based upon various factors which include number of hunters. This money must only be used by the State’s fish and game department. Any use of the money must be approved by the Secretary of the Interior. Such projects such as research, surveys, wildlife management, habitat, land acquisition for hunting and leasing of land are all acceptable uses of these funds. To break it down simply, it must be used for conservation and wildlife management programs.

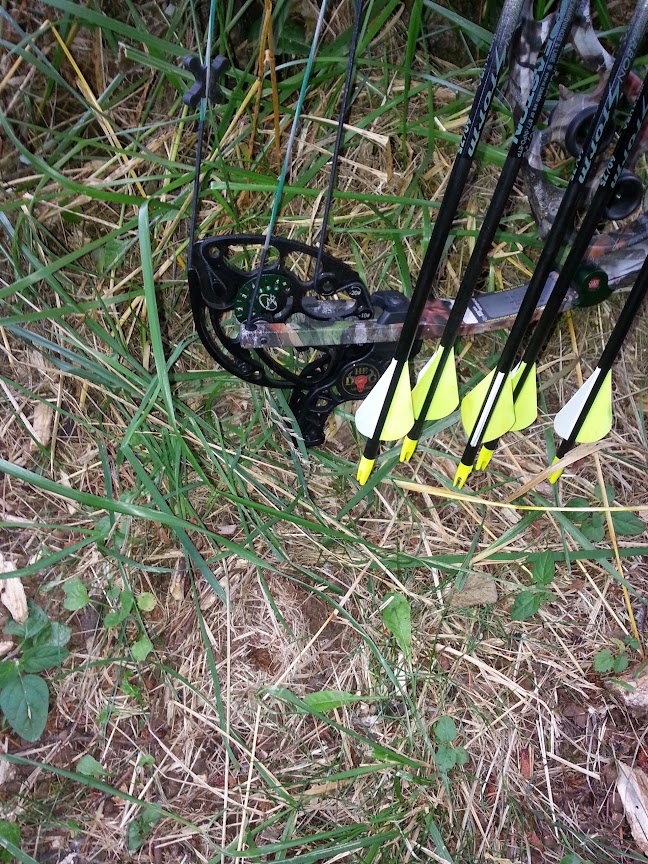
A years progressed additional taxes upon handguns and archery equipment were also included in the Act with half of that money going to education and training programs.

Since adoption of this Act over 2 billion dollars in funds were collected in the first 50 years. States are required to match the Act’s funding at a 25% State/75% P-R fund ratio. The states matched over 500 million in the first 50 years of the Act. These funds were mainly through hunting license sales.

Although hunters, firearms users, and archery enthusiasts pay for almost all the conservation programs in America recent estimates show that over 70% of the people using the benefits of these programs are not hunters nor do they contribute via taxes or licenses. Some areas these figures are as high as 95%.

Here is a short video about this Act and the benefits we have seen from this program.

As you can see from the video and any research you might have done on your own, this act is almost single handedly responsible for the conservation and preservation of wildlife resources that we have today. If it was not for this Act we would not be able to enjoy the animals we see in nature nor would be be able to responsibly harvest these animals for personal consumption.

For those that do not hunt, buy guns/ammunition or purchase archery equipment: The next time you see someone that makes a firearm/archery/hunting license purchase treat them with the respect that they deserve. You may even want to quit being a freeloader and make some of those type purchases yourself if you enjoy seeing the natural beauty of America and love all the wildlife that it holds.

For those of you who do contribute through your purchases: Keep it up and since these freeloading “do-gooders” would never thank you I will….  Even though my wife thinks my purchasing single handedly funds our Fish and Wildlife Regional Office I know the $1k’s I spend annually are only a drop in the bucket……

  • Share on Tumblr

HEDOG Armour Dillo – Cam Protector

by Woodsbum

A friend of mine got me one of these things for my bow a few months ago. I was supposed to take a few pictures of it in use and send those pictures back to the company. Unfortunately, it was outside of bow season and we had already done our April class. This left me without any real opportunity to take pictures other than during one of my many “plinking” sessions…..  Until this last weekend.

Now, I only got 2 pictures of this bad boy during our class. The reality is that I love this thing so much after only truly “using it” once that I spent more time bragging than snapping pictures. Holy sheep shears, Batman. This guy is awesome. I will start off by giving you the link and an initial picture.

HEDOG Archery is the website. Here is a quick picture of the cam protector on my bow:

HEDOG Archery Cam Protector

HEDOG Archery Cam Protector

What this thing does is not only protect the cam on your bow, but gives you the ability to use your bow as a cane/walking stick when needed. It also keeps dirt and grime out of your cam when you raise or lower your bow from a tree stand.

I will admit that at first, I thought that this thing was a gimmick and was WAY overpriced. If I had not received one as a gift, I truly would have never paid for one. Many people that I show this to feel the same way, until I start to use my bow as a walking stick and for stability while climbing over/around things. Then they see how truly remarkable this product is. After having gotten to use one (and mind you that this was just during a WA Bowhunting Class) I will not have a hunting bow without one and am now hooked.

Take a look at the video:

As you can see, this is VERY rugged and can take a beating.

My final testimonial regarding this product is in regards to its use while we were brushing through blackberry thickets looking for stray arrows. I used my bow quite extensively to push away blackberry vines and then would lean on my bow like it was a walking stick. The HEDOG protected my cam superbly and allowed me to literally push the vines to the ground without worry. It made my life much easier, although I got a few little scuffs on my lower limbs.

I really love this thing and must say that it is worth the $70 or whatever it costs. It’s highly recommended and I do not think I will have another hunting bow without one of these HEDOG cam protectors.

my bow and HEDOG

My bow and HEDOG

  • Share on Tumblr

The Swedish M39 Rucksack – Mods

by Woodsbum

The Swedish M39 rucksack goes almost hand in hand with the whole “bushcraft” craze. It is leather and canvas, a definite favorite among bushcrafthers, and holds just enough gear to allow for a comfortable weekend or day outing. It has straps to carry a bedroll or wool blanket. There are straps on the side to carry an axe. It even has a separate pocket inside that stores your cooking gear quite nicely without getting all sorts of soot on your other gear, assuming that you cook over an open flame as I do. All this in a simple, inexpensive, extremely sturdy little “pack”age (sorry about the pun…  been a long week already).

Swedish M39 Rucksack

Swedish M39 Rucksack

There are several short comings to this pack, however. Most of which revolve around the suspension and straps. The shoulder straps are adjusted by buttons that slip into slits that are cut into the shoulder strap itself. The bottom part of the shoulder strap is supposed to hook under the waist belt to give a more uniform ride of your pack when under heavy load. There is the problem. Not only does this button dig into your shoulder, but the clips to hook onto the waist strap are not long enough to reach for most normal sized people. The waist strap itself is made for someone with a 30 inch waist as well. This makes it impossible for people my sized to even use the stock system.

The frame that the pack uses has a riveted in leather lumbar strap. It also is made for a 30 inch waist person. To turn this pack into a comfortable system for the average American, the frame must be bent and tweaked. What I did was probably the easiest. I took a hammer and a block of wood to carefully bend the pipe frame into a more reasonable shape. You need to use the wood block as a forge and then open up the arch by hitting the frame at the apex. It will flatten out the frame and thus make it fit bigger people.

Flattened out arch of the frame

Flattened out arch of the frame

Be REALLY careful, however. The frame is a hollow pipe and does break if you are not careful. I have had to weld one already due to over jealous pounding on the frame.

To fix the crazy button shoulder adjustment issue some cutting and stitching is required. What I did involved stitching a D ring into the cut strap and then used the waist belt hooks to make quick disconnects. The same straps are used. Nothing new is introduced. The only difference is that the hooks that were originally designed to attach to the waist belt are now being used on the bottom shoulder adjustment straps. It is very clean and functional as a quick disconnect.

Quick disconnect for shoulder straps

Quick disconnect for shoulder straps

I also added some attachment points on the side so that I can attach a quiver. I can now put my takedown bow and arrows in my quiver then carry them attached to the right side of my pack. It also gives me easy access to my arrows for hunting purposes if using one of my traditional bows.

Quiver attachment points

Quiver attachment points

At the top of the pack I ran some hooks through the existing suspension straps. This provides me with a way to attach my pans, pots, cups, etc., or any other item that I want quick access to that has a carry strap or eye on the handle. As you can see in some of the pictures, I put a handled cup/ladle thing on mine. This is just big enough to cook about anything I would want along the trail.

Hooks

Hooks

Last, but not least, I also found that one of those spring stop clips on the internal draw string helps immensely. Of course I tie it up before I start hiking, but getting that knot tight is sometimes a chore without this plastic stop.

This is a highly recommended pack and if you would like to see some more detail in what I did to this baby, just leave a comment. If you have one of these packs, I think the pictures will explain about everything I mentioned without too much confusion. Don’t forget to check out some of my other gear reviews and mods while you are here.

  • Share on Tumblr

Washington Bowhunter Education Class

by Woodsbum

This last weekend we did the first of two Bowhunter Education classes for year 2014. Each year we do two; one in April and one in July. They are a two day course that have one day of lecture and one day in the field. The topics covered are as follows:

  • History of bowhunting
  • Conservation
  • Ethics
  • Archery equipment to include sighting in, form, shot placement, etc
  • Bowhunting safety
  • Treestand safety and how to use one
  • Hunting equipment such as camouflage, scent control, clothing, blinds, packs, etc
  • Animal recovery, field dressing, and processing
  • Methods of bowhunting
  • Outdoor preparedness such as survival, land navigation, first aid

On our field day, we actually set up tree stands and go over the entire process involved with setting them up, how to recover in case you fall, safety harnesses, how to tie off properly, use of a climbing style treestand versus hang on styles and techniques learned through years of use in the field. There is also a section on animal recovery where we follow a blood trail and go over basic tracking techniques. The last main section we cover is how to start a fire with ferro rod and natural materials.

Teaching hang on style treestand usage and safety.

Teaching hang on style treestand usage and safety.

Teaching the use of a climber style treestand.

Teaching the use of a climber style treestand.

The whole course is really a great time. There are always new people in the class for us to teach, but many times we get an experienced hunter that is either needing his Bowhunter Education course to get a license in another state or might be making the transition to bowhunting. Either way, it is always fun and plenty to be learned by all.

So, if you get a chance to take one of these courses it is well worth the time. The cost is $20 and you can check out this Meetup group and they will be listed with contact information.

  • Share on Tumblr