Monthly Archives: June 2014

Follow Up to First Aid Kit Post

by Woodsbum

There was quite a bit of chatter about my post last week. Almost all of it was related to my comments regarding the use of tourniquets. Because of this, I wanted to reiterate several of the things I said last week for those that had failed to read my whole post.

  1. “My opinion is that there is WAY to much emphasis based around the idea that people will be able to get to a hospital in a timely manner.” The places that I like to hunt, fish and camp are well outside of cell phone coverage and unaccessible except by foot or air. Most people I know that do serious backwoods activities are the types that understand that help might be 2-3 days (or longer) away if they get into trouble. Many don’t. Even more people, such as many that tried to attack my stance on tourniquets, live in a SHTF fantasy world where Emergency Rooms are still open and ambulances continue to operate. As stated last week, “there is WAY too much emphasis based round the idea that people will be able to get to the hospital in a timely manner.”
  2. “I have seen a lot of problems with most “field” first aid kits being produced and sold today in addition to the severe lack of proper training given to people in their use.” Most “field” first aid kits tend to be either constructed like a military kit or like an OSHA recommended kit you would see in a business. There tends to be little middle ground. Either you carry everything with you to include a kitchen sink or you have material for sucking chest wounds. My kit is personalized to the injuries I have encountered and well within my skill level to use.
  3. “Even the idea of using a Israeli emergency bandage is a far superior idea than drawing that dotted line with a tourniquet that says, ‘Cut off appendage here.'” Remember how I said, “there is WAY to much emphasis based around the idea that people will be able to get to a hospital in a timely manner?” This goes right along with that. If a tourniquet is applied for too long of a period of time by someone that doesn’t know how to properly release said tourniquet (read as hospital personnel), the limb can be lost. Not many people without extensive medical training know how to release a tourniquet properly. Now think about how many “gear junkie, combat commandos” there are. Should we really be teaching these barely trained people to use a tourniquet as a first line in control of hemorrhage? My opinion is that they are not educated enough in most instances to make that determination. All you have to do is watch a large city’s morning commute to agree with me.

Due to the wars in Iraq and Afghanistan there has been a marked increase in the use of the tourniquet as a first line of defense against exsanguinating limb injuries. The average time spent with the tourniquet in place was approximately 70 minutes. (Lance E. Stuke, MD MPH) This echoes my statement that a prompt evacuation to a higher tier medical facility was a significant factor in limb survivability. This has also led to other people agreeing with the use of tourniquets in a prehospital setting (Lee and Porter, 2007). Again, they are specifically referring to short term use of the tourniquet and not considering that it might be on the patient for the amount of time needed to muster a rescue operation. Even the National Highway Traffic Safety Administration has done studies regarding the use of the tourniquet (NHTSA, 2014). What is interesting to note about their findings is that most of their research that has a complete outcome of the patient listed is from military cases. They also note that there are “no studies identified for this report <to> provide a direct comparison of tourniquets and compression for treating trauma patients with extremity hemorrhage.” What this means is that the military’s new trend of using the tourniquet for a primary control of hemorrhage really is biasing the studies provided by the military. This should then assume military assets, trained personnel on site, and types of injuries that would rate the use of a tourniquet.

As a quoted article that was used to counter my opinion based on research and experience, the following was submitted to me (Risk, MD MPH FACEP and Augustine, MD FACEP). It does, however, echo my point dramatically. It quotes from the 2004 edition of Emergency War Surgery Manual, ““Use a tourniquet early, rather than allow ongoing blood loss. Substitutes for issued tourniquet include belt, torn cloth, gauze and rope, among others … does not require constant attention; allows first responders to care for others, extends resources.” Their take on limb loss is as follows, “Application for more than two hours may increase limb loss. Don’t avoid a tourniquet in order to save a limb, and then lose a life! Use of the tourniquet does not always lead to limb loss.” Considering the fact that I said “there is WAY too much emphasis based round the idea that people will be able to get to the hospital in a timely manner,” using a tourniquet as a first line of defense against hemorrhage should be highly scrutinized based upon transportation and availability to a hospital’s resources. Again, the link provided (Risk, MD MPH FACEP and Augustine, MD FACEP) supports my statements in the following way, “Although the studies continue to verify a lack of extremity injury attributable to the use of tourniquets, the ongoing improvement and reduction in transport times to tertiary levels of care further reduces those concerns.” My final point referencing this article is simply their way of stating the same thing I said, “Each of these points is meant to delineate the differences that would likely mean less civilian EMS use of tourniquets, more rapid transport and shorter times for their usage—hence, less potential for limb ischemia. Therefore, there should be far less hesitancy about using this tool at the appropriate time and for the appropriate patient to obtain rapid hemorrhage control. The limiting factors appear to be appropriate medical direction and protocols, equipment selection and adequate training,” of which being adequate hospital response time and proper training. YouTube videos really do not equate to proper training.

Of course there are several studies that show when a limb was salvaged and significant functional recovery was accomplished, the time with tourniquet in place was only 16 hours (Kragh, MD, Baer, PhD, and Walters, PhD 2007). Again, this was ONLY 16 HOURS!!!! It takes longer than that to reach my alpine elk hunting location, there is no cell phone reception there, and it takes longer than that to reach a location to connect to the nearest HAM radio repeater. Even this study used a combat casualty and the time frame for advanced medical care was 16 hours. I found another reference to a 24 hour tourniquet application where the patient was in a cold environment. The basis for the study and research conducted was a bit on the reporting versus scientific side, so I will not go into any depth or link that “article.”

For those of you who have read all my post and have done proper research into this topic, I hope you found it enlightening and now understand the restrictions that the tourniquet has regarding usage. It must be appropriate and the personnel must be trained. It is not a first line of defense against hemorrhage like many “weekend commandos” preach. It is both a life saving device and a crippling device all in a single package, so choose it wisely.

To fully follow up on my post Friday, I will reiterate that your kit should be multipurpose and fit within your particular needs. Here are my final thoughts and advice:

  • If you do not feel comfortable in applying a tourniquet you should then get highly proficient with the other hemorrhage control options available.
  • You should not use a tourniquet as your primary choice for hemorrhage control.
  • If you are training for any of the possible SHTF scenarios, please remember that advanced medical care is not going to be readily available. Any possible way to remain completely independent and self sustaining is highly recommended.
  • If you are in a combat situation, I would suggest that you follow your current protocols and standing orders per Chain of Command.
  • Share on Tumblr

First Aid Kit

by Woodsbum

It seems that a very hot topic among people I speak with is field medicine. To be specific: first aid kits and tourniquets. After finally getting tired of having to repeat my same spiel on the dangers of tourniquets improperly used and how first aid kits tend to have WAY too much stuff in them, I felt almost forced to put fingers to keyboard and make a post.

Fist off, I want to let everyone know that I am not an “armchair commando” when it comes to field medicine. I was a paramedic/EMT for 4 years and then joined the Navy, where I was a Hospital Corpsman for 9.5 years. Overall, I have almost 14 years of direct patient care in both field and hospital settings with 9 years being in a pre-hospital setting. I was ACLS, BTLS, ATLS, PALS, NALS, EMT Instructor, BLS Affiliate Faculty, Combat Lifesaver Instructor, the list goes on. In another words: I am not a trauma surgeon or a contributor to AMA journals on pre-hospital trauma treatments, but I have quite a bit of hands on experience and training.

This being said, I have seen a lot of problems with most “field” first aid kits being produced and sold today in addition to the severe lack of proper training given to people in their use. My opinion is that there is WAY to much emphasis based around the idea that people will be able to get to a hospital in a timely manner. A prime example of this is the overuse of the tourniquet. The tourniquet is an easy way to say, “Everything below this point will be chopped off and you better know a good prosthetics person.” The fact that all the “weekend commandos” now carry one and there are classes designed to promote tourniquet use absolutely drive me nuts. Having worked on ambulance in rural settings and done such things as pull people’s extremities out of heavy equipment, I have NEVER had to resort to a tourniquet. Between the proper use of the following techniques, I have been able to avoid contributing to a patient’s reason for amputation:

  • Direct Pressure
  • Pressure Dressing
  • Elevation
  • Splinting as needed
  • Constriction Bands NOT tourniquets
  • Ice if available

Even the idea of using a Israeli emergency bandage is a far superior idea than drawing that dotted line with a tourniquet that says, “Cut off appendage here.”

As I step off my anti-tourniquet soap box, I will admit that they do have their place IF they are used properly and appropriately. They just need to be used as a last resort and not a replacement for the other less invasive/damaging options.

Enough about how dependence upon hospital settings have increased the use of the tourniquet as a way to control bleeding. Let’s take a quick look at some of the things that I carry. Now I want you to know that, because I had to use them and have been too lazy to replace the items since my last outing, there are two items that I carry that are not in this picture. Sorry for that, but I just grabbed my pack and came in to take pictures. When you look at this you can definitely see that these items are not my shiny little kit that I hope never gets used. These items are exactly what I carry and can cover you in almost any situation with the proper training.

My first aid kit excluding 2 4x4's and moleskin

My first aid kit excluding 2 4×4’s and moleskin

Let me go through each item so you have a good idea of what each is.

  1. Waterproof case: In my kit, I chose the old issue first aid kit case that really isn’t waterproof but it was handy and works. It also has an ALICE cover that attaches to the left side of my butt pack or I can remove the case and just throw it into whatever pack I have at that time.
  2. ABD: Military issue Abdominal Battle Dressing. This is the clear wrapped bandage in the brown paper wrapper. This thing will take care of eviscerated abdomen, severe chest injuries, or even be used as a soft splint if need be. It unwraps to be fairly large and has long tails to tie it around whatever you have applied the bandage to. The dressing portion of the bandage is very absorbent and quite thick.
  3. Battle Dressing: This is the OD green thing on the left side. It is a smaller version of the ABD. Not only can it be used as a dressing, but it also can be used to tie off a splint if you have to. Of course that is worst case scenario since the patient’s clothing is always a better choice.
  4. Three Triangular Bandages (cravats): These are not only great for scarves and headgear, but they work very well as slings, splint ties, bandages to hold on dressings, constriction bands, tourniquets if all else fails, hold ice/snow, filter big stuff out of water, or even as gaiters to keep some of the crap out of your socks if need be. These are very multipurpose and you can see that I use them a lot.
  5. Sutures: Yes, I have had to sew myself up in the field. Yes, it hurts. I am not John Rambo. Yes, I still have the scar. No, you can’t see it…..
  6. H Shaped Bandages: These are great for knuckles and such. Basically any point that bends, but is not too big. I keep them in my kit as a way to make myself feel better if I bust up a knuckle. I carry both types that have the adhesive strips that will stick well to a flat-ish area or an articulating area.
  7. Larger Bandages (read large Bandaids): These work well for skinned elbows, knees, extremity cuts, small head lacerations, etc. They stick a lot better than a 2×2 or 4×4 with silk tape.
  8. Kwik-Scan Thermometers: You put these things on someone’s forehead to check their temperature. No, it is not as accurate as a real thermometer but I can carry several in my kit quite easily. They are great for checking for fever (possible infection of a cut for instance) to a low body temperature (cold injury). Great things to carry with you if you are not anywhere near a hospital and won’t be for a period of time.
  9. Butterfly: I carry a couple butterfly closures. These are great for when you don’t have a total need for suturing something closed.
  10. Cling: Rolled gauze is amazing for so many reasons. It holds bandages on SO well, can be twisted to make splint straps, etc. Great piece of gear to take.
  11. 3M Silk Medical Tape: I like the 3M stuff because it sticks SO much better than the Curad brand. It can also be twisted to make cordage.
  12. Alcohol and betadine based swabs: These are antiseptic swabs to clean wounds. The alcohol ones will also catch on fire if need be if you can’t get something else burning.
  13. Abdominal Patch/Dressing: I keep these not only for what I call “bigger spills” of blood, but they can easily be cut and used to cover eyes as well. In a worst case scenario, I have also offered them up to my female campers who needed a sanitary pad. They are better than nothing.
  14. Trash Bag: That is the rolled up blue thing in the middle. They can be wrapped around entire torsos in the case of any open thoracic or abdominal injury, can be used to keep bowels moist in the even of an evisceration, and can even be used to gather condensation if placed over a plant to gather water. Cut out some holes and you can even keep your patient partially dry in the rain.
  15. (Not Pictured) Moleskin: This is for blisters or to cover wounds so that you are not slowed down by a bulky bandage. When moleskin gets wet, granted that it was applied correctly in the first place, it tends to almost make a second layer of skin. This stuff is great to keep you going until you can get back and get something treated properly. I have sutured up lacerations, cleaned everything REALLY well, and then put moleskin over the thin dressing to keep Marines out in the field for additional weeks before they get seen to remove the sutures. Mines is not here because I gave my chunk away to someone who had blisters and I forgot to replace it since I have not been out in the woods for almost 4 weeks.
  16. (Not Pictured) 4×4 Gauze Dressings: These are sterile and allow you put them directly on a wound, then use about anything around to cover that wound as a bandage. These I forgot to replace because I was showing off and starting fires with them…..  Don’t ask.
  17. (Pictured Below) Metal straw: I picked up several of these from 7-11. They are branded as Slurpee Straws. I use them to blow up fires mostly, but in the case of a severely compromised airway I can use one for an emergency tracheotomy, in the case of severe chest injury they can be modified for use as a chest tube, or (most importantly) to drink my Apple Pie drink using only the best moonshine/everclear that can be had at the time.

Slurpee Straw of AWESOMENESS!!!

Slurpee Straw of AWESOMENESS!!!

Quick point for those that are not familiar with medical terminology: Dressings cover wounds. Bandages cover dressings. Many “bandages” have a “dressing” built into them to cover the wound, but not all. Having some sterile dressings in your kit to sit directly on a wound is important to keep that wound from getting infected. Toss some into your kit.

As you can see, I don’t carry medications. There are no splints or splinting material. You won’t see any straps to make a litter. All these items can be improvised if needed. Headaches can usually be fixed with some strong coffee as can many respiratory ailments. Of course any serious medical conditions need immediate medical treatment, but you should have your medications with you in those instances. Why should I keep track of and hump Albuterol inhalers for people if you have a COPD? I don’t. I can, however, use my Swiss Army knife and sutures to remove/repair injuries to myself caused by severe “dumb-arsery.”

Lastly, I will say that in my truck I do carry airways (nasal, oral, and masks), Ringers Lactate, sphygmomanometer, stethoscope, surgical kit, BVM, splints, and all sorts of other goodies. There is NO reason, however, for someone to carry all the other crap with them. The average person really needs to realize that purchasing gear does not make them a combat medic. The dependence upon gear and ignoring the idea that education will provide more options in a crisis really needs to stop. Quick applications of products that the user doesn’t fully understand will only cause more injury. Even though it might look “sweet” on your battle belt, there is no reason for anyone to ever use a tourniquet as a first step in control of hemorrhage. There are better solutions that don’t include removal of a hand for a minor laceration.

Just remember: All bleeding eventually stops!

  • Share on Tumblr

The Swedish M39 Rucksack – Mods

by Woodsbum

The Swedish M39 rucksack goes almost hand in hand with the whole “bushcraft” craze. It is leather and canvas, a definite favorite among bushcrafthers, and holds just enough gear to allow for a comfortable weekend or day outing. It has straps to carry a bedroll or wool blanket. There are straps on the side to carry an axe. It even has a separate pocket inside that stores your cooking gear quite nicely without getting all sorts of soot on your other gear, assuming that you cook over an open flame as I do. All this in a simple, inexpensive, extremely sturdy little “pack”age (sorry about the pun…  been a long week already).

Swedish M39 Rucksack

Swedish M39 Rucksack

There are several short comings to this pack, however. Most of which revolve around the suspension and straps. The shoulder straps are adjusted by buttons that slip into slits that are cut into the shoulder strap itself. The bottom part of the shoulder strap is supposed to hook under the waist belt to give a more uniform ride of your pack when under heavy load. There is the problem. Not only does this button dig into your shoulder, but the clips to hook onto the waist strap are not long enough to reach for most normal sized people. The waist strap itself is made for someone with a 30 inch waist as well. This makes it impossible for people my sized to even use the stock system.

The frame that the pack uses has a riveted in leather lumbar strap. It also is made for a 30 inch waist person. To turn this pack into a comfortable system for the average American, the frame must be bent and tweaked. What I did was probably the easiest. I took a hammer and a block of wood to carefully bend the pipe frame into a more reasonable shape. You need to use the wood block as a forge and then open up the arch by hitting the frame at the apex. It will flatten out the frame and thus make it fit bigger people.

Flattened out arch of the frame

Flattened out arch of the frame

Be REALLY careful, however. The frame is a hollow pipe and does break if you are not careful. I have had to weld one already due to over jealous pounding on the frame.

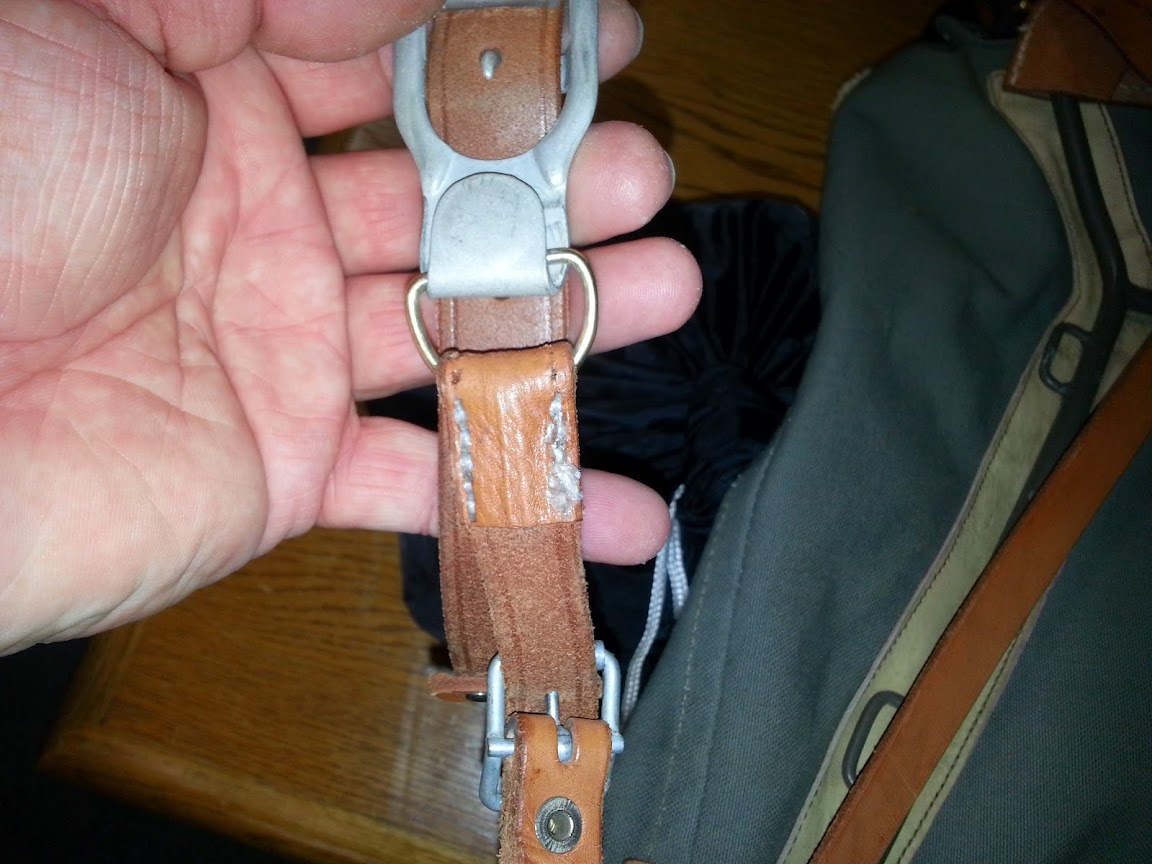
To fix the crazy button shoulder adjustment issue some cutting and stitching is required. What I did involved stitching a D ring into the cut strap and then used the waist belt hooks to make quick disconnects. The same straps are used. Nothing new is introduced. The only difference is that the hooks that were originally designed to attach to the waist belt are now being used on the bottom shoulder adjustment straps. It is very clean and functional as a quick disconnect.

Quick disconnect for shoulder straps

Quick disconnect for shoulder straps

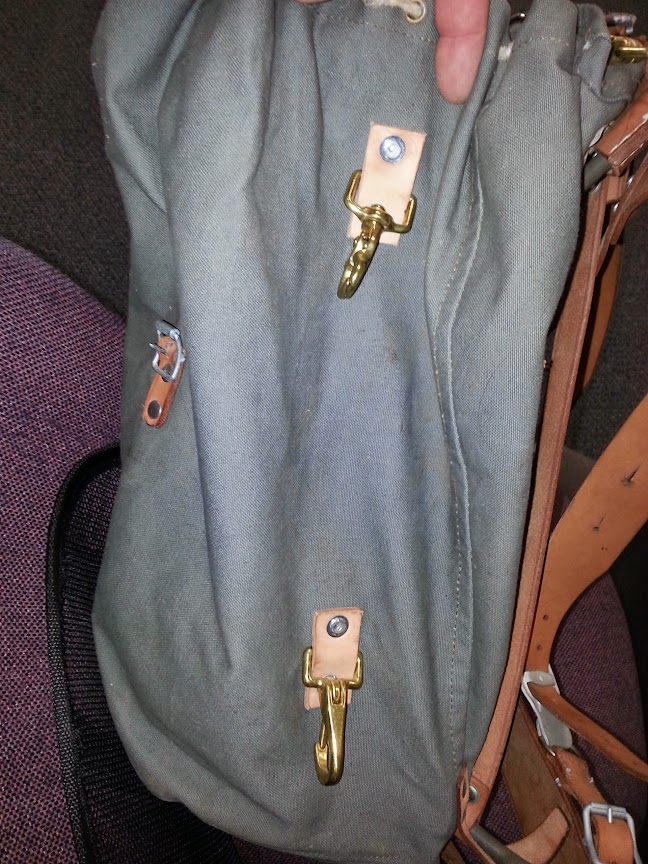
I also added some attachment points on the side so that I can attach a quiver. I can now put my takedown bow and arrows in my quiver then carry them attached to the right side of my pack. It also gives me easy access to my arrows for hunting purposes if using one of my traditional bows.

Quiver attachment points

Quiver attachment points

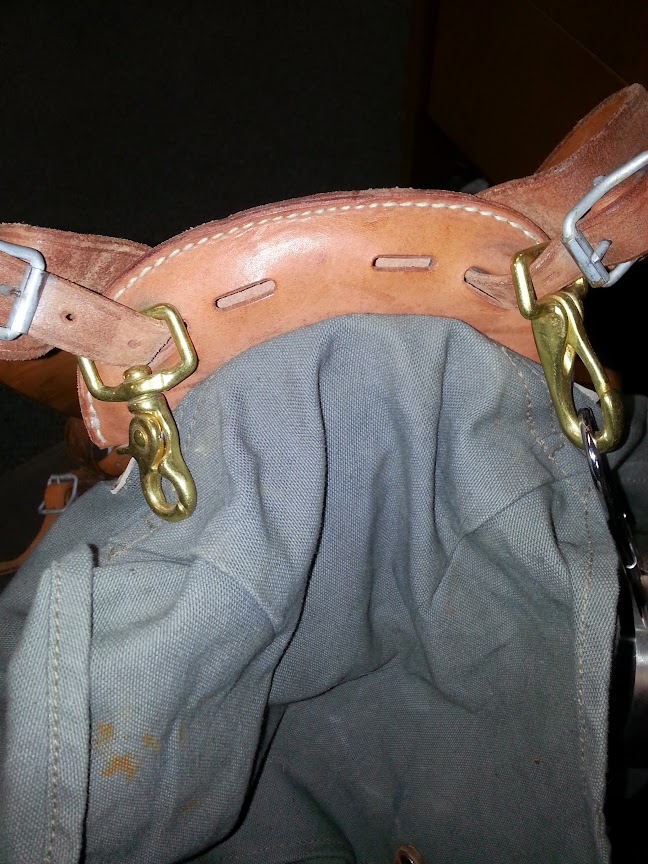
At the top of the pack I ran some hooks through the existing suspension straps. This provides me with a way to attach my pans, pots, cups, etc., or any other item that I want quick access to that has a carry strap or eye on the handle. As you can see in some of the pictures, I put a handled cup/ladle thing on mine. This is just big enough to cook about anything I would want along the trail.

Hooks

Hooks

Last, but not least, I also found that one of those spring stop clips on the internal draw string helps immensely. Of course I tie it up before I start hiking, but getting that knot tight is sometimes a chore without this plastic stop.

This is a highly recommended pack and if you would like to see some more detail in what I did to this baby, just leave a comment. If you have one of these packs, I think the pictures will explain about everything I mentioned without too much confusion. Don’t forget to check out some of my other gear reviews and mods while you are here.

  • Share on Tumblr

Tactical vs Hunting – Stance and Form

by Woodsbum

After having taught numerous Hunter’s Education classes, hunted around those new to the sport, and worked with countless people that are getting ready to start hunting at the range, I have found that there is a definite pattern. Those students that have taken tactical shooting classes and stick to those stances are at a definite disadvantage in the field. The tactical stances allow for great forward and lateral movement. In a hunting situation, however, most movement is based around a pivot foot. The tactical stances do not seem to allow for that pivoting movement and thus limit the field of fire and flight tracking needed to be effective while hunting.

As a way to better explain how I came to this conclusion, let me give you several examples.

Example 1: Several of us went out dove hunting. All of us “old school” stance users had no problem in getting our limits within only a few hours. A couple of LEO were also out there and were using their “tactical” stances. They had no problem hitting the birds that were flying in line with the way that they were facing. When a bird crossed their path, however, they could not effectively track it without having to physically pick up both feet and move. The stance just was not effective when it came to that swing movement needed in bird hunting.

Example 2: Skeet shooting at the range. A couple of prior military and current LEO persons were just stacking the slugs into a target one on top of another. They were obviously quite proficient and had practiced this a lot. When the range swapped over to skeet, they were both completely unable to track the clay. Their feet were moving around so much that we started giving them a hard time. We told them to, “Quit dancing and just shoot the clay.” Both were less than 5/25 and they admitted that they were never able to get into a good position fast enough to shoot skeet.

Example 3: Working with new hunters in the field. It never fails that when I work with new hunters that those in the tactical stances can not hit flying targets effectively. One such outing I saw this guy hitting everything set in front of him with slugs or buckshot. Not issues. Once we swapped to bird shot and tossed something, he missed almost every time. Even when I tried to help him and correct his stance, the way that the arms are positioned in a tactical stance really hindered his ability to transition over to hunting type situations.

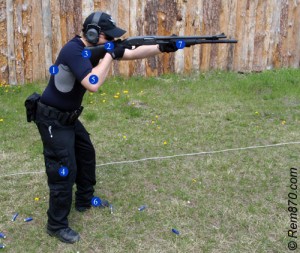
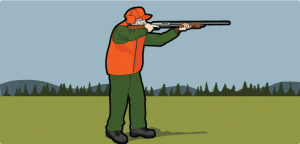
So everyone can see the difference, here is the stance I am talking about.
shotgun_shooting_stance_scheme

This stance is more squared off toward the target. Some people even square up completely with both shoulders completely perpendicular to the target. This disallows much twisting at the hips while keeping the firearm placed properly on the shoulder. It also does not allow for decent twisting motion because you weight has to be evenly distributed. You have to shift your weight, move a foot, and then redistribute your weight. Even the LEOs that I saw had to make that same movement to try and track objects flying across their path. This made their “swing” that is required for leading flying birds uneven and jerky.

A more traditional hunting stance is more like a boxer’s stance.
ch7_015_NJ

This stance allows the hunter to simply transition their weight to either foot and spin on the ball of their foot, thus smoothly tracking the animal during flight. Think of the movements that boxers make. Their movements are smooth, quick and they can easily track their opponent.

Now I know that not all people bird hunt or will bird hunt. The principle holds true with all types of game, however. The tactical stance disallows for decent twisting or sweeping type movements where game crosses your path. The hunter would have to twist more at the knees than waist for those wider, sweeping motions. Having witnessed it first hand on multiple occasions, it really is a difficult maneuver to properly sweep smoothly.

Here is your test: Pull out your trusty firearm and try it yourself. Get into one of the many tactical stances that are taught. Square your shoulders up so that your chest plate properly covers your vital organs in case you are hit. Then try and move in all the manners required while hunting. You will quickly agree with me that you suddenly become like a rook on a chess board. Great forward, backward and lateral movements, but you will have little sweeping movement. Next get into that boxer type stance that us “old school” hunters use. There is very little decent movement allowed except for sweeping motion. Forward and later is more of a crossover step or a shuffle. Not very effective for finding cover, but great for tracking game.

This leads me to my final conclusion: If you are a tactical type guy, have fun. Do your thing. If you do the tactical stuff for those SHTF type situations (prepper type stuff), you really need to include some hunting type education to be well rounded. Hunters in their “old school” stances are not going to be running up on something while firing. It would be more of a move, fire, and then move type situation to be effective. Either way, learn both and become effective with both ways to fire your weapons. You never know when you might have to adopt that goofy looking target stance to shoot a deer out at 700m while standing…..  Now there is one more to learn, so get out there and practice PEOPLE!!!!

  • Share on Tumblr

Remington 700 Police – Custom Build

by Gunguy

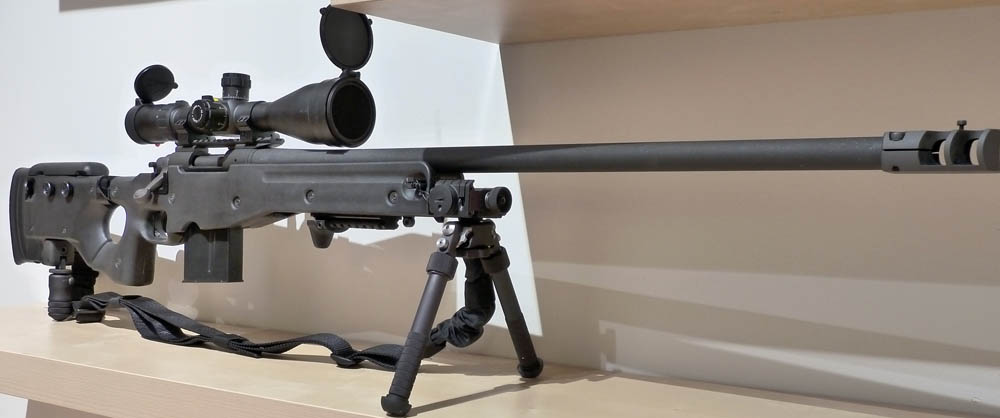
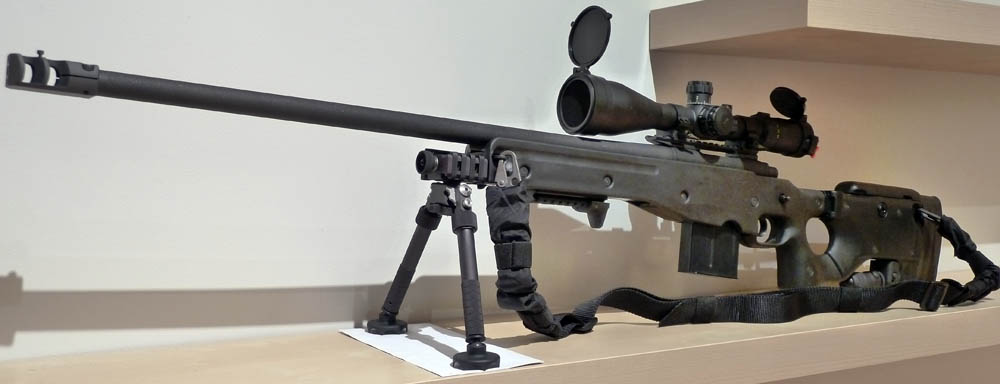
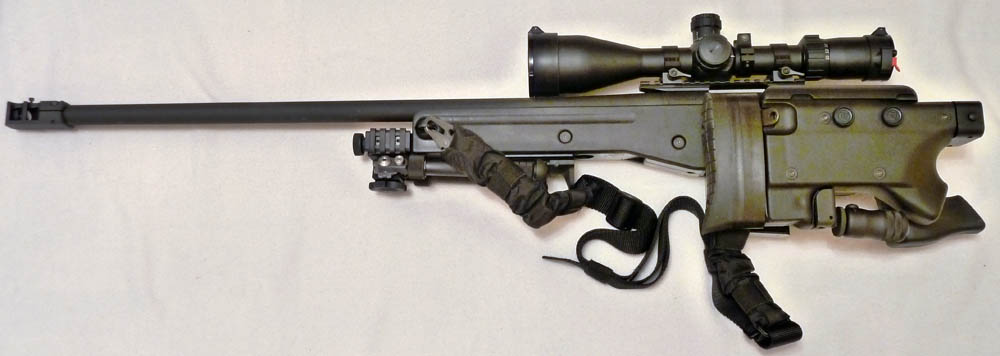
A good friend of mine seems to have an endless supply of disposable income. As you will see below he spared almost no expense customizing a Remington 700 rifle. It’s a beauty. Now all I have to do is convince him to go to the range and give me and all of the readers here a proper range report of the rifle, including pictures of the targets and ammo used.

I know he checks this web site periodically. I’m calling you out buddy. I mean it. You should feel guilty for not taking this bad boy to the range. Till then here is a list of everything that he’s done to it plus pics.

Remington_700_Police_Right_3

Remington_700_Police_Right_2

Remington_700_Police_Right

Remington_700_Police_Left_3

Remington_700_Police_Left_2

Remington_700_Police_Left

Remington_700_Police_Folded


  • Share on Tumblr