I get a lot of questions from new hunters about field dressing and processing game animals. When I come across excellent videos such as this that provide a step by step set of instructions, I try and share as much as possible. It only helps those learning to hunt and increases the self sufficiency of those that already hunt but don’t process their own game.
This is a little off topic in some regards, but after some scouring of the Internet I found that there is a distinct lack of information about which counties will sign off on an Oregon out of state concealed weapons permits. Most counties, especially in and around Portland, will not process them. According to Oregon law out of state residents are able to procure permits, but you have to find a sheriff office that will process it.
For what it is worth, there are several counties that do process them in southern, eastern, and around Corvallis. Unfortunately, this is a bit of a drive and a pain in the rear end since you have to be present during the application process for fingerprinting. This is when I stumbled upon Columbia County with the main offices in St. Helens. Apparently they not only process out of state permits, but they even show up at places like the Puyallup Fair to process applications. It also happens to be only a short drive (30 miles) from Portland.
There are a few things to note about Oregon’s concealed weapons application process. Not only do you have to show up in person, but you also need the following:
Compelling reason form. The template letter is available here.
Some sort of training. You can attend several different types to include online training, but if you were in the military and received pistol qualifications that are on your DD214 this qualifies. If you do the online course there is an additional form you have to fill out when you get to the sheriff’s office.
Be a resident of either California, Idaho, Nevada or Washington. They will only issue non resident CHL permits for residents of those states.
A copy of your current concealed weapons permit from whatever state issued it. For example, a Washington or Idaho concealed weapons permit.
$75 for the application per a phone conversation with their office staff. I also have seen where there is an additional $10 administrative fee, but I am not sure if the $75 includes that. Depending on the website, the total cost is either $85 or $75. Either way it is around $100 when you factor in fuel costs, so sell that to the wife if you have to budget.
Call the office and find out when the next available appointment is for processing applications. Their number is 503-366-4651. Normally applications are accepted and processed on the last Saturday of every month. Again, I would call to confirm because their website has not been updated.
Having dealt with many government organizations over the years, I went ahead and made copies of everything and put it all into a nice folder for ease of processing. The office will probably want to see the originals, but having the copies already made for them will hopefully help out the whole application process. I suggest anyone dealing with a government organization do the same and be completely prepared for any contingency. They are doing me this favor so I will make them have to work as little as possible……
I will be off to submit my application this Saturday. According to online accounts, it takes this office about 7-14 days for you to receive your actual permit. This is even better than many Washington departments, but again I have no hands on experience about this as of yet. I will after this weekend and will update this post as to how long it takes for mine.
I am really excited to finally get this process completed and procure my OR permit. It will make it SO much easier while traveling. If you find any more counties in Oregon (around Portland especially) that will process permits for out of state residents, please hit us up and we will include them here.
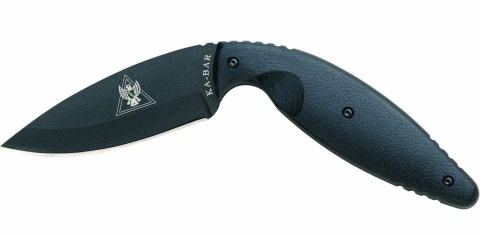
I’ve owned a largeKa-Bar TDIknife for over 5 years. It’s really easy to carry the knife in a discreet manner as a backup or primary every day carry (EDC). I carry the knife on my support or strong side depending on the circumstances and clothing. Those who have a few extra lbs around the middle will find that it digs into their side when carrying it inside the waist band (IWB). I found this out the hard way as my weight fluctuated over the years. Clipped on the outside of the belt there is no issue.
The knifes sole purpose is to be an emergency last ditch self defense knife. It comes sharp from the factory but I touched it up with a leather strop to make it razor sharp. This knife doesn’t get used for anything that will dull the blade.
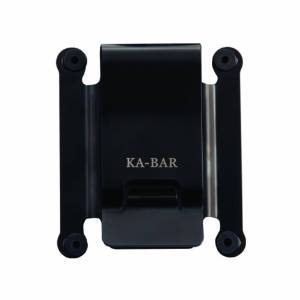
The Taiwan madeKa-Bar TDI ships with a kydex sheath, and includes two straps with velcro and button snaps that make it compatible with Molle webbing and belt carry. I added the Ka-BarTDI belt clipto give me some versatility while carrying IWM or OWB. The belt clip is personal preference and is not a requirement for carrying it effectively. For the price of $45 for theknife and $10 for thebelt clip it’s a good deal and it’s worth the money.
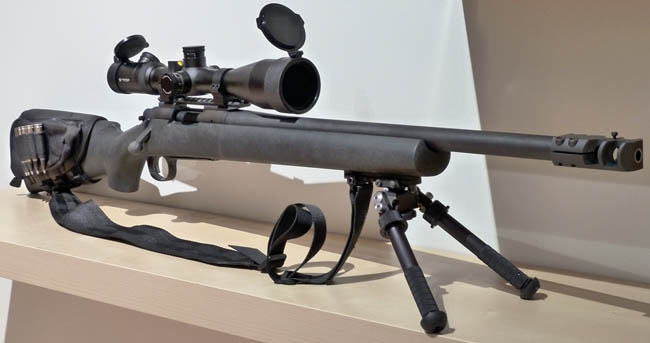
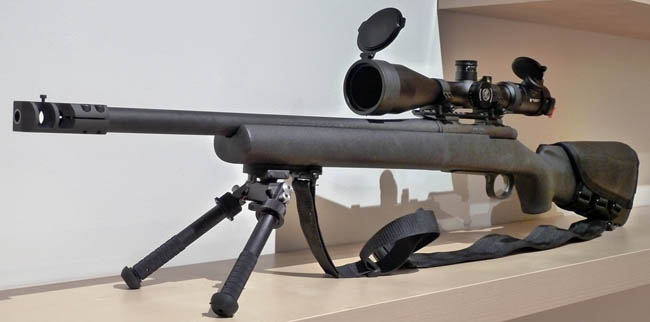
I have aVortex Viper Pst 4-16×50 scopemounted on aRemington 700 SPS Tacticalchambered in .308. I purchased the scope for $900 and the fit and finish of the scope is near perfect. Vortex is possibly one of the best values in mid-high range scopes. The equivalent Leupold would be another $300 and a Nightforce even more than that. More than anything else in the gun world, when it comes to optics you generally get what you pay for. This is where Vortex has really carved out its niche. It has become known for making very good quality scopes with very good glass at a very good price point.
TheVortex Viper PST lineoffers illuminated reticles on all models. What makes this scope so good is the magnification range is about perfect all around. With 4-16 magnification you can shoot from 100 to 1000 yards very well. The Mil scope adjustments are an improvement over the standard MOA adjustments of most American scopes. This allows your adjustments to match the reticle in your optic. If you range a target and need to make a 1 Mil adjustment you put ten clicks onto your optic and are good to go. With a traditional MOA optic with a mil based reticle you need to convert Mils to MOA and then dial the adjustment. Its just an unnecessary step and the reason military scopes now are adjusted in 1/10 mils instead of the traditional 1/4 or 1/2 MOA adjustments.
The first focal plane insures that your reticle is accurate at any magnification. With a second focal plane optic the reticle is only ‘correct’ at one setting, usually at the highest magnification. So 1 Mil would equal 1 Mil only at 16x magnification. At 8 magnification it should equal 1/2 Mil. Another step you can avoid with the FFP optic in which the reticle is correct throughout the entire magnification range.Vortexalso offers fantastic customer service and one of the best warranties in the business. I’ve seldom needed to take advantage of it but any time I have contacted them the interaction has been fantastic. I can strongly recommend this scope for the serious hunter, long range shooter or tactical shooter.
One note, if you are going to install the shims for the zero stop feature, be sure to not scissor the shims as they go in. If you do the zero stop will vary quite a bit. It’s not that big a deal but I have read where people are complaining about this.
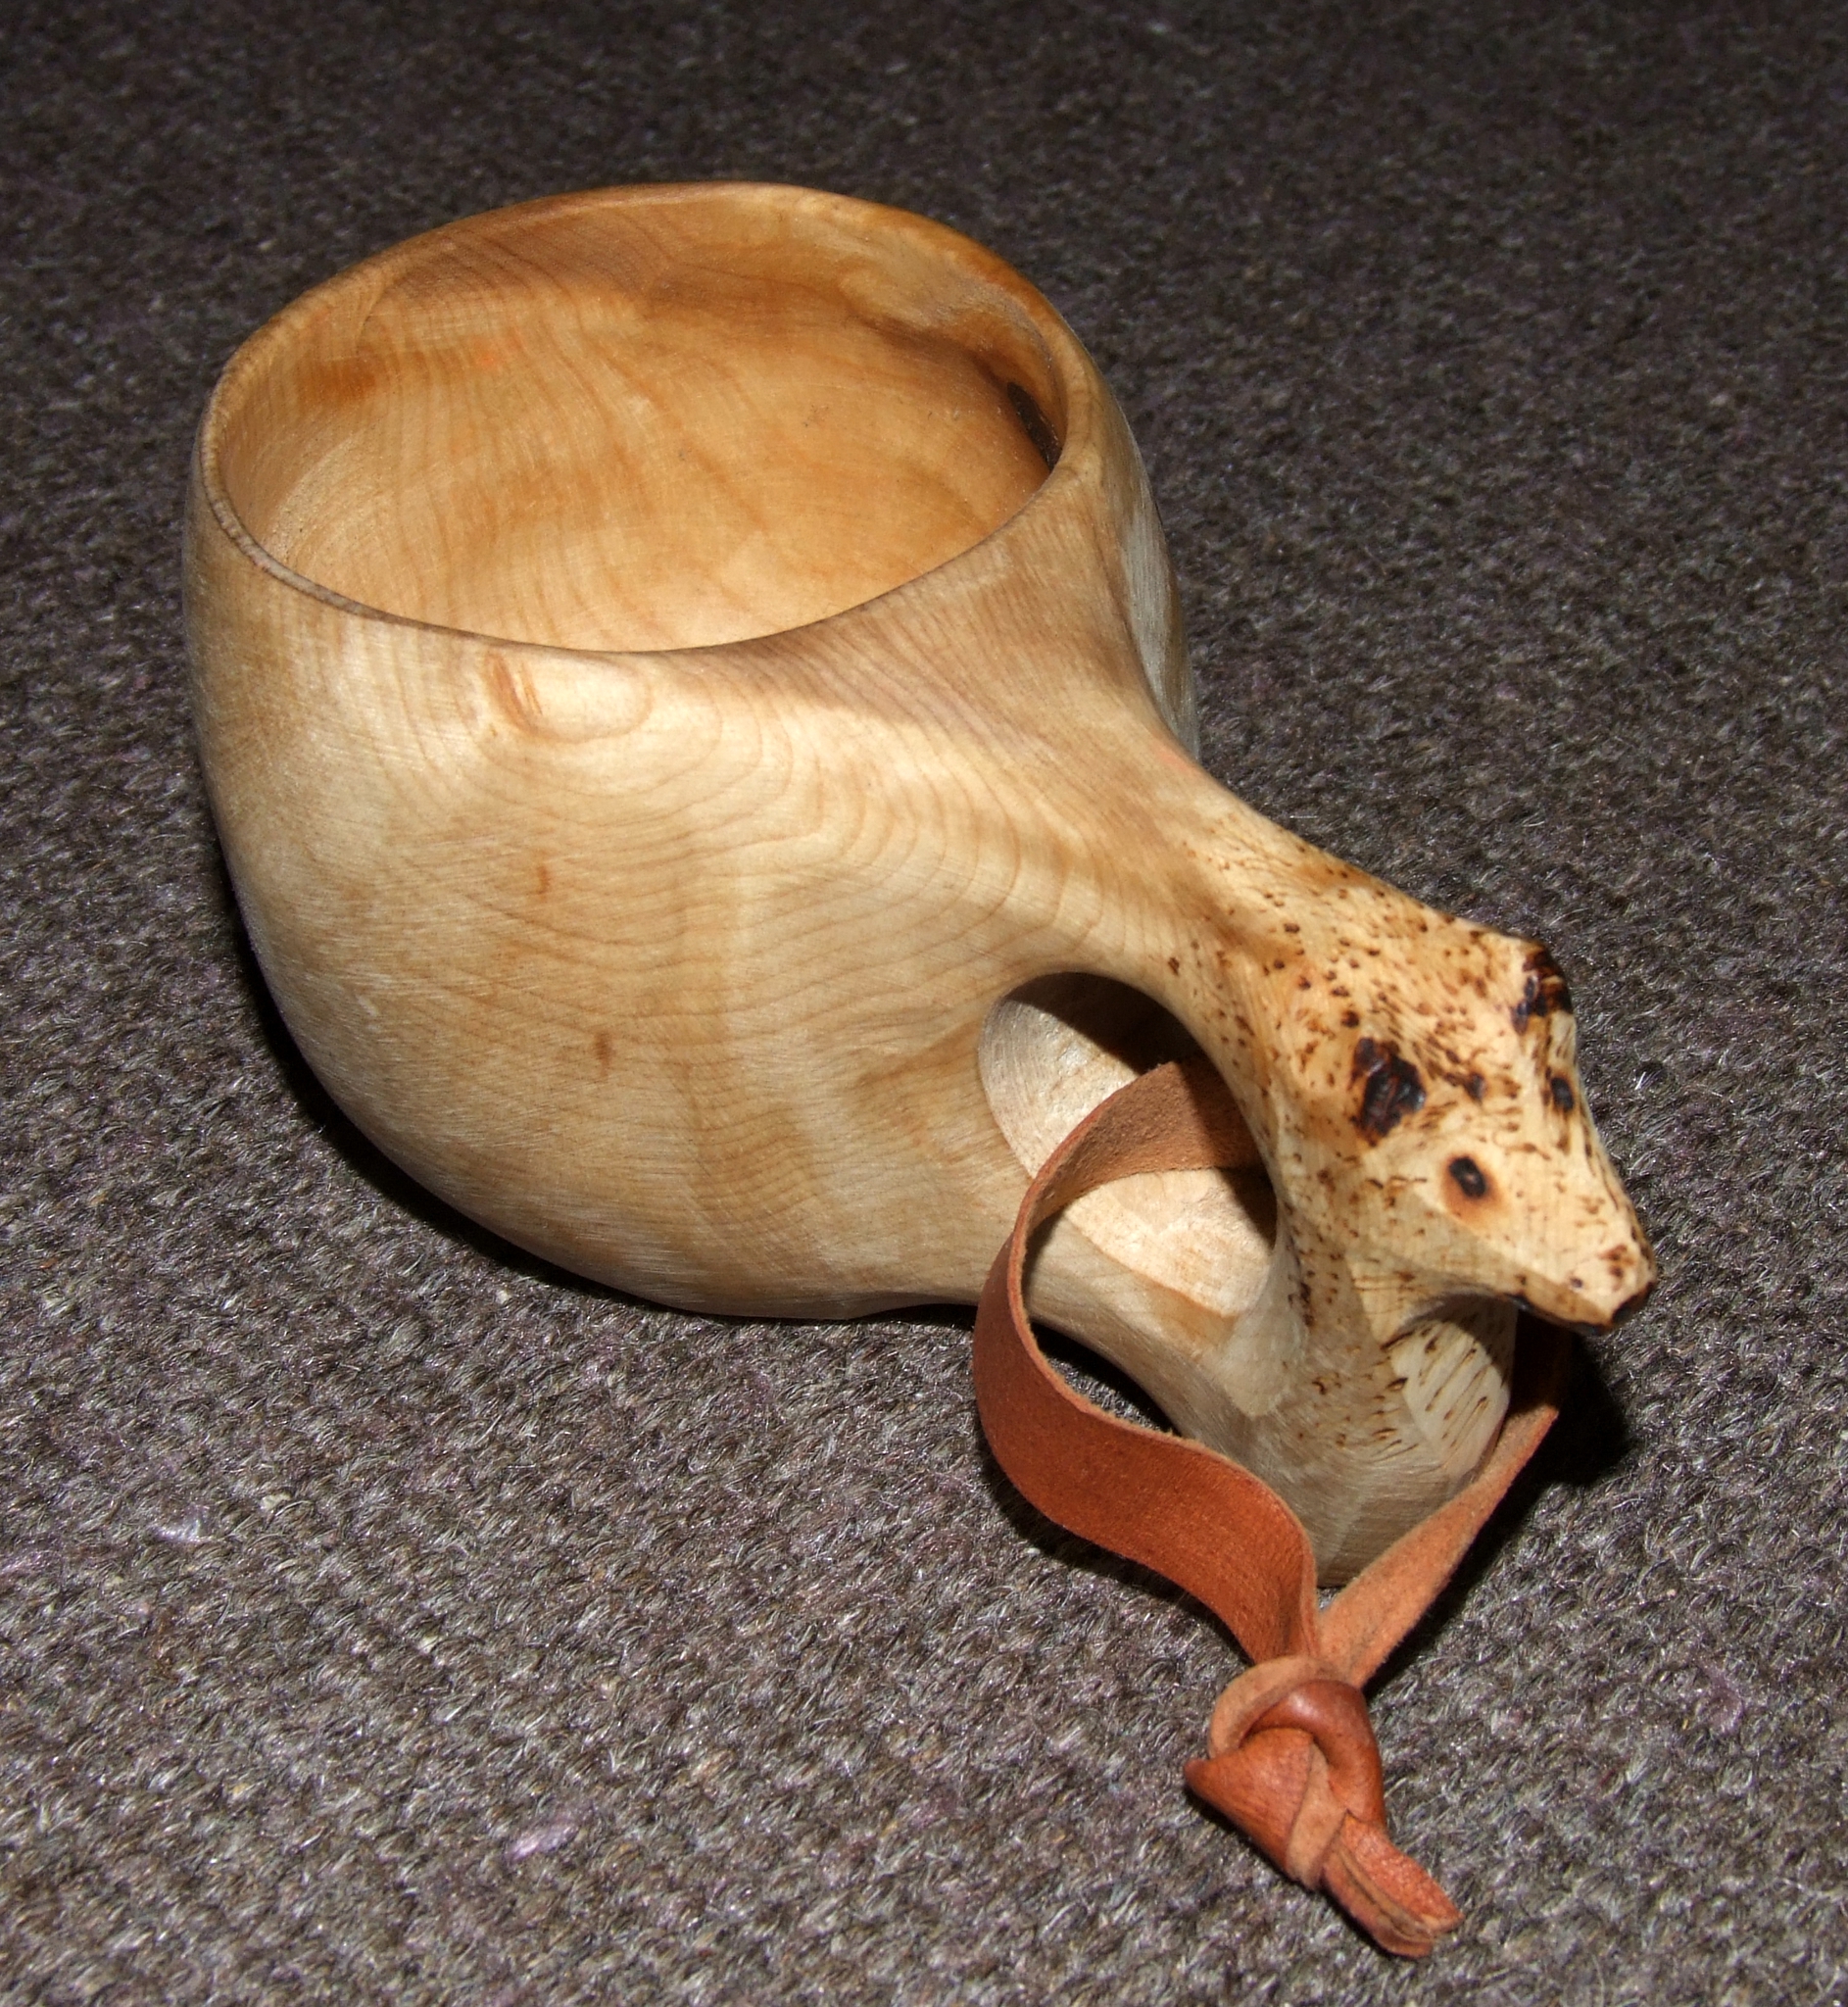
There are many, many really cool things that you learn about when diving into the whole “bushcrafting” world. Different techniques for doing things that you have done for years, re-purposing old gear, making your own kit items, and learning about things that you didn’t even know existed are just some of the ways in which an outdoors-person can benefit. When I ran across wooden eating/drinking items, I was not too sure at first. After time, I found that building these things didn’t just help me to become better with cutting tools, but it also helped me to think differently about what I truly needed to carry with me into the woods. Although my spoons, bowls and cups are not ready for prime time I wanted to pass along the whole idea of making your own items. When I make something that is more than one step above functional, I will include pictures and do a post on it. Until then, please learn about the “kuksa.”
Kuksa and Guksi originate from Scandinavian drinking cups that were made from birch burls. Now a days you can find them from all sorts of varied wood types, but they are basically the same concept. They are hollowed out pieces of wood that make a cup shape and have a handle. Not a big innovation of design. They are, however, very nice to use. The ones that I have made seem to cool my coffee to a drinking temperature almost instantly and keep it there for a relatively decent amount of time. They also give something I like to call “style points.”
Here are a couple pictures of different kuksas so that you have an idea of what I am talking about.
Kuksa
Kuksa
As you can see, they differ in shape and handle style. The only common thread that they really seem to have is that they hold liquids and have a handle of some sort. Many are hand carved in the traditional construction method. Many are also done by machine or a combination of machine, knife and axe. Once completed, they are soaked in some sort of a non toxic oil, like vegetable oil, and allowed to dry so that they don’t crack out.
Here are a few videos on construction.
And another one:
Again, these are beautiful and function pieces of equipment that can either be carved or machined, all depending on your skills. So, grab some wood chunks and get to work making your own. It is a rewarding experience that can become a bit addictive over time.