Monthly Archives: March 2015

Event Horizon Book Review

by Gunguy

Event Horizon is the second book in the Perseid Collapse series of post apocalyptic books by Steven Konkoly. Event Horizon picks up right where the The Perseid Collapse left off as the situation in Boston is set to go to hell in a hand basket.

All Alex has to do is escape Boston with two teenagers and then travel home back to Maine with the area falling into anarchy. Alex Fletcher desperately crawls through the urban jungle of Boston to save his son as well as his neighbor’s daughter. This herculean task is no small feat as the entire USA has been blacked out by a massive EMP blast. Chaos is running rampant and local militias are trying to take over various sections of the east coast including parts of Boston. Many of the militias believe that the EMP blast is a result of a government takeover and they are against any form of government, military or law enforcement presence.

Alex’s actions in this book are about the rescue and the aftermath of escaping Boston with his son and friends. His return to Maine and the defense of his family and friends is an amazing story and only his military training and his abundance of luck gives them a possible chance at survival. This series is well written and entertaining to read. Point of Crisis is the third installment of the Perseid Collapse series and is next up on my reading list.

Event Horizon  - The Perseid Collapse Series Volume 2

Event Horizon – Book 2 in The Perseid Collapse Series

  • Share on Tumblr

First Rawhide Project

by Woodsbum

A friend of mine gave me an osage orange walking stick that was in serious need of a handle and a way to protect the tip from damage. For those that are not familiar with osage orange, it is a tree that grows in places like Texas and is a very hard wood with thorns that will rip you up. It also produces what we used to call horse apples or hedge apples. The osage orange is also a prized wood for bow construction. In places where it grows, you will also see it used quite often for fence posts since it doesn’t shrink or rot very easily.

Since I had a blank slate from which to work from, I decided to try my hand at using rawhide. I have never used it before and am quite clueless about the process other than soaking, stretching and sewing….  That is about the detail and extent of the knowledge I had about it so I set out in search of some instruction. Library you ask? Nope. Elderly gentleman that looks like Davey Crockett? Nope again. Local books store, Backwoodsman magazine, or some obscure Foxfire volume? No way…..  Youtube!

So step 1 in the process was to find rawhide and some nice looking thread to use to sew it all up. On my way home last night the whole Interstate was actually closed down, thus forcing me to find an alternate route home. This made me think that I was suddenly destined to get my walking stick finished and I took the opportunity to stop by Tandy Leather. $45 later, I was back in traffic and slowly crawling home.

The next step is to make your template/pattern and cut out your rawhide so you can soak it…..  I bypassed the pattern thing and just cut off a few chunks to soak. After a couple hours sitting in water it was soft enough to work. At this point I eyeballed the sizes and did some chopping.

Soaked and ready for trimming

Soaked and ready for trimming

Once I had a rough guess as to what shape and size I needed everything and it was all chopped accordingly, it was time to punch some holes and get ready for sewing.

Holes poked

Holes poked

I found that rawhide is so forgiving due to its stretchy nature, it is actually quite annoying to work with at times. It gets slimy, pulls and stretches at the wrong times, and is difficult to judge the shrinkage and contraction as it dries. It really is quite fun.

Once the holes are poked you just start stitching it up. I used a cross stitch pattern that I have seen several sheathmakers use for rawhide.

Sewing it up

Sewing it up

Rawhide is much easier to work with than leather. There seems to be an inherent allowance for looser tolerances with rawhide than people allow with leather. I like this as well.

Once everything was all stitched up it looked like this.

All stitched up

All stitched up

One thing I need to figure out is how to tie off the ends of the thread. I just tied and cut for now, but I have a feeling that it will eventually pull loose and I will end up having to redo it. To help this not happen with the handle portion I did a sort of end cap thing. Once I figure out how to professionally tie it off, I will go back and do my version of professionally tying it off. My version is much goofier looking, but will work.
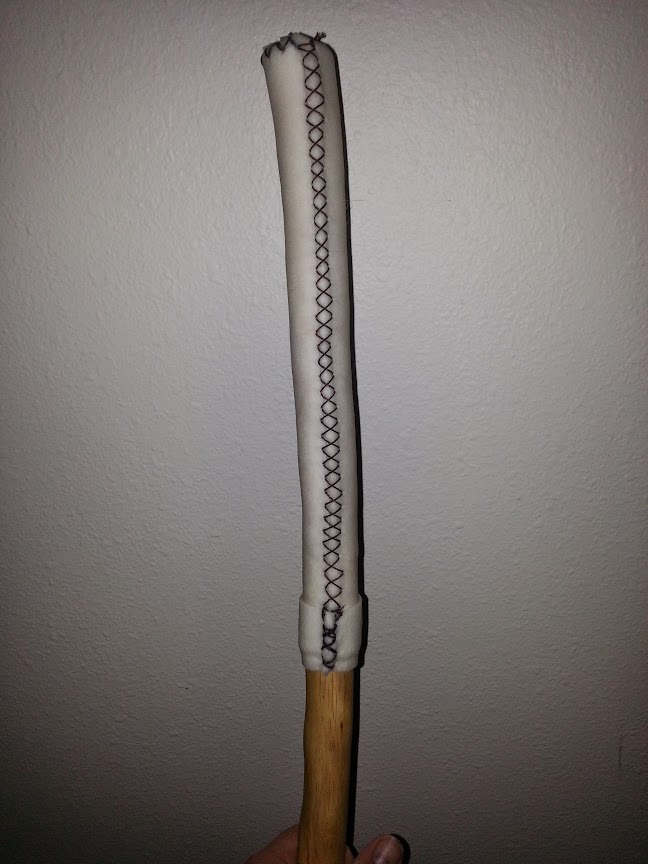
Handle section

Handle section

I will also research how to dye rawhide and go back later to make it a little less……  Uh…  Rawhide like? Not sure how to describe it, but it just kind of glows at this point.

For anyone that starts off on one of these projects, I suggest you do some Youtube research and then look at what some professional leatherworkers build. Contrasting the amateurs online with professional pieces helped to make me understand the idea of crossstitching and the sort.

Good luck to anyone that gives it a try. It is really quite easy and isn’t as big of a hassle as I originally thought it would be.

  • Share on Tumblr

The Perseid Collapse Book Review

by Gunguy

The Perseid Collapse is the first book in the Perseid Collapse series of post apocalyptic books by Steven Konkoly. The Jakarta Pandemic was the prequel to this series and introduced us to all of the main charachters. The book was a fast read as the action flowed quickly and the characters were further developed and fleshed out. I liked how the book went into detail about how quickly civility starts to go out the window after the collective memories of the experiences during The Jakarta Pandemic kicks in.

Throughout the book I enjoyed the descriptions of the protagonists friends and family and their interactions. They are written as believable characters who are very prepared and are either scared senseless or tactically proficient. Yet they still have moments when they want to curl up and hide, and instead step forward to do what they have to, even when that means accepting their own weakness or taking on a new role for the good of the group. They aren’t perfect but they are fiercely devoted to each other and they just keep going.

If you’re a prep minded, the moments when the characters discover they’ve made a bad gear choice or forgotten some small thing with critical results will make you reconsider your own plans. I don’t want to give any spoilers but I did find Mr. Konkoly’s approach to the militia issue to be very refreshing since he gives the reader a view of both the positive and negative aspects. The contrast between the two groups is telling and makes for exciting reading.

I highly recommend The Perseid Collapse  for anyone looking for a fast paced, action-oriented thriller that will make you wonder what you would do if the lights went out. My only gripe with it is that it ends at a critical moment in the plot. I hate having to wait to find out what happens next. Luckily the next book in the series, Event Horizon,  is out and next up on my reading list.

Book One in The Perseid Collapse Series

Book One in The Perseid Collapse Series

  • Share on Tumblr

Kydex Projects

by Woodsbum

This past weekend I finally got a chance to bust out the Kydex equipment I purchased last fall. There were several projects that I had to work on that had become fairly time sensitive. Two of which were IWB knife sheaths for Gunguy that would be more ergonomic and fit his needs better. Considering that this was really the first true project in Kydex, I had quite a learning curve to overcome. Luckily, Kydex is quite forgiving for if you screw it up you can quickly reheat and erase 99% of the evidence.

This is a great example of erasing the evidence.

Reheating a bad form

Reheating a bad form

If you look closely, you can see the Kydex starting to open back up toward the back of the oven. This plastic is actually quite amazing. It has a memory so heating up a previously formed item will literally leave you with a flat pieces of plastic after it heats back up. Admittedly, I reformed several things just to be able to watch it unfold and return to its previous shape. I have no idea what it does to the actual plastic itself, but I can assure you that the shaping properties of this stuff is very amusing.

Once I got the Kydex hot, I used these homemade presses to squeeze the plastic and form it to the knife. As you can see, this is eventually going to wear out and need to be replaced. I do like the design of the locking mechanism. Again, it was made by someone else, but whoever did build these forms really had a good eye for fabrication. I can see myself just replacing the foam when it breaks down rather than buying or making new.

Homemade Kydex press

Homemade Kydex press

One of the projects I had to do was for my daughter. When her deployment orders were cut I contacted a very talented knife maker to build her a combat/utility knife to take with her. I also contacted a sheath builder to make her a Kydex sheath that would clip onto her MOLLE gear. The knife is incredible, but the $100 I paid for the sheath was a bust. It not only didn’t hold up, but it broke during a ruck march. When I contacted the sheath maker about it he said that he would repair it, but it would cost me if he had to rebuild it. Once I got the knife back from my daughter and was preparing to send everything back to him to be redone, he suddenly pulled a Keyser Soze and disappeared on me. Needless to say, I will be much more careful about having custom pieces built unless I know the maker’s work. Very unfortunate because I have had a lot of custom work done in the past.

Here is the sheath I build for the daughter’s knife. I still have to do the final sand and polish, but I think it came out fairly decent.

Kydex sheath for Turley Knife

Kydex sheath for Turley Knife

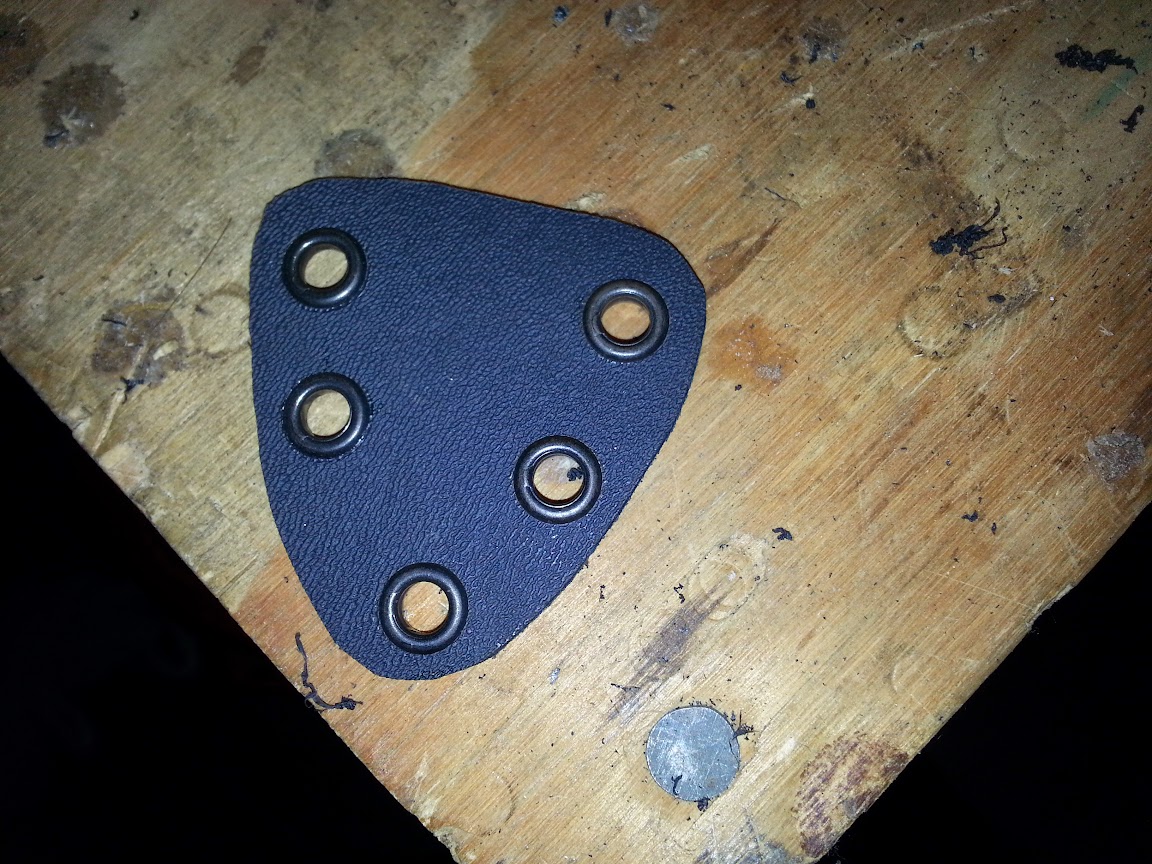
Here are a couple of the knife sheathes I made for Gunguy. I still have to do the final sand and polish for his as well, but wanted him to see them before I did. I didn’t want to do all the finish work on something just to have to redo it because it didn’t come out quite right. Notice how he wanted the grommets on the spine side of the knife? This was so he could comfortably put this inside his waistband and still get to the handle without cutting himself. Most of the loops and straps will get in the way of drawing the knife if they are on the cutting edge side.

Sheath for Izula

Sheath for Izula

Here is the other one.

Sheath for Spyderco

Sheath for Spyderco

See how I formed it “backwards” so that he could use the grommets to strap on different loops and fasteners? I also made him an adapter for his stock Izula sheath that moves the IWB loop to the other side of the sheath and thus more out of the way.

Izula loop relocation adapter

Izula loop relocation adapter

All said and done, this was actually a fun day in the garage. I will be building other gear out of Kydex as time goes on. Not sure what will be next, but I can assure you that it will be fun!

  • Share on Tumblr

D Version Hammer Spring

by Woodsbum

The last real upgrade I had pending on my 92 Beretta was upgrading the hammer spring. I grabbed a factory Beretta D version hammer spring from Brownells for less than $10.

Originally, I was told that this was the primary upgrade needed to drop both the DA and SA trigger weight from 12 lbs for DA and 6.5 for SA to a reasonable level. I do not have any of those spiffy trigger weight things, but I can tell you that the stock trigger pull of the 92 I have was a bit on the ridiculous side. This upgrade was quite welcome.

The process is actually pretty easy. All you have to do is remove the pin near the lanyard loop to drop the plug and spring out of the handle. Just make sure you are careful during the process so you don’t end up shooting the lanyard loop plug across the room. If you use a 5/16 punch to do this, just keep the punch in and the pin still set in the frame on the opposite side. After you swap out the spring you can easily hit the roll pin while compressing the spring to get the plug set back into place. The longest part of the whole process was taking off the grips, so it is really quite easy.

Here is a picture to show the difference between the longer, stock spring and the shorter, D version.

D Version and Stock Hammer Springs

D Version and Stock Hammer Springs

It really isn’t that much shorter, but it definitely does cut a couple coils off from stock size.

After I installed the spring and did a few test pulls on the trigger it is really easy to see how nice this upgrade is. Of course this raised a question as to why the stiffer springs were even installed to begin with. When asking Gunguy, I found out something quite interesting about this. I guess this spring is needed if you are shooting NATO 9 mm rounds due to the hotter round and tougher primer. The fact that I use factory US or hand loaded rounds would negate the need for this heavier hammer spring and thus make it much more pleasant an experience in firing with the lighter hammer spring. This does make sense, especially since Beretta is from Europe and sells a lot of pistols to military and LEO.

Now that I have completed all my upgrades to my 92a1, I will start on modifying and upgrade a different firearm. The next project will probably be ripping apart my 1911 and polishing up all the trigger parts to lighten and smooth out the pull.

This is how my Beretta looks in it’s final stage of upgrades and modifications. I will be doing a range report after I take it out next weekend.

Final Configuration

Final Configuration

  • Share on Tumblr