Tag Archives: neck knife

Rawhide Mora Sheath

by Woodsbum

It has been several months of me procrastinating, but I finally got motivated for long enough period to finish my friend’s knife sheath. Believe me when I say that it was not an easy feat. We are in the middle of the rainy season and I still have a lot of new Netflix series unwatched, not to mention some Captain Morgan Reserve that isn’t going to drink itself.

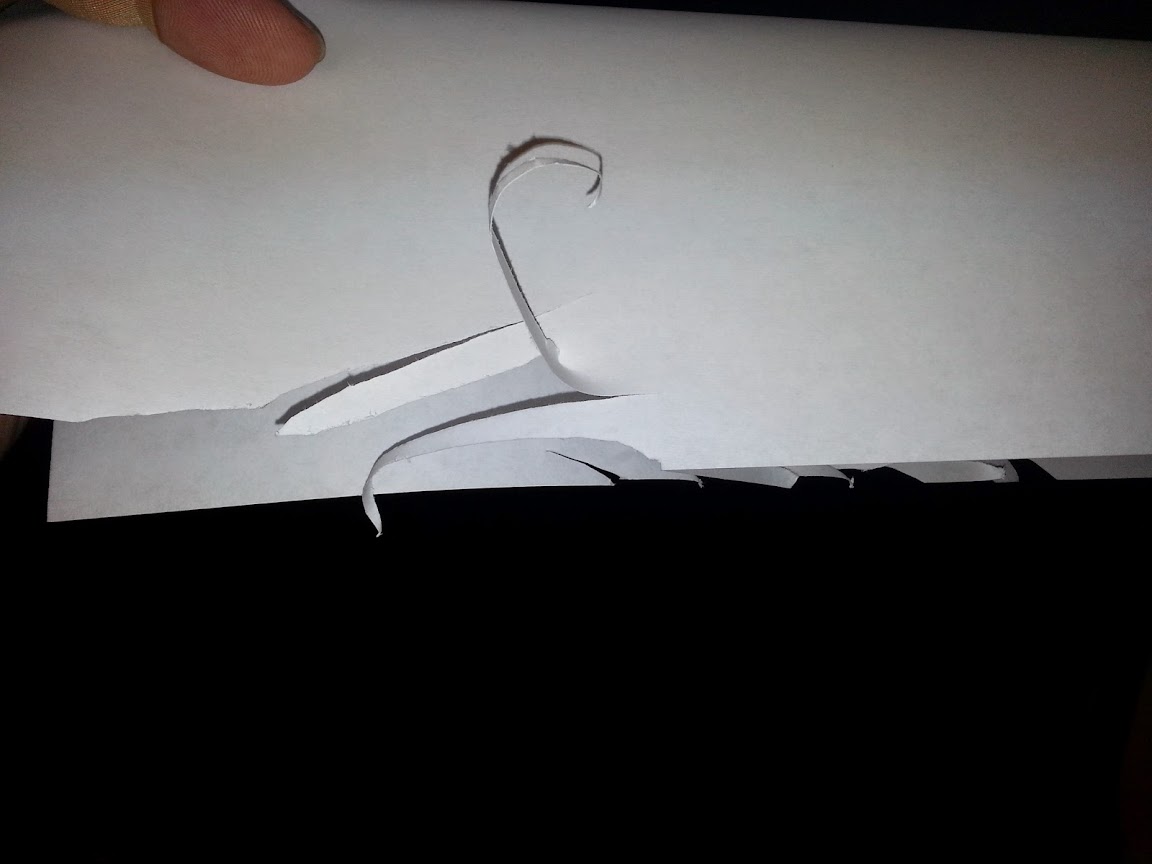
Lack of motivation and inebriation opportunities aside, I did get the sheath finished. For this build I did a few things differently. Instead of making a complete leather liner I cut out the plastic from the original sheath and then used leather for the top portion to make it snug. The first attempt didn’t work as well as I had anticipated so I ended up having to take it all apart and trim the thickness of the liner. Interestingly enough, the inner liner didn’t have to be stitched once I had the old one wet formed and waxed a little. It really holds its shape well.
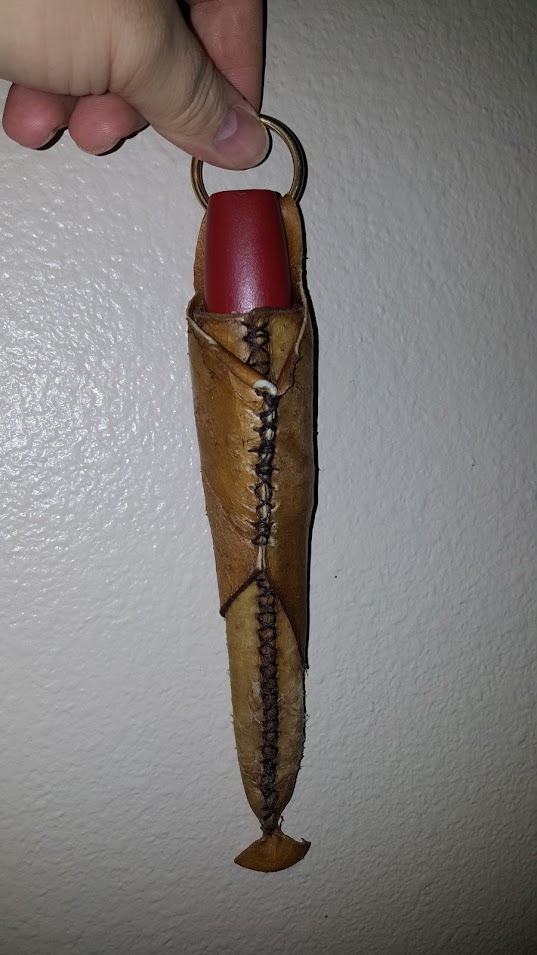
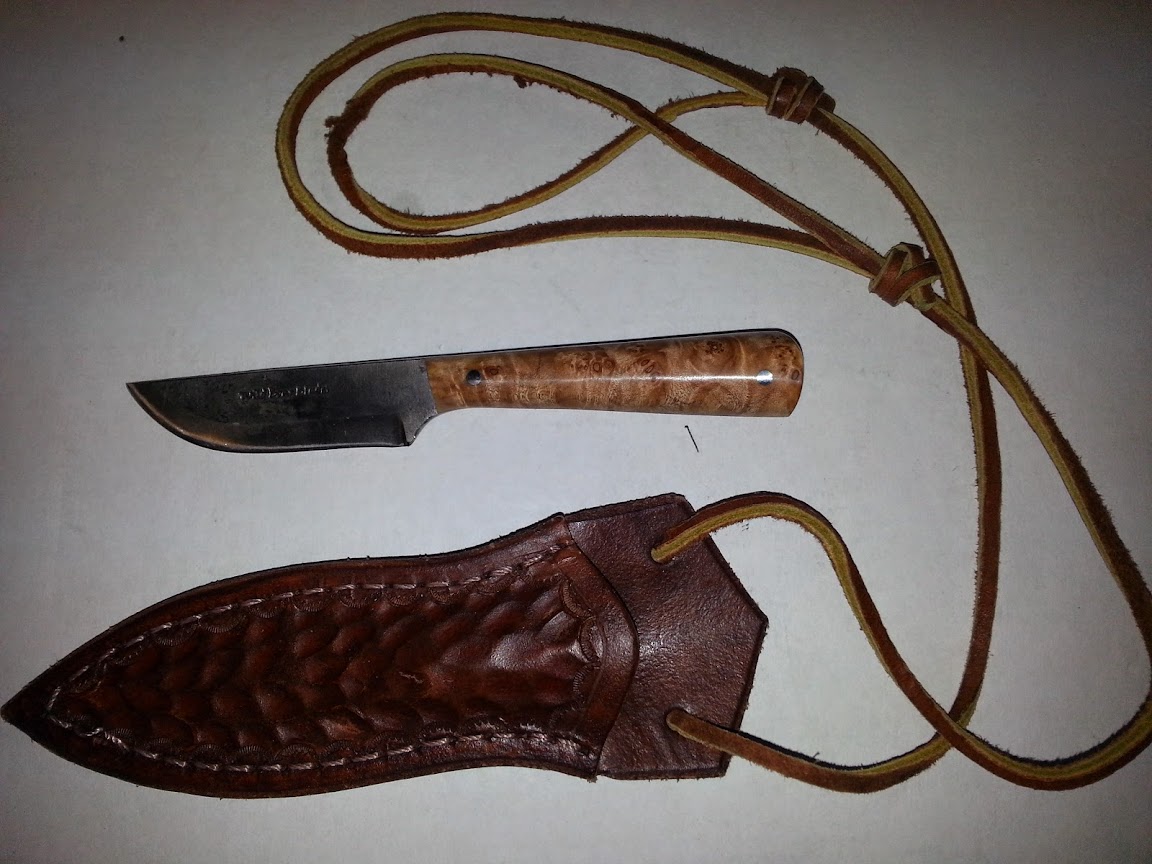
Rawhide Mora Sheath

Rawhide Mora Sheath

In future builds I might do something similar from now on. If I take the leather I am building the liner out of and wet it, form it, and bind it to keep it in shape, and then wax it when it is done I can easily just use rawhide over the top as an exoskeleton of sorts. This keeps the rawhide smooth and allows it all to stay tight without the liner binding up on me after the rawhide constricts during drying.

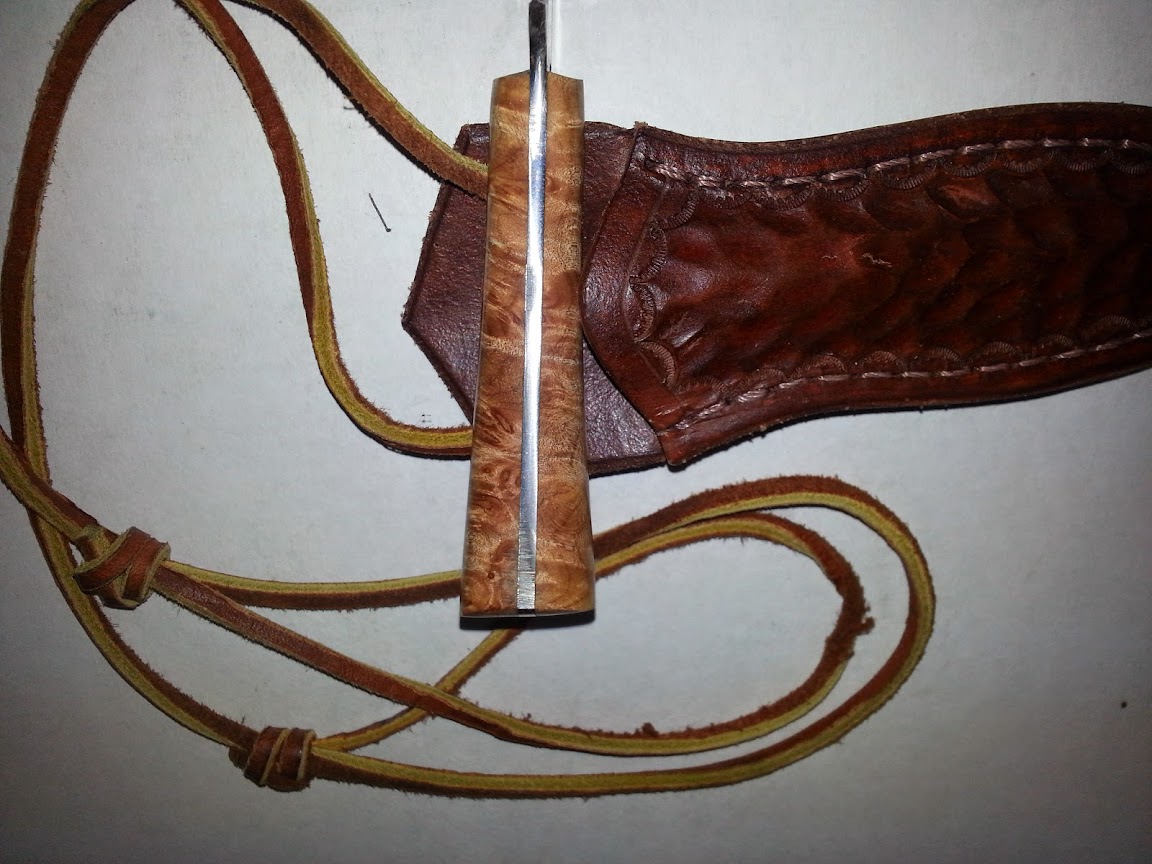
You can see how I forced the over layer to constrict and thus hold onto the main sheath by shear friction.

Side View - Notice the forced shrinkage.

Side View – Notice the forced shrinkage.

A few things that I have discovered about rawhide:

  • You can adjust the shrinkage of the rawhide with use of a heat gun. If you want it to constrict tighter just dry the wet rawhide with the old Warner.
  • Dying it is almost impossible, but getting it to soak up color while it is getting ready for working gives it a nice even color. I used coffee on this build but I am thinking about using some fruit juices and wine for some added shades on my next builds. I think some red wine in coffee would give an almost mahogany color.
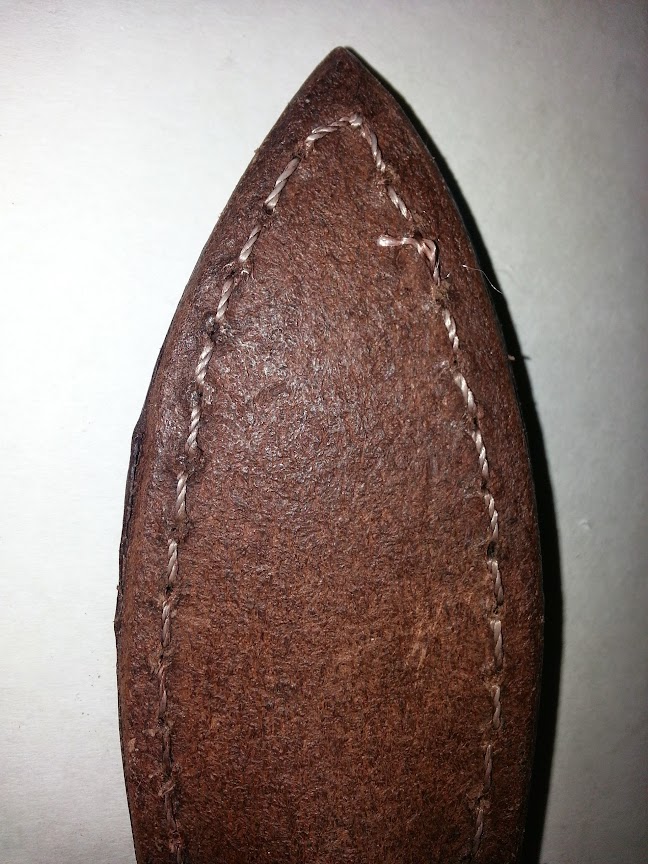
  • The more rugged the rawhide looks the better the finished product. I like how the inner part of the rawhide is textured. It gives a very interesting and rustic look to the sheath.
  • Layers of different rawhide cuts and textures also gives it an interesting look.

I am thinking about doing something out of rawhide for my Marlin 1895 to hold a few additional rounds. I think I can do a rawhide cover with leather liner that will lace up one side and hold 8 to 10 cartridges. If I do, I will try and take more pictures of the actual build process. These last couple knife sheaths were fairly basic so a final description seemed to suffice.

As I do more projects and find soaks that will color stain the rawhide in interesting manners, I will update you. I will also do a few builds that have more pictures of the process. If you have been reading my site very much at all you know I am very bad about taking pictures. Someday this may change, but if you have any questions I can try and answer them for you here.

Thanks for looking and if you get a chance, try out some projects yourself.

  • Share on Tumblr

Gift Neck Knife

by Woodsbum

I have been working on a gift neck knife combo for my son in law’s birthday. He does not have any real field knives for camping, hunting or bushcrafting so I thought that a solid neck knife would be the best way to get him started.

When choosing a good field knife, I like to look at how harsh someone is going to be on the blade. My son in law doesn’t do a lot of woodcarving, but wants to get more into hunting. Getting him something that was lighter on the bushcraft and heavier on the camp type chores seemed like a good target. The blank I chose was a MP Classic built by Matt Paul in New York. We have several of his builds and have been very happy with them. Getting a solid blank from Matt was a no brainer since I wanted something to eventually become an heirloom. Because this was going to be my first “outdoor gear” gift for him it was very important that I do a lot of the work to get it built and ready. It might not have been important to him, but I wanted him to know that I was willing to spend a lot of time and energy in creating something that will last his whole lifetime.

When I went shopping for scales I looked for something different, but went with the classic lines of the blank. There was no real shape to the handle so something simple and elegant seemed like the right choice. I chose some paduk that had some phenomenal color and grain. For pins I used some brass stock.

Fitting the handle on a straight lined knife handle is not nearly as easy as one would think. There are no curves or shapes that you can use to hide small imperfections. Everything has to be completely straight and smooth to feel right.

Unwaxed and initial shaping

Unwaxed and initial shaping

To finish the handle I melted in some carnuba wax and polished it. For some reason the pudak soaked the wax up so I didn’t get the high sheen I was expecting. This is okay, however. The lowered gloss of the handle goes well with the sheath I made him.

Waxed

Waxed

To compliment this knife I wanted a sheath that was completely different than what you would normally see. I started off by making a leather liner out of 8 oz leather. Due to my normal picture taking deficiencies, I have had to add this picture of another sheath I am making so you can see the gist of what I did. From the picture you can see that I just did a simple taco sheath without a welt.

Liner

Liner

And then I wet formed the sheath into a Scandinavian style form.

Wet formed liner

Wet formed liner

Once I got this wet formed I wrapped it in rawhide. The process involves a lot of soaking, stretching and is then sewn along the same lines as the liner. The rawhide was left overlapping the liner at the top so that I would be able to hit it with a heat gun and shrink it around the knife handle. In this picture you can see how I shrunk the rawhide to form it around the top of the leather liner.

Top of finished sheath

Top of finished sheath

The back of the sheath, like I mentioned already, is sewn along that same line as the liner. As the rawhide dried it pulled around the lines of the blade.

Back of finished sheath

Back of finished sheath

I finished up the sheath with a leather lace that I whipped onto the ring. For adjustability I added the fisherman’s knot on the side. You can also see how tightly the top of the sheath fits against the knife handle in this picture as well. This will keep water from running down into the sheath and hopefully help protect everything. To keep the blade from rusting I squirted some oil into the sheath and waxed the inside of the liner.

Top of finished sheath and knife fit

Top of finished sheath and knife fit


Hopefully my son in law likes his birthday gift. The sheath is still drying, but I hope to have it completely ready for use by the time I see him on Sunday. Lucky for me, he doesn’t read my site.

  • Share on Tumblr

Helle Harding

by Woodsbum

I have been waiting for about 3 years for a Skookum Bush Tool from Rod Garcia and for right at 2 years for a SPL knife from Steven Long. Both of which were slotted to be my neck knives while I was out in the woods. Unfortunately, I am still a ways down the list for both of these creations so I finally decided that I needed to get something that would fit the bill until I got either of these customs. After searching the Internet and messing around with several different knives I set my heart upon a Scandi grind of some sort that had around a 4 inch or less blade, but was full tang and had a good handle to do minor wood processing and carving. What I found that I really thought would work well was the Helle Harding.

Helle Harding

Helle Harding

On Amazon these knives are around the $140 mark, but I got mine at a local shop for $125. This definitely fit within my price range and the size, feel and weight were exactly what I was looking for. The stacked handle adds almost no weight to the knife overall and the blade itself feels quite light and agile in my hand. The sheath is real leather and there is a retaining flap that locks the knife in place when sheathed. This really gave me increased peace of mind that I could wear this all day long and not worry about losing the knife somewhere along the way.

Everyone is going to have to forgive my pictures. Like almost every outing I have, I leave my phone in my vehicle and almost never take a fully charged camera with me. It has gotten to be an almost impossible task for me to remember that I need to take pictures. Because of this you guys are going to have to suffer with my impromptu photo session on my lunch break. I think even these pictures will allow you to see how well this knife performs on even the least perfect of situations.

Over the years I have become quite the fan of Scandi grinds. What I love most about them is how easily they cut through wood and make curls for fire starting. I am not sure if it is just how I use a knife or if it works this way for everyone, but I exert far less energy and pay way less attention to my technique when using a Scandi grind. These pictures will show you how easily I was able to make some feather sticks with a less than desirable wood choice. Considering this was all done during my lunch break, I was very happy with how well it sliced right through this water logged dead branch without chipping it up too much. Again, it was not a wood choice I would have made if I was not desperate to take some pictures for this post.

Feather Sticks

Feather Sticks

Mind you that this wood was at the initial starts of being punky. It was really right in that perfect spot where (if it was dry) you could make a very efficient bow drill set out of it. As a matter of fact I am going to set it aside and let it dry for a while, then carve out a spindle and hearth.

With almost no effort at all, this guy just sliced right through the wood and made nice curls. Most of them broke off at the end as you can see, but each cut curled multiple times. The sweet spot on this blade seems to be the entire cutting surface. There are no areas that seem to cut worse or better than another. It will be interesting how it performs once it dulls several times and I have to resharpen it. If it can keep the current cutting efficiency even after multiple sharpenings, I will be quite impressed.

Here is a better look at both the knife and how it cut this very brittle branch.

Cutting Power

Cutting Power

The knife also works very well for field dressing animals harvested in the field. Well, it works quite well for the ducks I tested it on. I could see this as a field knife that would handle any task thrown at it, although like all general purpose items it would not excel at every task.

Overall I am quite impressed with this buy. The grind on the blade is a very capable feather stick maker, the agile feel to the blade allows for fairly intricate carving (although I am horrible at carving and refuse to show my poorly made spoons to anyone), it works fairly well for game processing, and the weight is negligible. If anyone I run into is looking for a mid sized knife to use for general camping chores I will now recommend this particular knife.

Now that I have picked this up I am concerned that I will have a hard time choosing between this and the two customs I have on order. Too many options!!!!

  • Share on Tumblr

Wild Boar Blades Trout and Game Knife

by Woodsbum

I can’t remember exactly, but it was about 18 months or so ago I saw an advertisement in The Backwoodsman for a nice little trout and game knife made by Wild Boar Blades. I called the number to get some pricing and information. Come to find out, the maker has a shop out in Silver Lake, WA and answered his own phone. The gentleman seemed like a great guy so I went ahead and ordered one of his knives.

Shipping was quick and the price was good considering I was getting something from a custom knife maker. Some of my custom knives have been over $600, so this was almost “chump change” in comparison. Again, I will say that the maker himself was great to talk to over the phone and the pictures of his work made his knives appear quite good. Then I got it in the mail……

Now I don’t want to pick apart someone’s work nor do I dislike the knife enough to not use it. There were just some quality issues that need to be addressed before I feel that it should have been released from the work bench.

First, let me show you the knife.

Wild Boar Blades Trout knife

Wild Boar Blades Trout knife

As you can see, it looks nice from the pictures. Mind you, I have used the heck out this knife and both it and the sheath have seen better days. There are a couple maker errors that I found when I first got the knife, however. The first thing that I noticed was that the handle scales were not even. The maker did not square off the butt evenly and now there one side is annoyingly longer than the other. It is hard to see in this picture, but if you look closely you can see it.

Crooked scales

Crooked scales

You can also see the grinding marks on the tang right at the butt as well as crookedly ground scales up toward the top of the scales.

The grind on the blade was also way too sharp of an angle. It would not hold an edge at all. It took me several hours on a stone to get the angle to a workable angle. As you can see here, I did not do a perfect job. It is a lot better than it was, however. The blade came with a very sharply angled convex grind to it. The way it was done made it where the blade did not hold an edge nor could I get it very sharp. A flatter or more tapered grind would have been a better choice for this knife considering it was designed for cleaning trout and small game. It really came as more of a patch type knife than anything else. I still have many hours left to make it perfect, but considering the other flaws I will just let time and strop sharpening fix the edge.

The other issue that will require my attention is the stitching of the sheath. Even though the sheath is not evenly cut and the stitches were not properly aligned to the edge, the real problem is that the maker used an easy stitch with unwaxed thread. Of course the thread broke and is now in need of a complete restitching job.

Broken stitching and uneven edge spacing

Broken stitching and uneven edge spacing

Now don’t get the idea that I hate the knife. The finish sanding and polish of the scales is awesome. The design and shape is phenomenal as well. I even like the maker’s mark and name of the blade company. I just think that there are some build and quality issues that need to be addressed.

As a side note, I have used this knife quite extensively to clean small game and fish. It has cleaned 20-30 trout, several dozen ducks, a dozen or two rabbits, probably a 100 doves, countless squirrels and helped bone out my son’s deer. After flattening out the edge on the blade it is now sharp enough to work as it was originally intended. Again, it has a long way to go. As you can see below, it is sharp enough after meating out several racks of ribs last night to still cut paper without issue.

Sharp enough for now

Sharp enough for now

If you have the skills to fix the blade when you get it or are like me and don’t care too much about using a blemished custom knife, I would recommend the shape and design of this knife. If you want a show piece or don’t know how to fix the edge of a knife to make it more suited for cutting up meat then I would recommend you look elsewhere.

  • Share on Tumblr

The Joy of a $15 Knife

by Woodsbum

I am a big fan of custom knives. When I say, “big fan” I am talking about 6 of them and 3 others on order. My son has 2 that I bought him. Most customs cost around $350 on average, so I have made a substantial investment in cutting instruments. My distrust of production and dedication to custom knives has become so ingrained in my being that I actually have found myself giving a “meh” to everything but a Becker at Cabela’s the other day. That only got a “it’s ok.”

There does seem to be a couple exceptions to this whole custom knife kick I am on. One exception is my EESE’s. For whatever reason, I love these knives. They are simple, tough, and keep an edge like no other production knife I have seen EXCEPT my $15 knife.

My $15 Knife

My $15 Knife

This old Mora Classic 2 has been used, abuse, sharpened with belts, new edge put on with a belt sander, dropped, kicked, drowned, and it still shaves hair with only a little bit of time on a strop or stone. This thing is amazing. If you look closely, you can see how bent the tang/handle are. It is much harder to see in pictures, but is painfully obvious when using this knife. Long story short is that I have used it so much for fuzz and feather sticks that I bent it a bit.

Bent Tang

Bent Tang

Now many of you have already discovered the sharp steel goodness of the Mora line of knives. This was one of my first and the only one from the “old days” that somehow survived. Some were gifted to friends and family. Many more just ended up lost. I did break one while trying to baton a very hard piece of cedar that was borderline fatwood. Here is the final surviver of all the torture dished out upon the batch of Moras I got years ago.

As you can see, this has been slightly modified. I sanded down the bubble of a handle that comes on it for two reasons. One was to mellow out the bubble and the other was to get rid of the red lacquer that covers the birch handle.

Sanded and Grooved Handle

Sanded and Grooved Handle

As noted by several people, this industrial strength coating stinks and is so injected into the wood that there is NO way that it could be anything but harmful to your health. The worst part is that it gets REALLY slick and slimy after living in the PNW’s squishy environment. To help make it less “hazmat on a stick” I sanded the lacquer off and carved in a corkscrew type groove around the entire handle. I found that this made a HUGE difference in making the handle more PNW friendly.

I also had to make a modification to the spine of the blade.

Squared Off Spine

Squared Off Spine

So that I could use the spine of the blade to strike a firesteel, I squared off the back really well with a file. The lightly discolored area between the handle and the “dirt patina” as I call it gets the most use against a firesteel. I have actually used it so much that it is in need of a bit more squaring off and the edges have rounded out a bit.

My last modification to this knife was more for me than the knife. I built myself a sheath and made a matching firesteel. When you get your Mora it does come with a plastic sheath. Mine broke in less than 24 hours during its first camping trip. I also lost a couple knives because it fell out of the original sheath. My suggestion is to make something better immediately after getting your knife. The sheath I made has been waxed and Liquid Wrench is squirted inside the sheath to help keep the blade from rusting. This is very important here in the PNW. It gets so wet over the winter that anything you have used in the field will rust and keep on rusting. By heavily waxing the sheath and squirting oil into it very once in a while you knife will not be as apt to rust.

Mora Neck Knife

Mora Neck Knife

This $15 knife I ordered online has been a great knife for many years. Be aware of the following things that I have mentioned previously:

  • Handle needs detoxed from the red lacquer.
  • Original sheath is crap
  • Square the spine
  • Abuse, but no heavy batoning or it will break

Other than that, this knife is solid and will last you for years. Enjoy!!!!

  • Share on Tumblr