Tag Archives: campfires

Campfire Reflector Wall is Useless

by Woodsbum

Today I ran into an interesting article that about campfire reflector walls. Their contention is that a campfire reflector wall is useless. According to them, they have scientifically proven that the reflector wall does not work. The article can be found here, but as always I have copied it for ease of reading.

******************************************************************************

Does The Campfire Reflector Wall Work? NO… Here’s Why

The campfire reflector wall is somewhat the mark of the experienced outdoorsman. But do they actually work they way they are purported, to redirect heat at the back of the fire to someone on the opposite side of the fire all snug in their lean-to? The short answer is NO! It doesn’t, however, stop others from continuously preaching it and can be found in many survival books. In all honesty, I too, many years ago, believed it. But why doesn’t it work? Well, first lets look at what we are discussing, so we are all on the same page.

sasfireleanto

On the surface, it seems it would work, right? Science, however, tells us that it can’t and a simple experiment you can do at home will prove that it doesn’t. Inverse Square Law and more appropriately Inverse Cube Law says that it doesn’t work. But for the purpose of explanation we will use Inverse Square Law.

Inverse Square Law

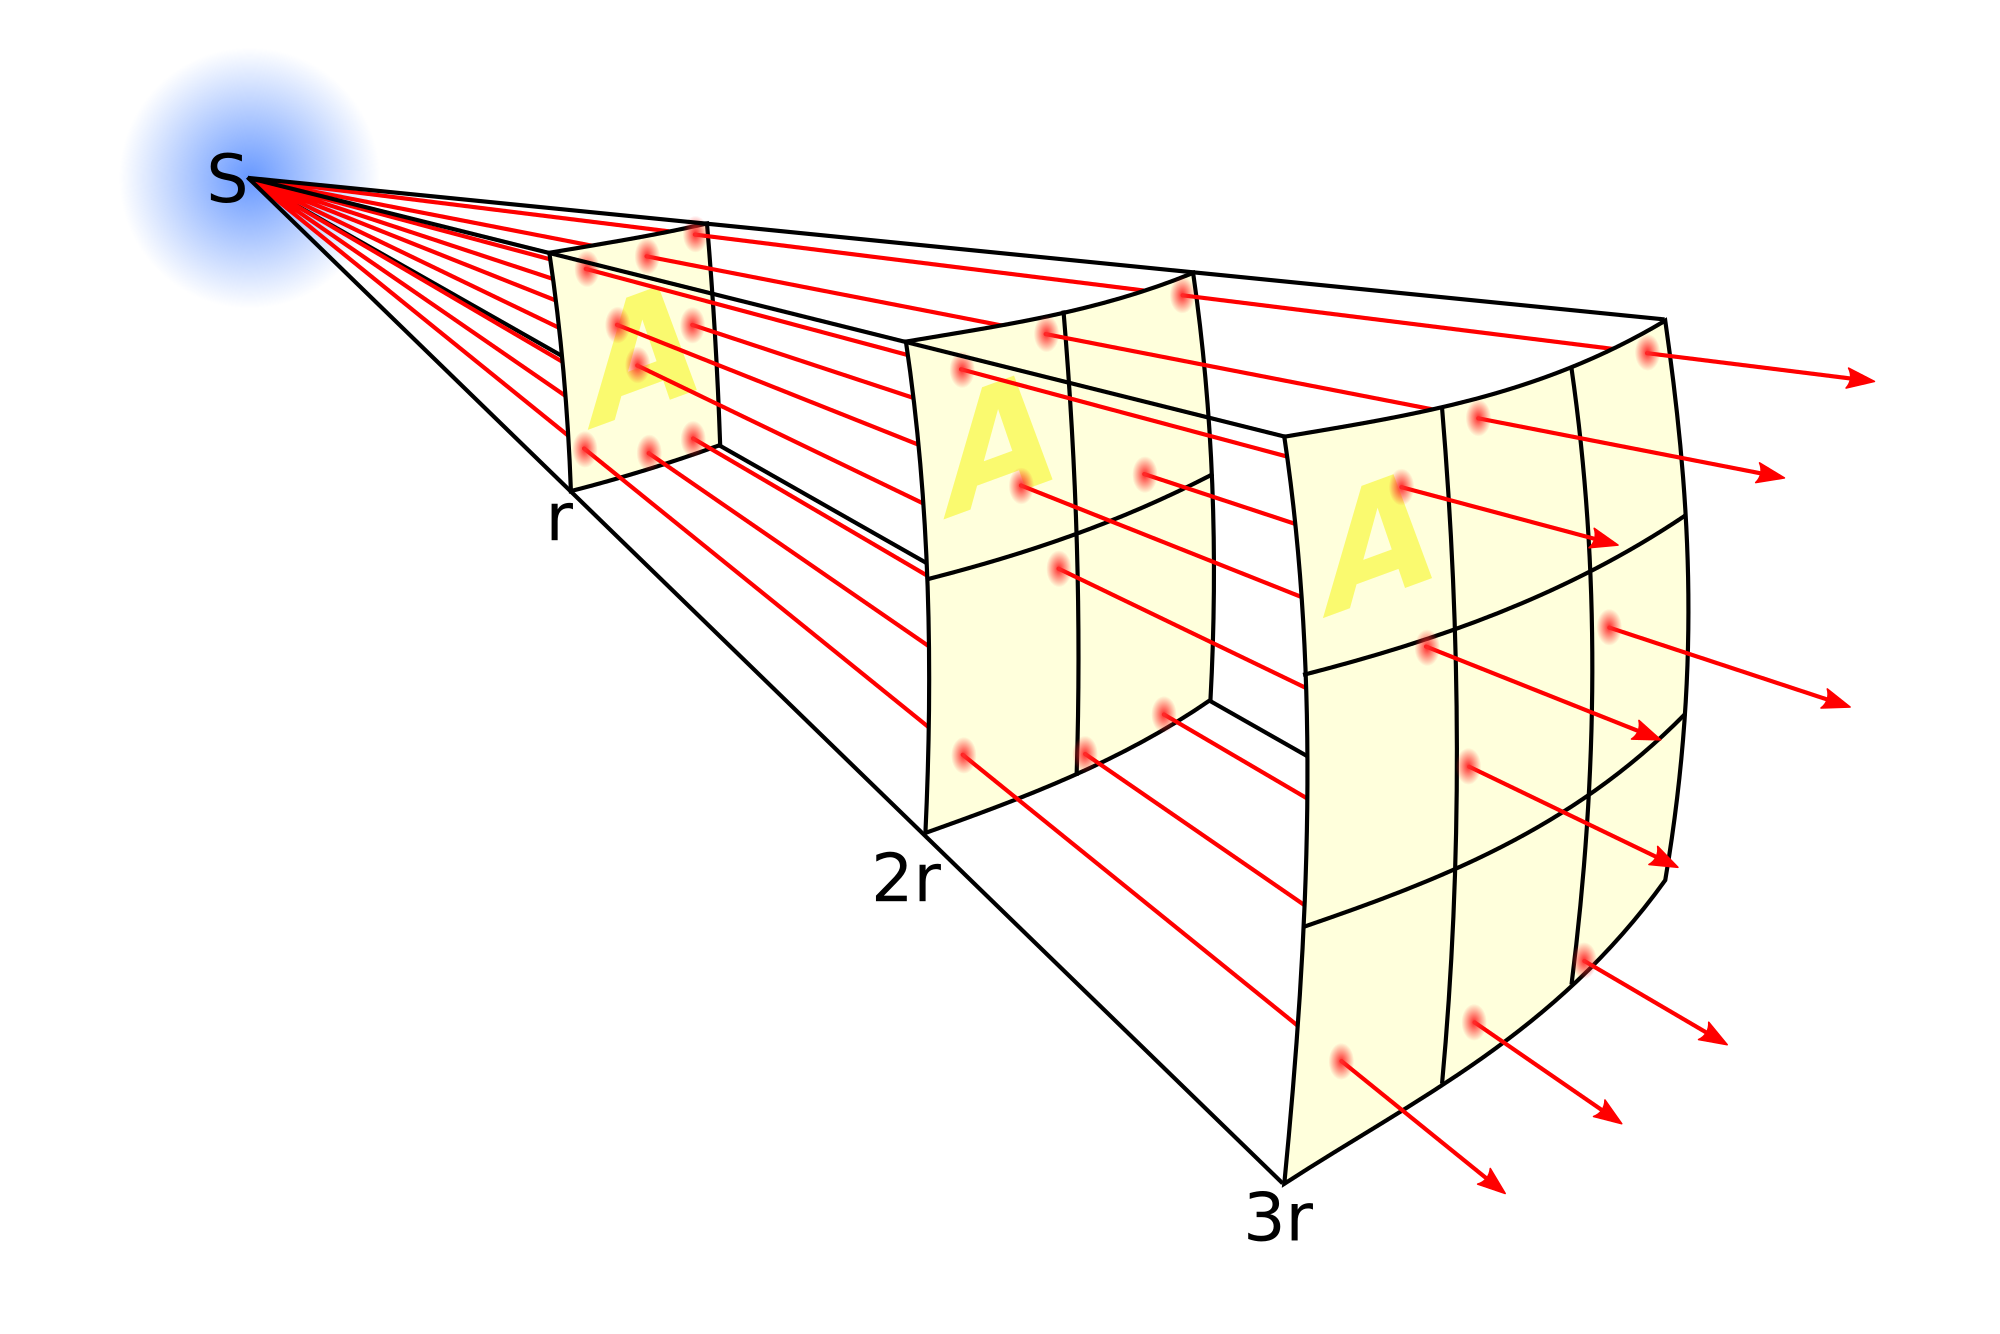
Inverse-square law is any physical law stating that a specified physical quantity or intensity is inversely proportional to the square of the distance from the source of that physical quantity.

A clear example of this is dropping a pebble into a still pond. The concentric rings near the point of impact will be more intense and as the rings radiate outwards they spread out and lose intensity. This happens with light, heat, magnetism, gravity, etc.

You can do the same thing with a flashlight. Place the source of light near a wall and you will notice how intense it is. Now begin backing away from the wall and you will notice the light covers more area, but the intensity of the light falls off proportionately to it’s distance squared.

The same is true of heat. The closer you are to the campfire, the hotter it is. But as you back away, heat becomes less intense but covers a greater area at that new intensity.

Using the formula of Inverse Square Law, one will note that if we have a fire radiating at 100 degrees, when one moves back say two feet and square the distance one receives only a quarter or 25 degrees of the heat radiated by the fire

Look at the diagram below and position yourself at the position where the Yellow A is. Notice how the letter A has less red dots on it the further away from the source it is. That is Inverse Law.

So how then does this affect the reflector wall? Well, imagine the radiated heat on the other side of the fire also falls off at the same rate, which it does. Now in order to reach you, the already lost heat has to jump back over the source, losing more heat in the process, and reach you at what ever distance you’re at, losing even more heat. The fact is by the time it reaches back just to the heat source it originated from, it is not even measurable, because the temperature is below what the source is radiating.

I know, your head is spinning, right? Here’s the experiment I performed at home, to illustrate the effect.

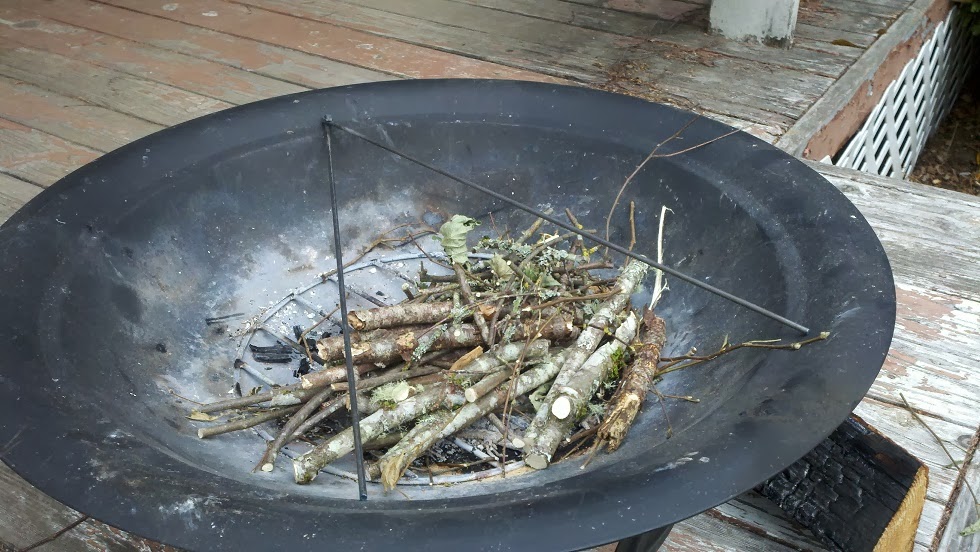
I took an indoor/outdoor thermometer and placed the outdoor probe 6” away from the back stove, between the stove and the back wall. I turned on the stove and watched the thermometer climb until it became stable and the temperature wouldn’t climb anymore. In my case that was 103 degrees Fahrenheit. I then took the wooden cutting board I had and placed it 2” away from the heat source, a la reflector wall, on the opposite side of the flame, nearest me. Now keep in mind the cutting board was way larger in relation to the temperature probe than anyone builds a reflector wall in relationship to themselves or the fire. The results were, that even though the cutting board was only two inches away from the heat source, the temperature at the probe did not climb past 103 degrees, even after leaving the board in place for about 10 minutes.

Now, keep in mind, this was about as a controlled experiment as one could have. I had a constant room temperature in the kitchen of 74 degrees, without fluctuation, and I had a gas stove putting out a constant 103 degrees at 6” away. In the outdoors, things will not be so kind to you as any little breeze will diminish results exponentially.

So, the long and short of it is The Reflector Fire Wall does NOT work. But if you’re going to go through the effort of building one at least use it to as part of a system to draft smoke away, because using it to reflect heat back to your lean-to won’t work.

*****************************************************************************

As I always do, I like to analyse these type articles and put in my $.02. To begin, let us look at the science they used to determine that this does not work:

1) Inverse Square Law: They are correct about how the law works and they applied it correctly as long as you DO NOT TAKE WIND CURRENTS AND STRUCTURES into effect. The fact that a campfire’s heating dissipates so quickly is based also upon the cooling nature of wind currents and surrounding structures. A campfire out in the open will actually have much more of its heat dissipated and you will receive less heating effect because of this. To illustrate this, let us think about a wood burning stove or fireplace. As slow moving air around the fire is heated it will rise, thus creating a current. These warm/cool air currents will slowly heat the room due to the ambient air temperature rising and the air ends up being rewarmed. The heat will also warm the surround structures, thus also helping to increase the ambient air temperature. Quite simply, if you were only judging the filling of an apple pie instead of the whole dessert most people would consider it WAY too sweet.

2) Ever heard of “getting out of the wind” or “wind chill?” These effects were never even discussed because this would have disproved their misguided theory. By adding more protection to your shelter, whether there is a fire or not, you decrease that effect. Because most people are not going to go out the woods and build an entire log cabin for a short stay in the woods, good shelters and a reflector wall become a great alternative. When this wall is created and a fire is properly placed between that wall and your structure, you have in essence created a “fireplace” of sorts for you shelter. This protective wall blocks the wind, cuts down on the air currents that will carry your warmed air away and your structure is able to collect enough of the warmed air to actually start to warm up itself. This is just like the concept of a fireplace or wood burning stove. Warm the air, collect it, reheat it, warm the surrounding structures, and thus the camper will be happy…..

3) Lastly, I want to add a bit of common sense to this. Why is it that your tent will heat up the longer you are in it? Is there any major insulation to that sil-cloth dome tent you bought? That fabric is VERY thin and lightweight. How about that rain fly made from the same material? There is no insulation there. Where is the insulation and how does the tent stay warmer than the outside environment? The air trapped between the fly and the tent itself acts as a layer of insulation. This works just like goose down, prima loft or any other number of materials. The trapped air works as an insulation barrier to keep you warm and act as insulation. This same principle is at work when you build a good, solid and large campfire reflector wall in front of your shelter. Although the sides are open, the wall works as a way to partially wall off your shelter and allow you to use trapped air for insulation. Heat that air and you are good to go…..  This is a no brainer…..

To wrap this up, I am quite concerned at the stupidity being spewed by so many “outdoors” sites that are trying to cash in on the survivor hype that reality TV has created. These morons are going to get someone killed if they don’t slow down and apply some traditional knowledge to situations rather than picking out a single aspect to rip apart techniques that have been used for 1000’s of years. Even though ancient people had never heard of Inverse Square Law, they seem to have been better suited and more capable of applying Common Sense Law to their daily activities. If you want to quit doing what has worked since the Stone Age then go for it. Have fun in your RV while you watch Netflix and your DVD of Jeremiah Johnson. I will keep doing what works, makes sense, and doesn’t require some keyboard commando to validate it.

  • Share on Tumblr

Split Wood Fires

by Woodsbum

Several people have told me that I take things for granted due to my upbringing. One of the things that I think probably fits that description is my ability to make fire, even in terribly wet conditions. To assist people in getting better at making fires, I searched around for a couple videos on split wood fires.

Split wood fires are just that: fires made from wood that has been split into smaller diameter sections. The nice thing about split wood fires is that you can get past a lot of wet or punky sections and just use the good parts, you can take big pieces and get them down to desired size without the need for aimless searching through the woods, and even allows you the ability to store large rounds that just get split up before use. It is a great technique and skillset to have.

Here is the first video I found. It goes over some basic ideas and fire lays to get you started.


This one is a bit more advanced and shows the use of a bit larger wood.


I would take every opportunity to practice these techniques and get good at using them. As an estimate, I would guess that about 75% of the fires I make in the bush are split wood type.

Enjoy!

  • Share on Tumblr

Collapsible Grill or Pot Holder

by Woodsbum

Especially during the spring and fall months, I tend to spend a lot of time in my garage making things. Here is one of my creations that didn’t take that much to build, but is VERY useful when out bushcrafting/camping. It is a takedown grill that also turns into a pot holder for use over your campfire.

Here is a good look at my contraption:

My Pack Grill

My Pack Grill

As you can see from the picture, I made loops at the end of each of the cross pieces as well as a loop and hook on the end of the longer side pieces. This allows me to adjust the spacing, location or even take the entire thing apart for transport.

Here is a picture of it for use with a pot:

Hooked at the end to hold a pot

Hooked at the end to hold a pot

This is how it looks with a tea pot on it:
Making some tea

Making some tea

As a grill, it works quite well. I have used it to a large degree as a way to cook steaks and brauts, but I am sure it will work for any number of things you could cook on a grill. Here is a good picture of how it looks cooking some nice slabs of steak.
Cooking some steak

Cooking some steak

To make this, I just fired up a blow torch and bent the ends of the round stock metal into the desired shape. All told, I think I have less than an hour in the whole thing. This includes cutting my transport/carrier.

For transport, I actually carry it in a PVC pipe with caps that I just tie onto the side of my pack. I did this for transport so that I didn’t have to even clean the grill before I put it away. I could just burn off the extra food that was stuck onto it and then just slide it into the pipe after it cooled off.

Remember that anything you can think of as possibly useful in the bush can probably be fabricated in your garage. Just take some time and play around to see what you can come up with. All told, I love this little grill and wonder all the time as to why I didn’t build one earlier in my life. It would have saved me a lot of hassle with the Weber replacement grills that I used to carry.

  • Share on Tumblr

A Good Video about Friction Fire

by Woodsbum

It is really hard to find a good video about friction fire. Most don’t really go too much into wood selection other than giving you a list of “wood combinations” that work together. This video shows you the finger nail test and explains how to check to see if the wood is actually dry enough to use.

Another couple of points about this video:

  • He uses the spindle to create a good socket in the hearth (fire board). Good technique that most “experts” online do not do.
  • He also checks the dust after he creates a socket. The color and consistency of the dust will help you figure out how well your spindle and hearth will work.
  • It isn’t too obvious in the video, but using the initial dust from creating your socket will help you get an ember quicker. I assume that he did that considering he piled all the remaining dust on top of his ember to keep it going.

Here is the video:

How to read the dust:

  • Light brown and lighter dusty dust means that you are going too slow or there is not enough friction. Try going faster and pressing down a bit more. It could also mean that your wood choice was too soft.
  • Light brown and fuzzy type dust means you are just shaving off pieces of the wood and not actually getting any heat. Go faster. The dust will get darker and be kind of fuzzy in appearance as you get closer to the right combo of technique and wood.
  • Dark brown almost black and fuzzy dust is what you are after. This is the perfect combo so look for embers burning in the dust.
  • Dark brown/black that are almost like little rolls of wood means that you are possibly going too fast and not pushing down hard enough. The wood dust is more like shavings that are not keeping enough heat to burn.
  • Dark brown/black that is almost a crusty or already burned looking means that you are going too fast or pressing down too hard. It could also mean that your wood choice was of a type wood that was too hard.

This is perfect dust:

Perfect dust from friction fire

Perfect dust from friction fire

There are many different charts out there on what type of wood works best. The big thing is for you to test out several combinations and get used to testing the wood’s density with your fingernail. It has to be able to dent it without a massive amount of pressure, but it should not break or crack under that pressure.

Keep trying  different wood types from your area to get that perfect combination for you. Technique plays an important factor as well. I can get the softer woods like pine and cottonwood going, but fail with maple and cedar. It really comes down to what works for you.

Good luck and have some fun!!!!

  • Share on Tumblr

Cooking Over Flame at Home – Fire Pit

by Woodsbum

Many of my friends and family are amazed at how well I can coordinate an entire meal through the use of a campfire as my heat source. Until recently I just told them that I was so good at it because, “Generations of country run through these veins!” Either that or I would look at them and sing, “Red-red-red-red-red-red-neck!” Either way it was amusing for me. Not that either of these isn’t a true statement, but it also helps to practice up a lot when not out in the bush. Now I confess and let them know how to practice.

A lot of you might not live in a place where having a full blown fire pit or campfire in your yard is an option. For those of you who want to practice up, but don’t have the facilities, can use one of these type fire pits.

Inexpensive Fire Pit

Inexpensive Fire Pit

Even if you have to purchase wood from the local store, this is a great way to get the knack of cooking with actual fire. My first suggested dinners include those that are built in a Dutch oven and on aluminum foil. “Cowboy casseroles” and bannock are two great dinners to start with. For “Cowboy casserole” do the following:

  1. Cook some steak to medium rare or some brauts to a point right before they are truly cooked.
  2. Pour some drained, baked beans into your Dutch oven.
  3. Add some spicy BBQ sauce to the bean. Add enough to make them a little bit soupy.
  4. Cut up whatever meat you previously cooked. Make sure it is in small pieces. We are talking smaller than a bite. Add this to the beans.
  5. Toss in some cut up bacon.
  6. Cook to the point where the bacon starts turning color. Add some biscuit mix (mixed up of course) to the top. You can also mix flour, a table spoon of baking powder, salt, and enough water to make it into a batter, then pour it on top. Either way, it needs the biscuit type material on top.
  7. Cook it the rest of the way. If you added the biscuit type layer after the bacon had already started cooking, everything will get done at the same time.

For bannock:

  1. Take flour, a table spoon of baking powder, sugar, cinnamon, and enough water to make it into a biscuit type mix.
  2. Cook it like you see in the picture below.

Cooking bannock and Cowboy casserole

Cooking bannock and Cowboy casserole

As you can see, I took some foil and put it over some tree bark. You can put it right on the bark if you want, but expect a bit of dirt that way. I did the foil because my wife was eating with us and she complains about the dirt and grime in her food.

If you are not sure how it should look when you are cooking your steaks, check out this picture.

Cooking steak over a fire pit.

Cooking steak over a fire pit.

Almost done

Almost done

When you get a bit more experienced, you can even cook with a pot over the fire pit. Just take some metal rods to make yourself something like the following to put your pot over. I wasn’t cooking with the pot, but wanted to give you an idea of what it would look like with the fire pit.
Cooking with a pot over a fire pit

Cooking with a pot over a fire pit

As you can see, the only limitations on how to cook with one of these fire pits is your imagination. We have had ours for several years and have put several cords of wood through it. During the summer we use it at least three times a week and cook with it about half the time. We use it during the winter as well, but only two to three times every couple weeks. Still, it is enough to get good at open flame cooking.

In conclusion: You will never get good at something unless you practice. If you live in a city that frowns upon bonfires in your backyard, you have to get a bit creative. This simple fire pit not only gives you the opportunity to practice building fires any time you feel the need, but it also allows you to practice your bush cooking. For the $40-$50 we spent on this bad boy, we have been able to do the following:

  • Teach my family how to cook over open flame.
  • Teach all my family how to build a camp fire.
  • Teach my son how to do flint and steel fires as well as friction fires.
  • Spend countless hours of quality time with my family.

To me, this money spent has been one of our family’s best investments. Take a look at one and get out there to have some fun……

  • Share on Tumblr