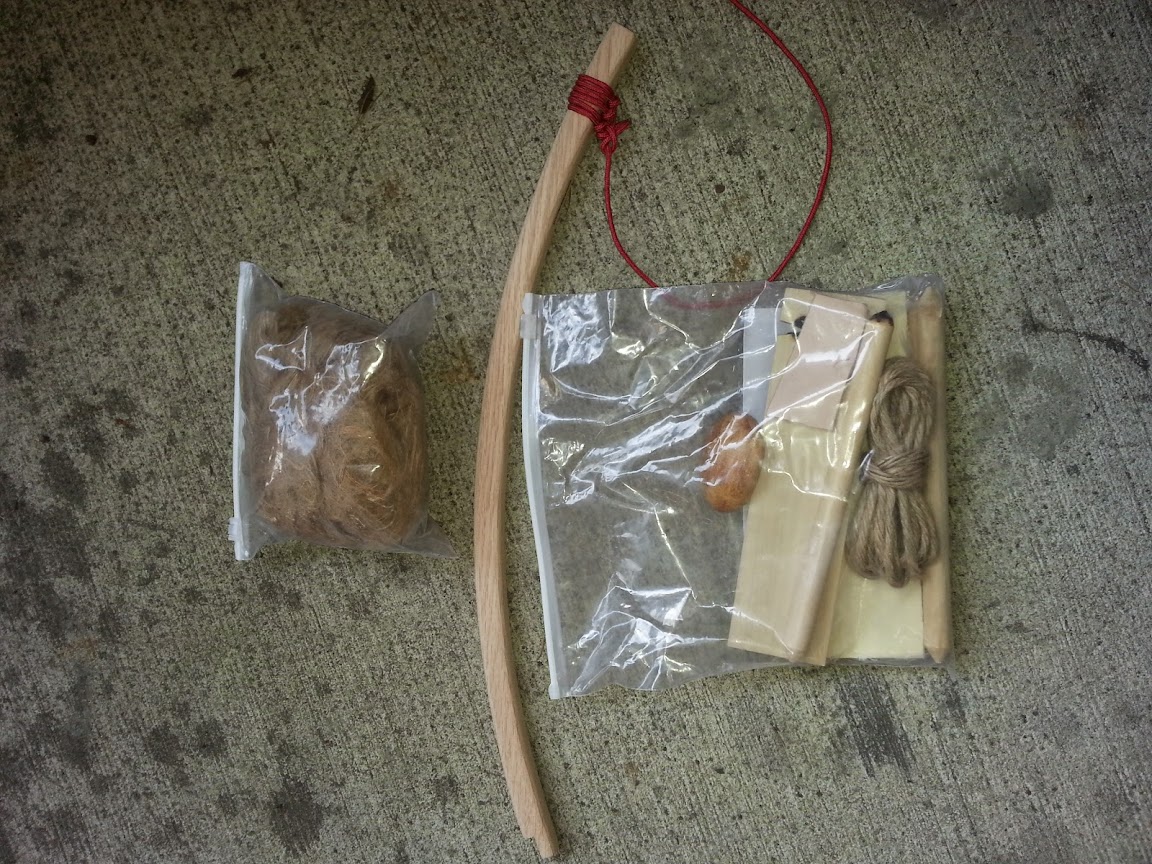
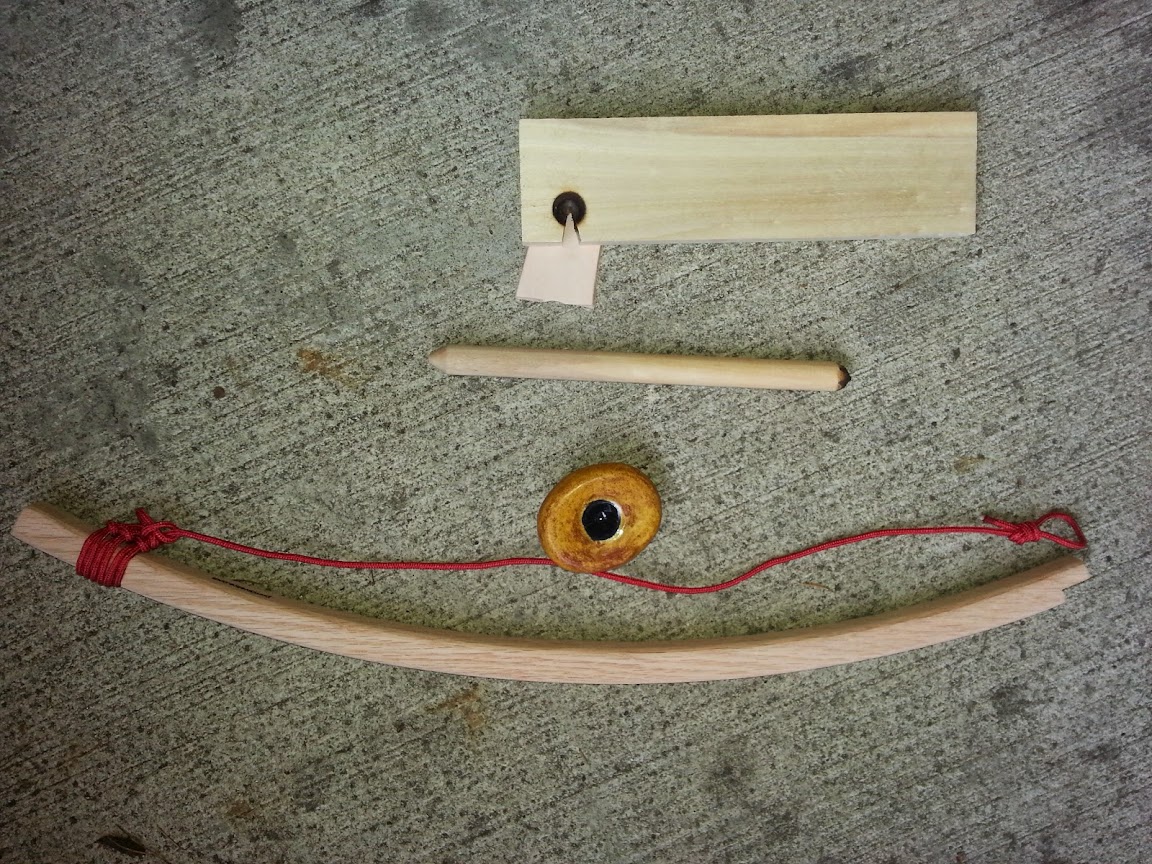
Tag Archives: bow drill fire

A Good Video about Friction Fire

by Woodsbum

It is really hard to find a good video about friction fire. Most don’t really go too much into wood selection other than giving you a list of “wood combinations” that work together. This video shows you the finger nail test and explains how to check to see if the wood is actually dry enough to use.

Another couple of points about this video:

  • He uses the spindle to create a good socket in the hearth (fire board). Good technique that most “experts” online do not do.
  • He also checks the dust after he creates a socket. The color and consistency of the dust will help you figure out how well your spindle and hearth will work.
  • It isn’t too obvious in the video, but using the initial dust from creating your socket will help you get an ember quicker. I assume that he did that considering he piled all the remaining dust on top of his ember to keep it going.

Here is the video:

How to read the dust:

  • Light brown and lighter dusty dust means that you are going too slow or there is not enough friction. Try going faster and pressing down a bit more. It could also mean that your wood choice was too soft.
  • Light brown and fuzzy type dust means you are just shaving off pieces of the wood and not actually getting any heat. Go faster. The dust will get darker and be kind of fuzzy in appearance as you get closer to the right combo of technique and wood.
  • Dark brown almost black and fuzzy dust is what you are after. This is the perfect combo so look for embers burning in the dust.
  • Dark brown/black that are almost like little rolls of wood means that you are possibly going too fast and not pushing down hard enough. The wood dust is more like shavings that are not keeping enough heat to burn.
  • Dark brown/black that is almost a crusty or already burned looking means that you are going too fast or pressing down too hard. It could also mean that your wood choice was of a type wood that was too hard.

This is perfect dust:

Perfect dust from friction fire

Perfect dust from friction fire

There are many different charts out there on what type of wood works best. The big thing is for you to test out several combinations and get used to testing the wood’s density with your fingernail. It has to be able to dent it without a massive amount of pressure, but it should not break or crack under that pressure.

Keep trying  different wood types from your area to get that perfect combination for you. Technique plays an important factor as well. I can get the softer woods like pine and cottonwood going, but fail with maple and cedar. It really comes down to what works for you.

Good luck and have some fun!!!!

  • Share on Tumblr

Bow Drill Kit – Primitive Fire

by Woodsbum

Ok… I have a confession to make that many of you already figured out. I am kinda lazy about certain things. Well, many things. To come to my own defense, however, I do try and work smarter and not harder. This being the case, I decided that I was too lazy to actually pull up long term memory or use trial and error to find the materials to build a bow drill set. In the past I would get a wild hair up my hind quarters and decide to go get some cedar and poplar to play around with just to show off. Since it has been a while I somehow fogot the “fingernail test” (knowing the right hard/soft wood combo) that I used to use to find the perfect drill/hearth combo. This made me decide to go purchase an actual bow drill set online so I had a working set to reestablish a working “fingernail test” for future field expedient bow drill sets.

WELL, it came in the mail today so I had to test it out……..

Here is the picture of the kit:

Primitive Fire Bow Drill Kit

Primitive Fire Bow Drill Kit

The kit from Primitive Fire comes with:

  • 1 Hardwood bow
  • 2 Cottonwood hearth/fire boards
  • 3 Cottonwood spindles/drills
  • 1 Ceramic palm rock
  • 1 Quart size bag of shredded jute twine
  • 12′ Jute
  • 1 Leather coal catcher
  • Instructions

Of course I had to play around a bit so I ran downstairs to the parking garage and got my implements of destruction ready.

Ready to play

Ready to play

Because I did remember the techniques and tricks showed to me as a kid, I did as I was originally taught. I drilled until I got some black powder produced and then dropped that back on top of the hearth.

A little powder produced

A little powder produced

Once that is put back onto the hearth and you drill some more, it doesn’t take long to get smoke/embers. This was about 10 seconds of drilling to get this result. I am not kidding about the 10 seconds, either.
Smoke from a 10 second drilling session

Smoke from a 10 second drilling session

As you can see, the embers can be shaken onto the leather piece for easier moving over to the jute bundle/tinder you want to ignite. This also keeps you from burning your hands as much. In the picture below there are two big chunks of burning dust. They are in the center of the picture and the large chunk on the right side of the picture, towards the back of the pile. I drilled much longer than I needed to and got a lot more embers than needed. This was intentional so that I could get a good picture.
Embers

Embers

Here is me poking the pile with my finger in an attempt to get you a good picture. For the record, I did burn the tip of my finger to get this picture.
Two embers

Two embers

Here are my final thoughts on this:

  • The “palm rock” is awesome and I would have purchased this regardless
  • The kit works very well and is easy to use
  • As a kit to learn with, it is quite good
  • If you can remember the hardness/softness of the wood you need to make a bow drill set work, you don’t need the whole kit….. Maybe just the “palm rock.”
  • Extra, stripped jute is always a good thing….  Especially if you didn’t have to strip it.

I hope this helps you guys and you learned something. I have yet to pull out their instructions and look at them, but the whole idea is pretty straight forward. If you get one, I really doubt that you will be unhappy. Again, the “palm rock” really is nice……

  • Share on Tumblr