Category Archives: Camp Techniques

Outdoors and camping techniques to help guide you with your outdoors lifestyle.

Batoning – “You did WHAT with your knife?!?”

by Woodsbum

How long are people going to argue about the viability of using a knife for fire preparation? It makes NO sense to me why this is still an argument……..

Let me being with the back story before my rant:
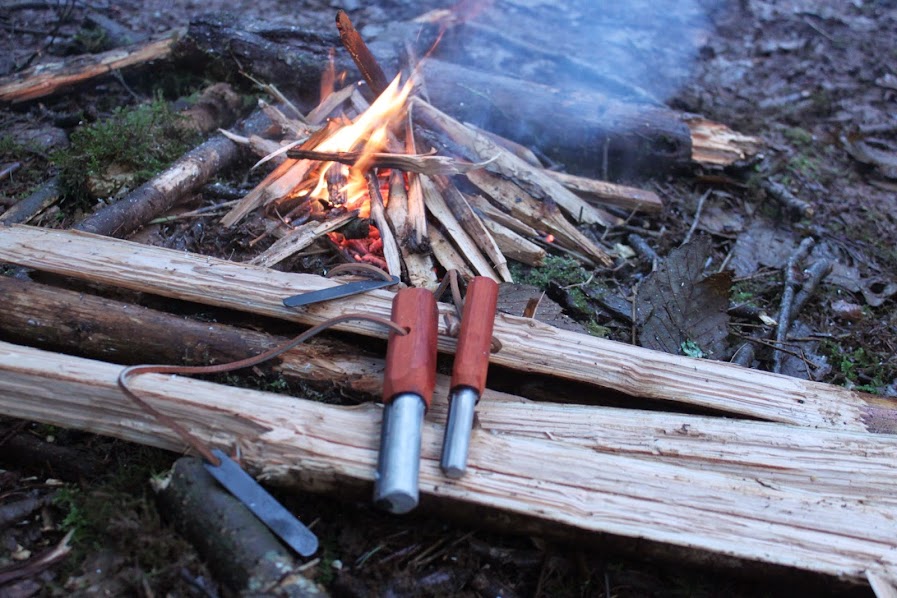
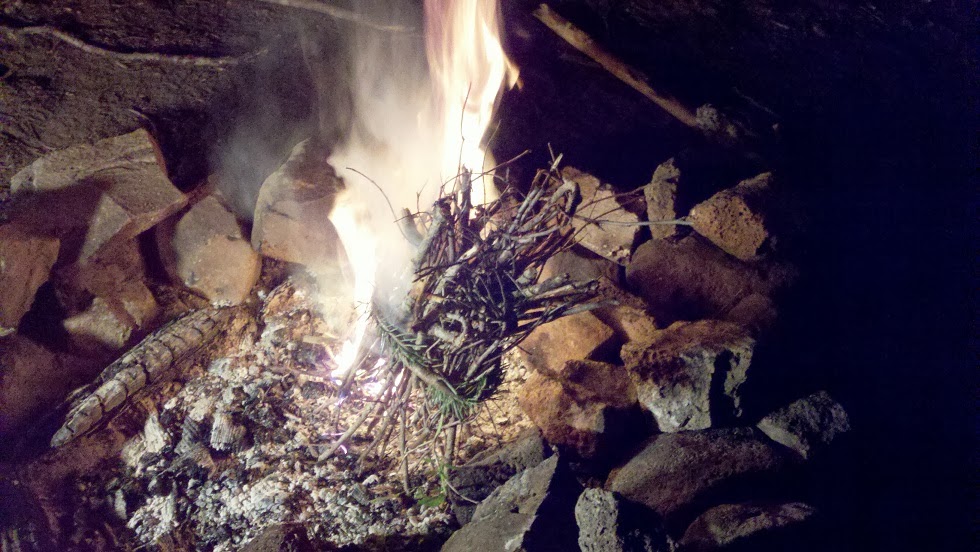
I was down in Texas for the better part of last week. My plane landed a little after 1800 (6 pm) and I got home around 1900 (7 pm). The son, the daughter and the daughter’s boyfriend were outside. A fire in our fire pit was in the works. Like usual, my son was out there with his Primitive Edge bushcraft knife batoning and feathersticking away. Some jerk had stopped to give him hell about using his knife in such a “disrespectful” manner. This guy then felt the need to start in on me about how ill taught my son was and how I should have put him in the Boy Scouts so that expert outdoorsmen such as himself could have taught my son correctly……….

Again, I ask why people argue about the use of knives in fire preparation. When you go online and do a search for using a knife to baton wood, you will get tons of results where anyone that batons is called names. These same people will quickly turn around and use the same knife they won’t baton with for making a feather or fuzz stick, however. This makes no sense. If you can use one knife for cutting and stripping wood, why can’t you use it to make smaller strips of wood by batoning? Better yet is when they pound the wood onto the ground or a rock with the knife being used as a splitting maul. When the wood splits, they quite effectively slam their knife into the rock. Again-again, I wonder why that is a fine use of a knife when careful batoning is not.

For those of you who do not know what batoning is, please let me explain. Instead of using an axe to split wood, a knife is used and another piece of wood is used to hammer the far end of the knife so that the blade travels down the length to split it. This is most commonly used in split wood fires to make very small pieces of wood for kindling. Once the small pieces are done, you use the same knife to make feather/fuzz sticks.

Many of these self proclaimed “experts” in outdoors “survival” have a tendency to use military survival training as the basis for everything that they know about living in the bush. They will buy those mylar emergency blankets and expect that to keep them warm if a situation crops up where they get stranded. They will also carry some Rambo knife that is not even full tang and think that this fighting knife is a survival knife. What really needs to happen is that they need to understand that “survival” and “bushcraft” are two completely different things. If you can thrive in the woods, you don’t need to “survive” in the woods. You can carry less and be comfortable for the wild will provide.

Maybe they need to research this guy:

Mors Kochanski

Mors Kochanski

The picture is of Mors Kochanski. If you don’t know who that is and are spouting off about batoning a knife, you have serious issues……..

Here are some links to an interview with Mors.

As you can see from the interview, he is considered the modern “Grandfather of Bushcraft.”

Why do I mention him? He teaches and preaches the importance of being able to baton with your knife. It is one of the many lessons that he harps on as a basic skill for outdoorsmen.

If you are not as well versed in bushcraft and believe people like Dave Canterbury more, even he batons his knife.

If you don’t believe them, then how about this?

The reality is quite simple. People use tools to complete tasks. A good bushcraft knife is simply a tool. Just make up your mind as to which tool you like best. Whether you use a knife, hatchet, machete, cleaver, axe, or any other tool you choose, the final result is really the only true way to evaluate the effectiveness or value of the tool. In the case of a skilled woodsman using any of the previously mentioned tools, they are all effective.

  • Share on Tumblr

A Good Video about Friction Fire

by Woodsbum

It is really hard to find a good video about friction fire. Most don’t really go too much into wood selection other than giving you a list of “wood combinations” that work together. This video shows you the finger nail test and explains how to check to see if the wood is actually dry enough to use.

Another couple of points about this video:

  • He uses the spindle to create a good socket in the hearth (fire board). Good technique that most “experts” online do not do.
  • He also checks the dust after he creates a socket. The color and consistency of the dust will help you figure out how well your spindle and hearth will work.
  • It isn’t too obvious in the video, but using the initial dust from creating your socket will help you get an ember quicker. I assume that he did that considering he piled all the remaining dust on top of his ember to keep it going.

Here is the video:

How to read the dust:

  • Light brown and lighter dusty dust means that you are going too slow or there is not enough friction. Try going faster and pressing down a bit more. It could also mean that your wood choice was too soft.
  • Light brown and fuzzy type dust means you are just shaving off pieces of the wood and not actually getting any heat. Go faster. The dust will get darker and be kind of fuzzy in appearance as you get closer to the right combo of technique and wood.
  • Dark brown almost black and fuzzy dust is what you are after. This is the perfect combo so look for embers burning in the dust.
  • Dark brown/black that are almost like little rolls of wood means that you are possibly going too fast and not pushing down hard enough. The wood dust is more like shavings that are not keeping enough heat to burn.
  • Dark brown/black that is almost a crusty or already burned looking means that you are going too fast or pressing down too hard. It could also mean that your wood choice was of a type wood that was too hard.

This is perfect dust:

Perfect dust from friction fire

Perfect dust from friction fire

There are many different charts out there on what type of wood works best. The big thing is for you to test out several combinations and get used to testing the wood’s density with your fingernail. It has to be able to dent it without a massive amount of pressure, but it should not break or crack under that pressure.

Keep trying  different wood types from your area to get that perfect combination for you. Technique plays an important factor as well. I can get the softer woods like pine and cottonwood going, but fail with maple and cedar. It really comes down to what works for you.

Good luck and have some fun!!!!

  • Share on Tumblr

Cooking Over Flame at Home – Fire Pit

by Woodsbum

Many of my friends and family are amazed at how well I can coordinate an entire meal through the use of a campfire as my heat source. Until recently I just told them that I was so good at it because, “Generations of country run through these veins!” Either that or I would look at them and sing, “Red-red-red-red-red-red-neck!” Either way it was amusing for me. Not that either of these isn’t a true statement, but it also helps to practice up a lot when not out in the bush. Now I confess and let them know how to practice.

A lot of you might not live in a place where having a full blown fire pit or campfire in your yard is an option. For those of you who want to practice up, but don’t have the facilities, can use one of these type fire pits.

Inexpensive Fire Pit

Inexpensive Fire Pit

Even if you have to purchase wood from the local store, this is a great way to get the knack of cooking with actual fire. My first suggested dinners include those that are built in a Dutch oven and on aluminum foil. “Cowboy casseroles” and bannock are two great dinners to start with. For “Cowboy casserole” do the following:

  1. Cook some steak to medium rare or some brauts to a point right before they are truly cooked.
  2. Pour some drained, baked beans into your Dutch oven.
  3. Add some spicy BBQ sauce to the bean. Add enough to make them a little bit soupy.
  4. Cut up whatever meat you previously cooked. Make sure it is in small pieces. We are talking smaller than a bite. Add this to the beans.
  5. Toss in some cut up bacon.
  6. Cook to the point where the bacon starts turning color. Add some biscuit mix (mixed up of course) to the top. You can also mix flour, a table spoon of baking powder, salt, and enough water to make it into a batter, then pour it on top. Either way, it needs the biscuit type material on top.
  7. Cook it the rest of the way. If you added the biscuit type layer after the bacon had already started cooking, everything will get done at the same time.

For bannock:

  1. Take flour, a table spoon of baking powder, sugar, cinnamon, and enough water to make it into a biscuit type mix.
  2. Cook it like you see in the picture below.

Cooking bannock and Cowboy casserole

Cooking bannock and Cowboy casserole

As you can see, I took some foil and put it over some tree bark. You can put it right on the bark if you want, but expect a bit of dirt that way. I did the foil because my wife was eating with us and she complains about the dirt and grime in her food.

If you are not sure how it should look when you are cooking your steaks, check out this picture.

Cooking steak over a fire pit.

Cooking steak over a fire pit.

Almost done

Almost done

When you get a bit more experienced, you can even cook with a pot over the fire pit. Just take some metal rods to make yourself something like the following to put your pot over. I wasn’t cooking with the pot, but wanted to give you an idea of what it would look like with the fire pit.
Cooking with a pot over a fire pit

Cooking with a pot over a fire pit

As you can see, the only limitations on how to cook with one of these fire pits is your imagination. We have had ours for several years and have put several cords of wood through it. During the summer we use it at least three times a week and cook with it about half the time. We use it during the winter as well, but only two to three times every couple weeks. Still, it is enough to get good at open flame cooking.

In conclusion: You will never get good at something unless you practice. If you live in a city that frowns upon bonfires in your backyard, you have to get a bit creative. This simple fire pit not only gives you the opportunity to practice building fires any time you feel the need, but it also allows you to practice your bush cooking. For the $40-$50 we spent on this bad boy, we have been able to do the following:

  • Teach my family how to cook over open flame.
  • Teach all my family how to build a camp fire.
  • Teach my son how to do flint and steel fires as well as friction fires.
  • Spend countless hours of quality time with my family.

To me, this money spent has been one of our family’s best investments. Take a look at one and get out there to have some fun……

  • Share on Tumblr

The H60 Firestarter

by Woodsbum

Being a complete gear freak has its benefits at times. I ran into a phenomenal piece of gear that I feel needs a post. During an outing with several BushcraftUSA members, I saw the absolute best firesteel I have ever seen. One of the people there works for a company that builds and sells the H60. It is absolutely incredible.

Let me start off by telling you a bit about the H60 itself. Here is a picture of what they look like.

H60 Firesteel

H60 Firesteel

They have a magnesium rod on one side and a normal ferro rod on the other. The handle is made from wood and it includes a striker that is attached via a leather lanyard. What makes this firesteel special are really two things:

  1. The quality of the product that allows it to produce the incredible sparks it can throw.
  2. The warranty.

Here is another picture of the H60 with an Izula-II for size comparison.

H60 and Izula-II

H60 and Izula-II

As you can see, it is fairly large. This design gives you ample amounts of magnesium and wood to use to get a flame going. I have taken the H60 and shaved off the magnesium and wood handle into a twig bundle (Apache match) and ignite the entire bundle with a single strike of the ferro rod. This thing throws sparks like a fiend.

Since I couldn’t catch a good picture of the actual rod sparking, I had to grab a bunch of other people’s pictures for this post. Here is a SMALL set of sparks that the H60 throws.

H60 tossing sparks

H60 tossing sparks

The guy who sells these had his son running around playing with one. The son was able to strike the ferro rod and throw a spark, NO JOKE, 10 feet. The two of them were running around throwing sparks at each other like it was a water fight. The distances that these sparks were going was simply amazing.

When I heard about the lifetime warranty on this piece of gear, I quickly purchased one. The H60 has a LIFETIME warranty. This includes the following:

  • Manufacturer defects
  • Wear from normal use

Yes, you heard that right…..  WEAR FROM NORMAL USE!!!

I have slowly gotten away from using a firesteel because I have gone through so many of them in the past. They wear down fairly quickly during my camping season and thus I picked up using flint and steel. I can find new flint/chert with relative ease and the steel strikers last forever it seems. Now that I discovered the H60, I have a great piece of gear that I can use when I feel extremely lazy and don’t want to blow an ember into flame.

The H60’s run around the $25 range and can be purchased through this link here. If you do end up getting one, please let him know that you found the information on this site. I won’t get anything for it, but it will at least let him know that people do love his product.

  • Share on Tumblr

The Beauty of the Twig Bundle

by Woodsbum

Most people love a good campfire. The problem is that there is an art to the whole “fire building” thing. If you don’t know how to make feather or fuzz sticks, gather tinder and kindling, know the difference between green or dried wood, etc., you can be stuck using one of those fire starter logs on your next camping trip. What I am going to do is start adding a few fire starting techniques and instructions to help you along if you do want to start a fire on your next outing.

The first series of instruction is on the “twig bundle.” It is also known as the “Apache match.” All it really consists of is a gathered bundle of dried twigs that range from the width of a pencil lead to the size of a disposable pen. These puppies get very hot, very quick and burn long enough to get some bigger split wood burning. They are quite effective and I personally use this technique about 1/3 of the time I am out in the woods.

Your first step is to gather as many twigs as you can find. They should be very dry and range in size from pencil lead diameter to the diameter of a disposable pen. When gathering these twigs it is imperative that you only gather those that are very dry. To test to see if they are dry enough you should bend them and see if they snap. If they tend to bend more than snap, the twigs are not dry enough. Gather enough to be able t make a bundle about 8 inches in diameter. To judge this size you can look the length of a United States Dollar. It is about 6 inches long. Get a group of twigs together that create a bundle farther across than the length of that dollar.

Once you get your twigs gathered, break them into 12 – 16 inch chunks then separate them by diameter. The thinner pieces need to be in the middle of the bundle and the thicker pieces need to be towards the outside. This allows the thinner pieces to catch on fire and get the thicker pieces going after it gets hot enough. You pile of twigs should look like this.

Pile of twigs

Pile of twigs

After you get them sorted and built into a good, organized bundle you should find yourself some sort of cordage to tie the bundle together. Twine, inner tree bark, fresh tree branches, stalks from weeds, blackberry vines, etc., all work well. In this picture I used a fresh bough I cut off a tree that kept poking me as I worked.

Tied twig bundle

Tied twig bundle

As you can see, it doesn’t have to be perfect. All you are going to do is start it on fire, so generalized “organization” is more than perfect. As long as it is relatively “organized” you will be fine.

Once you get your bundle ready to be lit, you then need to decide how you are going to light the bundle. Some common methods include the use of cotton balls, dried cat tails, jute twine, dried grass, inner bark of a dead tree…..  The list can go on for days. The important thing to remember is as such: Get some easily combustible material to nestle into one end of the bundle and get a different pile of materials to get your actual flame. You DO NOT want to fight the twig bundle as you are trying to get an actual flame started. Get the flame and then start the bundle on fire. If you pack one end with something like dried grass, the whole end of the bundle will take off in a matter of seconds.

If you are wondering what I use, you might be a little scared. I tend to use flint and steel to get a piece of charcloth going, then blow a “nest” of dried materials into flame. Once I get that going I get the dried material I packed into the end of the bundle started, which in turn make the bundle burst into flames. I use this method because of the extremely wet environment in which I live. You might not have as many issues if you don’t live in a rain forest type environment.

Once your twig bundle takes off, it will get hot and burn quickly. Don’t forget to have yourself some staged firewood ready in various sizes that range from the diameter of a dime to the size of a quarter to begin with. You will take your brightly burning twig bundle and use that as a way to get your other materials going.

Twig bundle burning

Twig bundle burning

These bundles burn for several minutes and get a good set of coals started. It is a great method to start working with as you progress in your fire starting skills. If you look at the next pictures, you can see how setting the bundle on end will get you a fairly high and hot fire going. This helps you get split wood burning quite effectively. Again, make sure you are using dry materials. Green wood and materials do not burn very well.

Twig bundle set ablaze

Twig bundle set ablaze

In this next picture you can see how I just added bigger twigs and branches to build a good set of coals with which I could cook. The better the bed of coals you build, the easier and better it is for cooking. It also makes it easier to keep the fire going all night long if you have a solid bed of coals going. We will get into stoking fires for a full night’s burn and the different types of fire lays in another post. Just remember that you need to have a bunch of small pieces of wood burning before you add bigger pieces. Also keep in mind that you need to step up the pieces and not drop an entire tree on a new fire without a coal bed. If you do move up in size too quickly, the fire will go out. Again, this will be touched upon in later posts.

Twig bundle with larger branches in a modified tipi style fire lay

Twig bundle with larger branches in a modified tipi style fire lay

I hope that this helped some of you that are new to building campfires. As I remember to take more pictures, I will show several more fire building methods to include the use of metal matches/firesteels and flint/steel. There will also be posts on making your own charcloth as well, so keep checking back for more fire building tips and instruction.

  • Share on Tumblr