by Woodsbum
A friend of mine gave me an osage orange walking stick that was in serious need of a handle and a way to protect the tip from damage. For those that are not familiar with osage orange, it is a tree that grows in places like Texas and is a very hard wood with thorns that will rip you up. It also produces what we used to call horse apples or hedge apples. The osage orange is also a prized wood for bow construction. In places where it grows, you will also see it used quite often for fence posts since it doesn’t shrink or rot very easily.
Since I had a blank slate from which to work from, I decided to try my hand at using rawhide. I have never used it before and am quite clueless about the process other than soaking, stretching and sewing…. That is about the detail and extent of the knowledge I had about it so I set out in search of some instruction. Library you ask? Nope. Elderly gentleman that looks like Davey Crockett? Nope again. Local books store, Backwoodsman magazine, or some obscure Foxfire volume? No way….. Youtube!
So step 1 in the process was to find rawhide and some nice looking thread to use to sew it all up. On my way home last night the whole Interstate was actually closed down, thus forcing me to find an alternate route home. This made me think that I was suddenly destined to get my walking stick finished and I took the opportunity to stop by Tandy Leather. $45 later, I was back in traffic and slowly crawling home.
The next step is to make your template/pattern and cut out your rawhide so you can soak it….. I bypassed the pattern thing and just cut off a few chunks to soak. After a couple hours sitting in water it was soft enough to work. At this point I eyeballed the sizes and did some chopping.

Soaked and ready for trimming

Holes poked
Once the holes are poked you just start stitching it up. I used a cross stitch pattern that I have seen several sheathmakers use for rawhide.

Sewing it up
Once everything was all stitched up it looked like this.
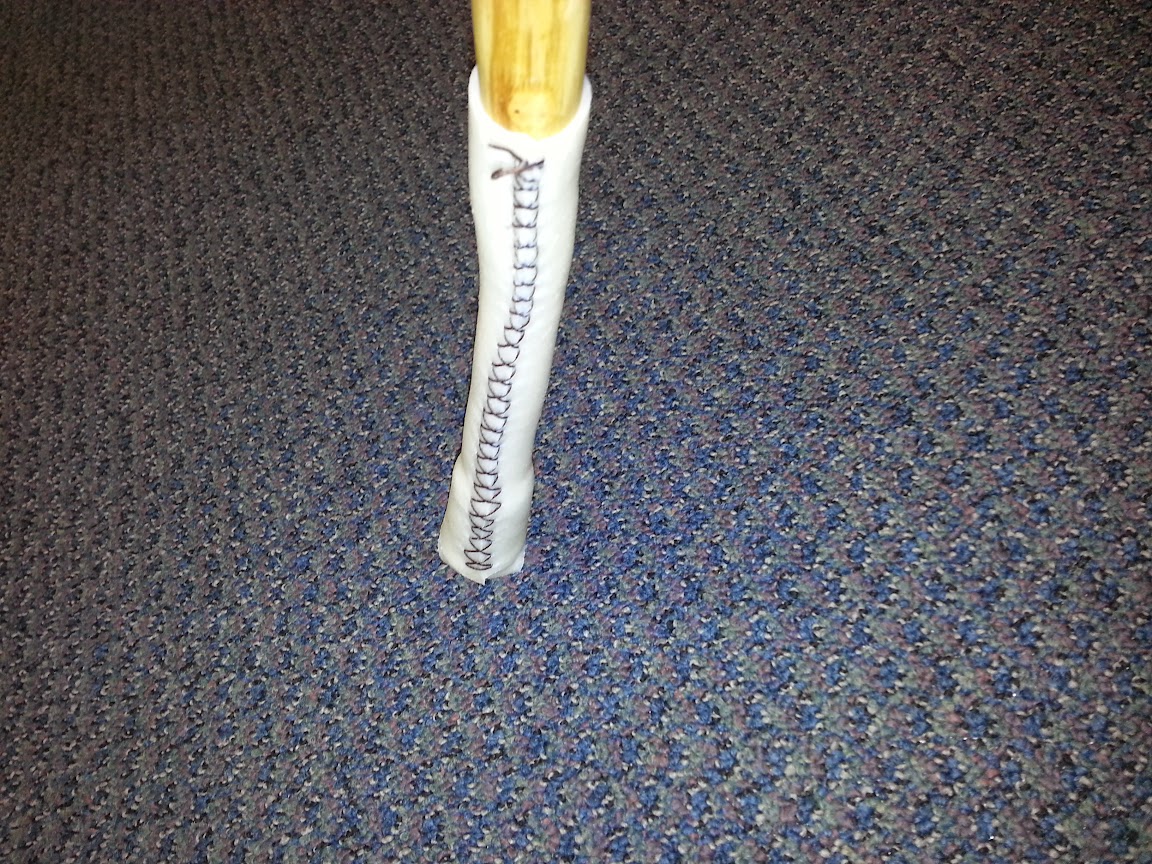
All stitched up
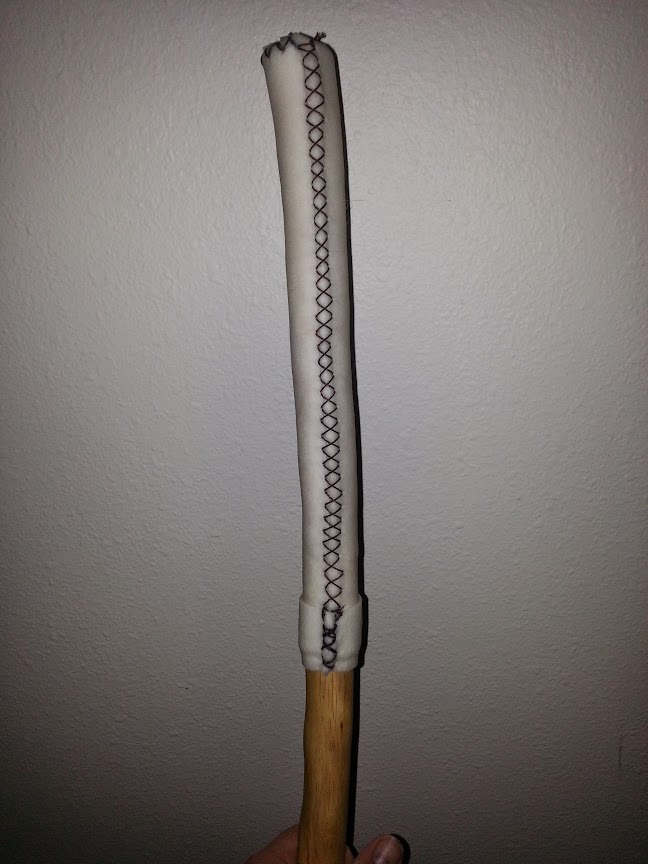
Handle section
For anyone that starts off on one of these projects, I suggest you do some Youtube research and then look at what some professional leatherworkers build. Contrasting the amateurs online with professional pieces helped to make me understand the idea of crossstitching and the sort.
Good luck to anyone that gives it a try. It is really quite easy and isn’t as big of a hassle as I originally thought it would be.