I went out and tested out the work done to my Beretta just to see how it would shoot. Unfortunately for you, the reader, I have no pictures due to several reasons:
I am TERRIBLE at taking pictures when out shooting.
When I shoot, I do not shoot targets. I normally shoot clay pigeons, potatoes, or tannerite.
Going out and cooking off some rounds is very therapeutic for me, so I don’t pay much attention until after I have started putting things away.
Here is what I can tell you about how well it shoots after all the upgrades and modifications I made to it.
The trigger pull is very smooth with much less effort needed in both single and double action.
The cases are no longer being flung 10 yards away when ejected. They travel about 10-15 feet and land all in about the same area.
The pistol now comes right back to target after each round is expended. It is now a very easy and gentle jump of the barrel. Double tapping or swapping targets while coming right back to a nice sight picture is so easy.
The clunk felt when the slide hit the stop was very obvious and deliberate. The recoil buffer I put in really made that less of an impact.
This part is hard to put numbers to, but it actually felt like it was quicker to cycle rounds.
All said and done, I am VERY happy and impressed with the final product. Anyone that has been thinking about doing some work to their Beretta 92 should look at all the modifications I made. It will raise your pistol to an entirely different level.
The last real upgrade I had pending on my 92 Beretta was upgrading the hammer spring. I grabbed a factory Beretta D version hammer spring from Brownells for less than $10.
Originally, I was told that this was the primary upgrade needed to drop both the DA and SA trigger weight from 12 lbs for DA and 6.5 for SA to a reasonable level. I do not have any of those spiffy trigger weight things, but I can tell you that the stock trigger pull of the 92 I have was a bit on the ridiculous side. This upgrade was quite welcome.
The process is actually pretty easy. All you have to do is remove the pin near the lanyard loop to drop the plug and spring out of the handle. Just make sure you are careful during the process so you don’t end up shooting the lanyard loop plug across the room. If you use a 5/16 punch to do this, just keep the punch in and the pin still set in the frame on the opposite side. After you swap out the spring you can easily hit the roll pin while compressing the spring to get the plug set back into place. The longest part of the whole process was taking off the grips, so it is really quite easy.
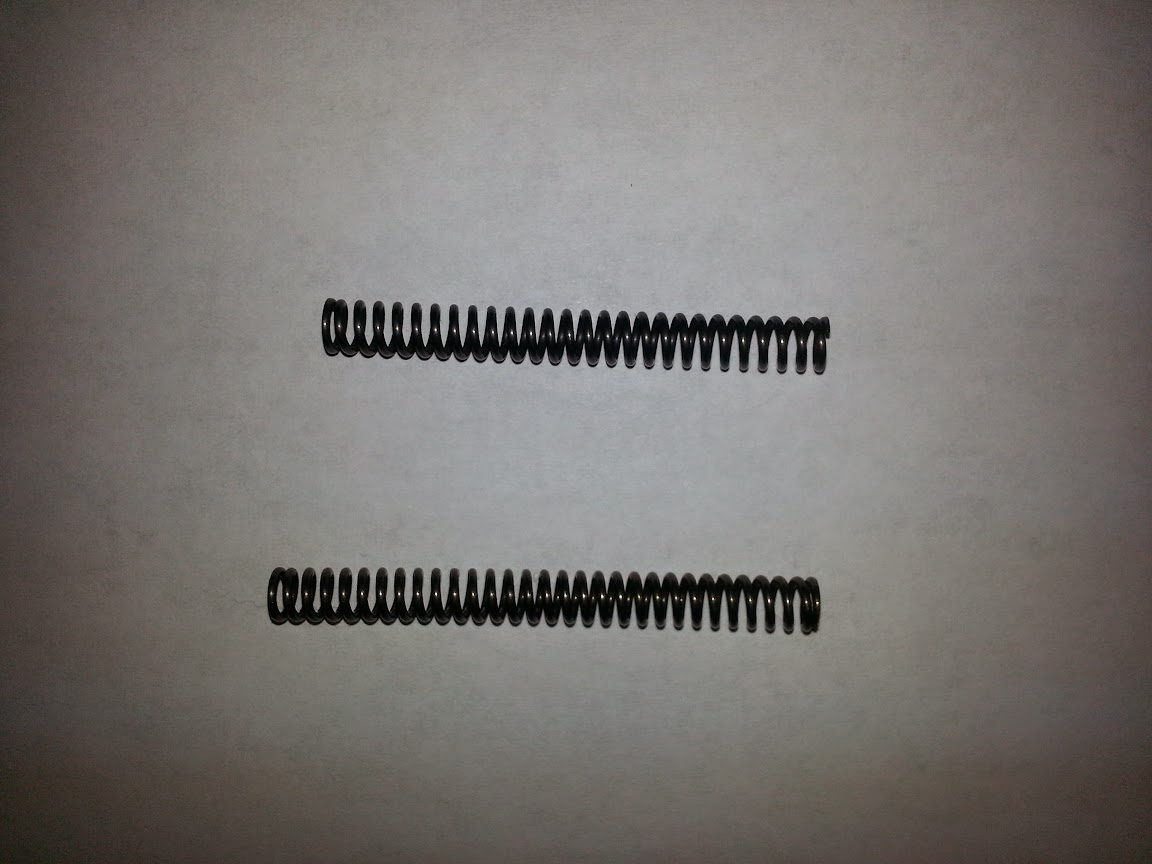
Here is a picture to show the difference between the longer, stock spring and the shorter, D version.
D Version and Stock Hammer Springs
It really isn’t that much shorter, but it definitely does cut a couple coils off from stock size.
After I installed the spring and did a few test pulls on the trigger it is really easy to see how nice this upgrade is. Of course this raised a question as to why the stiffer springs were even installed to begin with. When asking Gunguy, I found out something quite interesting about this. I guess this spring is needed if you are shooting NATO 9 mm rounds due to the hotter round and tougher primer. The fact that I use factory US or hand loaded rounds would negate the need for this heavier hammer spring and thus make it much more pleasant an experience in firing with the lighter hammer spring. This does make sense, especially since Beretta is from Europe and sells a lot of pistols to military and LEO.
Now that I have completed all my upgrades to my 92a1, I will start on modifying and upgrade a different firearm. The next project will probably be ripping apart my 1911 and polishing up all the trigger parts to lighten and smooth out the pull.
This is how my Beretta looks in it’s final stage of upgrades and modifications. I will be doing a range report after I take it out next weekend.
My Beretta 92a1 has been getting some upgrades over the last few weeks. The newest is a hammer upgrade to the Elite II Beretta factory hammer. I have also ordered a Beretta D Version Hammer Spring and a couple Wolff Springs upgrades that have not come in the mail yet. Here is the hammer upgrade.
The stock hammer looks like this:
Stock Beretta 92 Hammer
As you can see, it is a solid hammer with nothing really that special about it. The Elite II is a skeletonized hammer that is designed to speed up the cycle during shooting. When coupled with the other upgrades I am doing this should make this fire like a completely different pistol. The video I used to install this trigger is below:
The hardest part is driving out the pin used to hold the lanyard loop piece in the handle. You almost need a fourth and fifth hand to get it out without scratching things up. Then again, you almost need 5 or 6 additional hands to get the safety lever upgraded as well. This means that you should be used to the hassle by now.
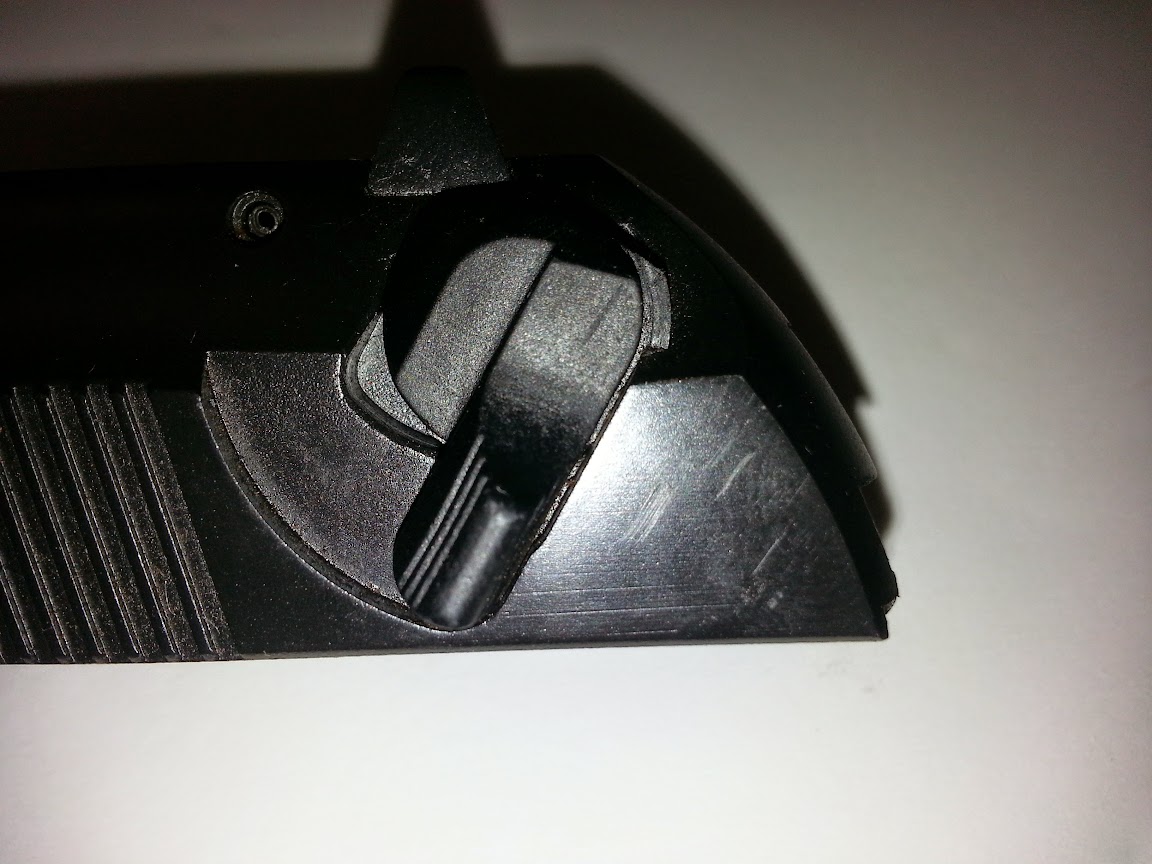
I think the entire upgrade for the hammer took about 5 minutes. It was really easy, other than that stupid roll pin and not having enough hands to properly get the pin out. This is what the pistol looks like with the new hammer. You can also see two other things in this picture. One is the upgraded safety lever and the other are the two scratches I put in my slide during the safety lever upgrade. Ooops……
Installed Elite II Hammer
The actual mass of the hammer is much less in this skeletonized version. When I swap out the trigger spring later this week/early next week I also picked up a buffer pad that is designed to help with the way that the slide hits the frame during cycle. It isn’t much more than a felt pad (from the description), but it is supposed to help a lot and assist you with getting back on target after firing.
Here are the two hammers side by side so you can see the difference in mass. Unfortunately, I installed the new one before I thought about taking a picture. You can see the difference quite easily, though.
Factory and Elite II Hammer
There will be a few more things that I am upgrading before I get a chance to do a range report, but I will keep everyone up to date as these changes are made. I really can’t wait to see how well it performs once all this work is complete.
When I was in the Navy, I carried the M9 constantly. I qualified Expert with it several times, got really proficient with it, and after discharge I finally settled on version this pistol as a personal firearm. The one gripe I had with it was the lack of steel parts and over use (in my opinion) of plastic and MIM. The first chance I had, I purchased the steel parts kit from Beretta and got to swapping things out.
The steel parts kit is about $70 and includes the following:
Trigger
Magazine release
Safety lever assembly
Recoil guide rod
After ordering and installing the recoil guide rod, I see that the website says that the recoil guide rod doesn’t fit the 92a1. It seems fine on mine, but I will have to research and figure out why it “doesn’t fit.”
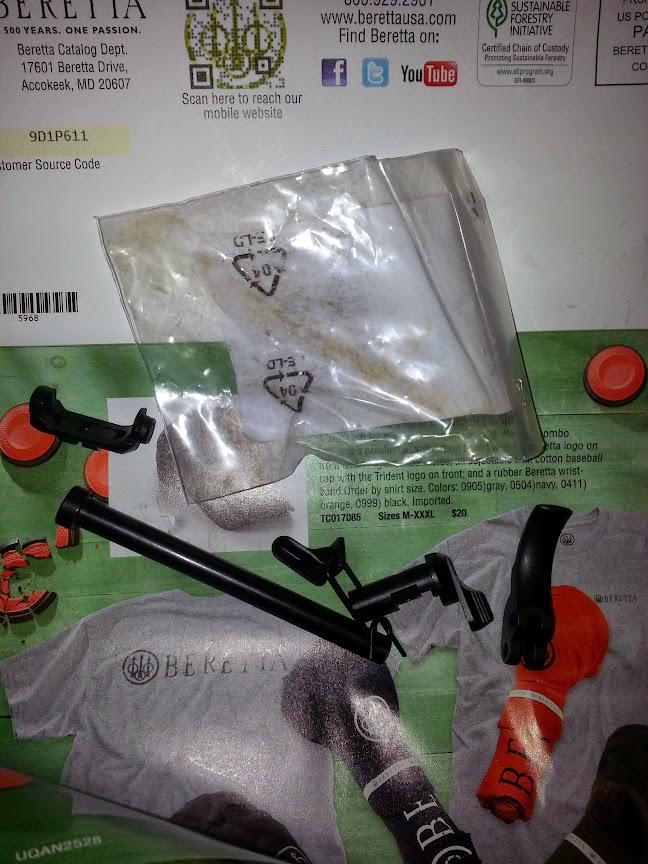
Now here is the kit. The packaging was a lot to be desired. The parts were just tossed into the box and the plastic bag that you would think should contain the parts was empty. The parts were just bouncing around.
Kit as it was just shoved in a box.
The actual parts themselves do feel much nicer than the MIM and plastic ones. This is especially evident with the trigger and magazine release. The factory originals just feel cheaply made and easily broken. Of course that is probably just conjecture and prejudice on my part, but the steel does feel much nicer. These
Old MIM trigger and magazine release
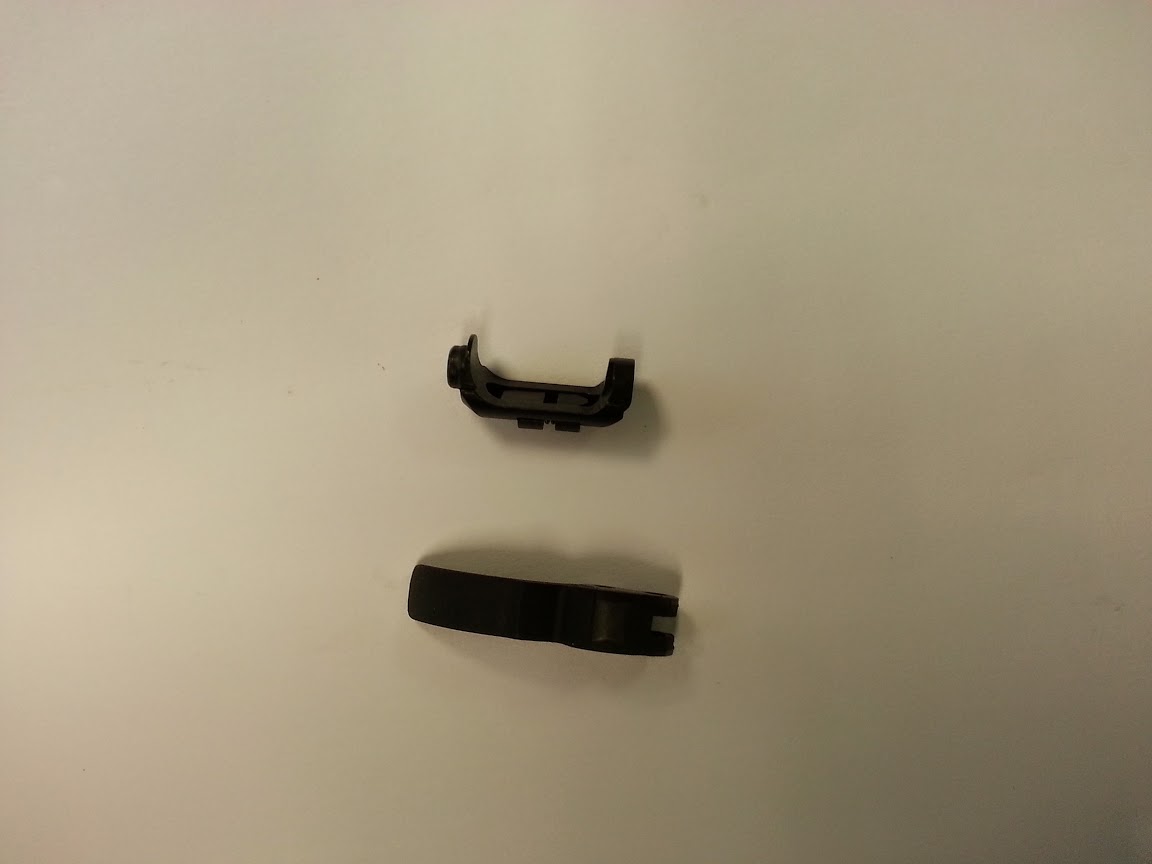
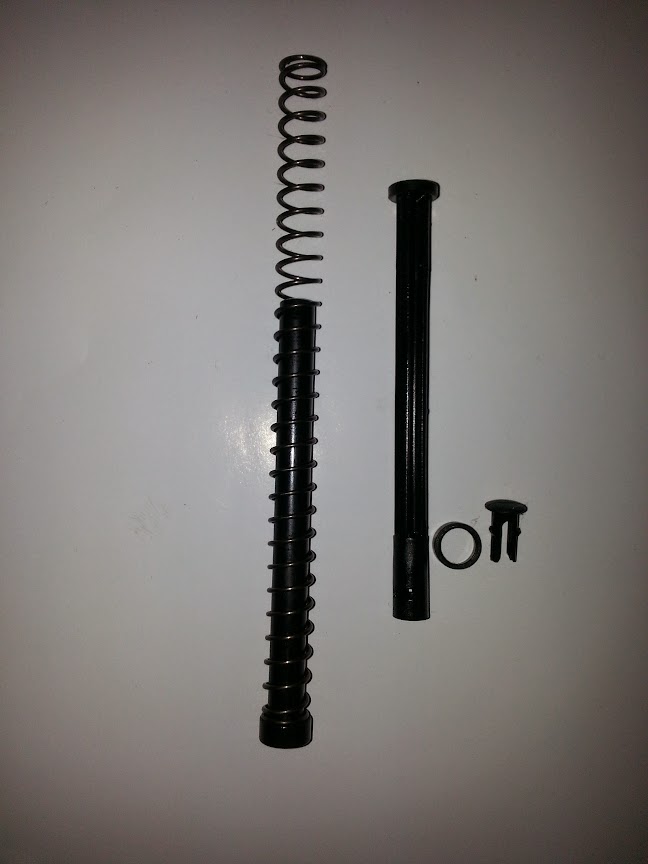
The recoil guide rod from the factory is actually a piece of plastic that holds the compressed spring. The new one is actually like the M9 I carried in the military. It is nice, sturdy and steel. It is kind of tough to get the plastic one apart to get to the spring. There are little tabs that hold the end of the plastic together that need to be pried off with a regular screwdriver. Once that is done, the rod just slips into the spring and you insert it spring first into the slide. The rod slips into place as before. Below are the parts. You can see the way that the plastic rod has the end attached.
Guide rods
Putting the trigger in is a bit odd. The old trigger has an actual spot for the spring to rest where the spring must be moved and rested on the rod that goes through the top of the trigger. Here are a couple pictures. This first one shows how there is an actual spot for the trigger spring on the old trigger.
Old trigger
This is how the trigger assembly looks with the springs removed.
Trigger assembly without springs
Once you get the spring installed and it all put together, it should look like this.
Trigger assembled
There are several companies that make after market trigger springs that make this a lot easier. I think I am going to do some research and pick on up eventually. If I do, I will post up the information here.
The next pain is the installation of the magazine release. There IS a trick to it. Check out this video to see how it works. Once you figure out to put in the correct side first, the rest is easy.
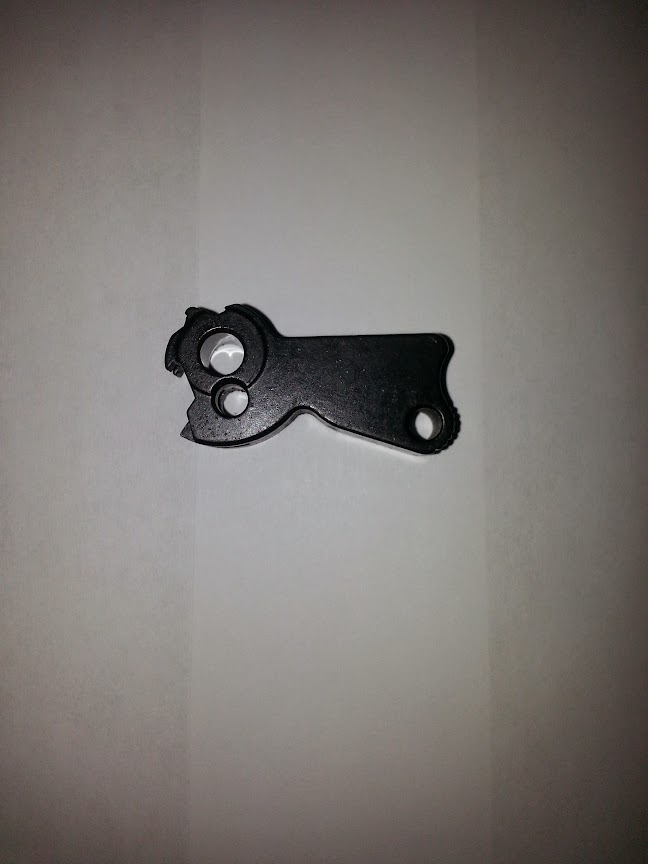
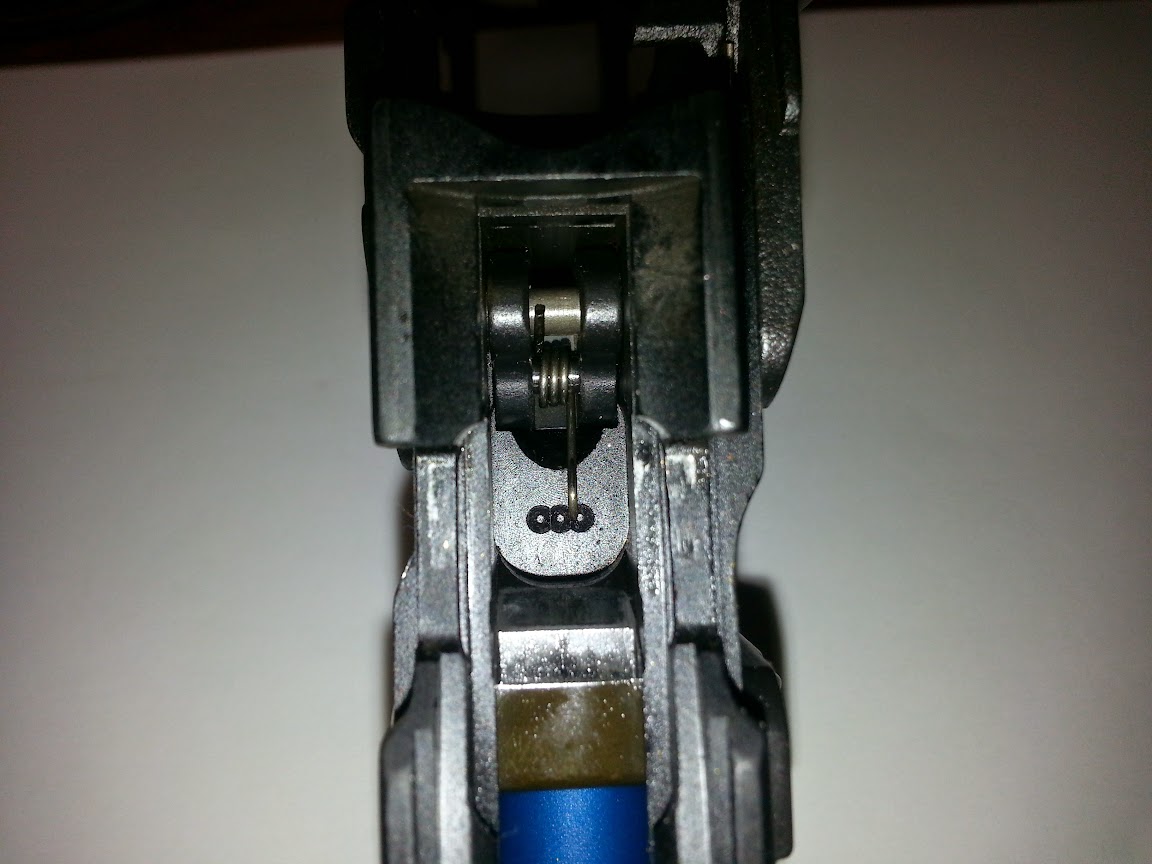
Next comes the REALLY tough part. I have to swap out the decocking mechanism. This is a bit on the rough to do side. As you can see, this is definitely MIM.
Decocking lever
To perform this upgrade I did a Youtube search and found a video about installing a Wilson low profile safety lever. It gave me the information I needed to be able to do this install. I did have to go find really small punches, however. Thankfully there is a Harbor Freight down the road.
Now I only have a few more modifications to make this the way I want it. I will be getting a skeletonized trigger, VZ G10 grips, and a couple Wilson Combat springs to finalize this build.
This last video is a complete (except for the safety lever) upgrade of the Beretta parts. I used this initially, but found that the guy doing the work was almost too good at putting the parts in. He made it look way too easy. It really was much more difficult than he made it seem.
I really love the feel and function of the Beretta 92/96 frame pistols. Many people tend to hate on them for whatever reason. Considering the abuse I put mine through while Active Duty and then still qualified Expert with it at the range on a consistent basis, I feel that these are great systems.