
by Woodsbum
The Swedish M39 rucksack goes almost hand in hand with the whole “bushcraft” craze. It is leather and canvas, a definite favorite among bushcrafthers, and holds just enough gear to allow for a comfortable weekend or day outing. It has straps to carry a bedroll or wool blanket. There are straps on the side to carry an axe. It even has a separate pocket inside that stores your cooking gear quite nicely without getting all sorts of soot on your other gear, assuming that you cook over an open flame as I do. All this in a simple, inexpensive, extremely sturdy little “pack”age (sorry about the pun… been a long week already).
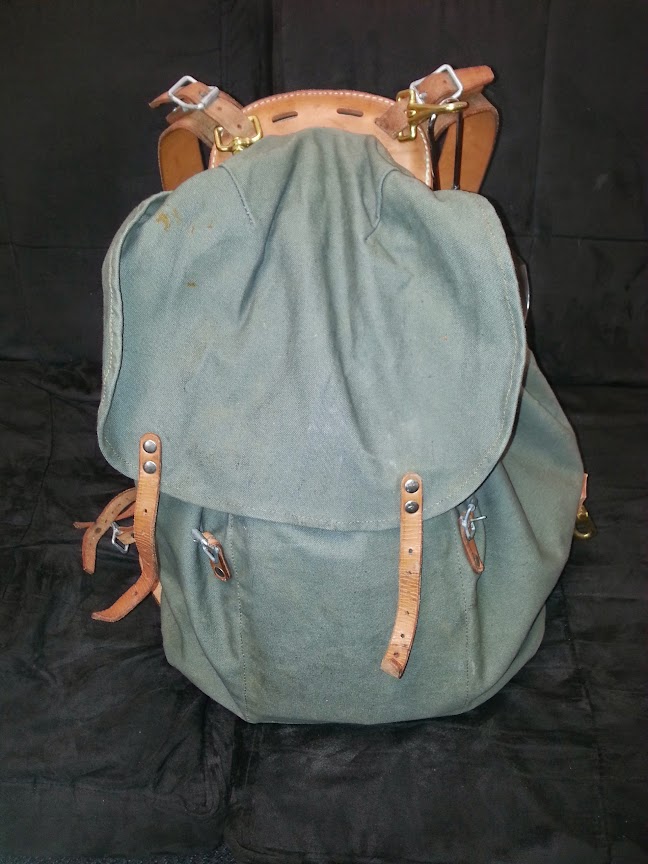
Swedish M39 Rucksack
There are several short comings to this pack, however. Most of which revolve around the suspension and straps. The shoulder straps are adjusted by buttons that slip into slits that are cut into the shoulder strap itself. The bottom part of the shoulder strap is supposed to hook under the waist belt to give a more uniform ride of your pack when under heavy load. There is the problem. Not only does this button dig into your shoulder, but the clips to hook onto the waist strap are not long enough to reach for most normal sized people. The waist strap itself is made for someone with a 30 inch waist as well. This makes it impossible for people my sized to even use the stock system.
The frame that the pack uses has a riveted in leather lumbar strap. It also is made for a 30 inch waist person. To turn this pack into a comfortable system for the average American, the frame must be bent and tweaked. What I did was probably the easiest. I took a hammer and a block of wood to carefully bend the pipe frame into a more reasonable shape. You need to use the wood block as a forge and then open up the arch by hitting the frame at the apex. It will flatten out the frame and thus make it fit bigger people.
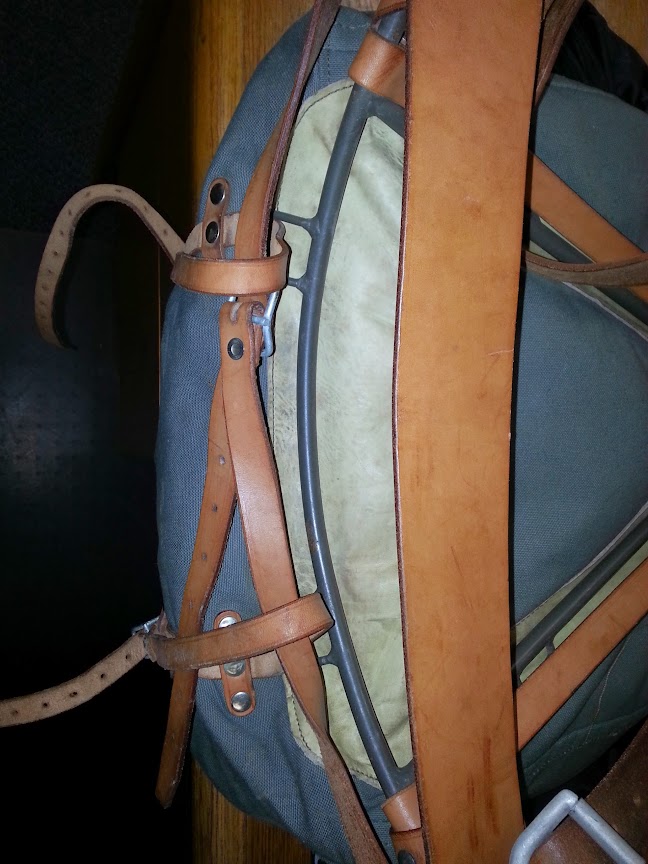
Flattened out arch of the frame
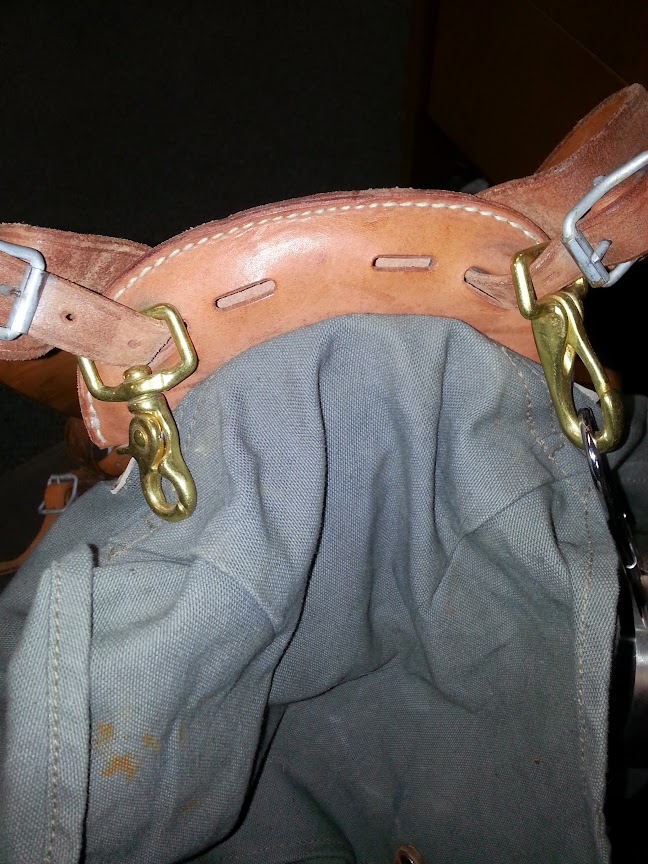
To fix the crazy button shoulder adjustment issue some cutting and stitching is required. What I did involved stitching a D ring into the cut strap and then used the waist belt hooks to make quick disconnects. The same straps are used. Nothing new is introduced. The only difference is that the hooks that were originally designed to attach to the waist belt are now being used on the bottom shoulder adjustment straps. It is very clean and functional as a quick disconnect.
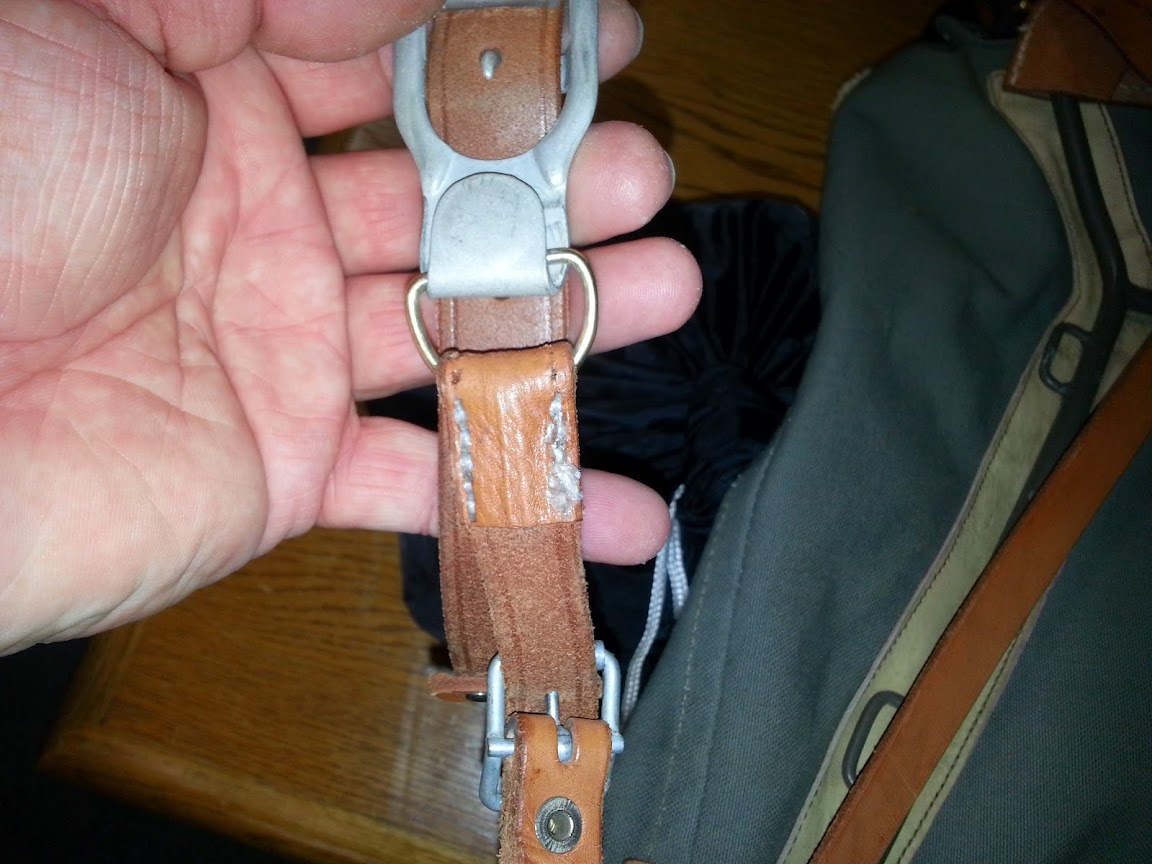
Quick disconnect for shoulder straps
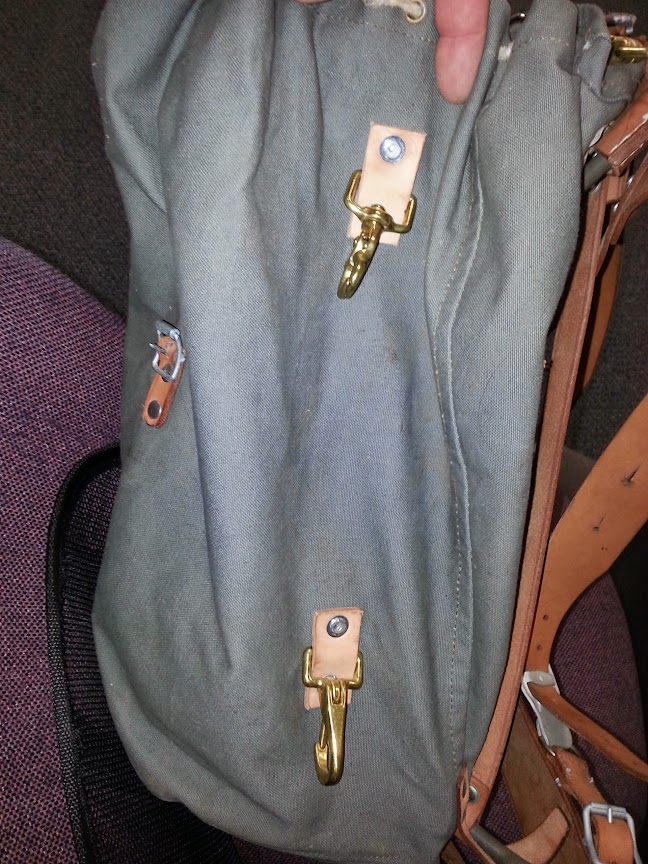
Quiver attachment points
Hooks
This is a highly recommended pack and if you would like to see some more detail in what I did to this baby, just leave a comment. If you have one of these packs, I think the pictures will explain about everything I mentioned without too much confusion. Don’t forget to check out some of my other gear reviews and mods while you are here.


