Monthly Archives: June 2014

Costa Ludus Shotgun Class After Action Report

by GunGuy

Class Attended

Shotgun Employment

Instructor
Chris Costa

Class length
3 Days

Class Description
This course is designed to give the beginner, intermediate or advanced shooter the proper Shotgun fundamentals. Starting with mindset, the class focuses on the core foundation of proper manipulation and function of shotgun employment to include the use of Slugs, 00Buck patterning, and ammo change overs. This course will leave the shooter with a proper shotgun foundation in manipulation.


Ammo
(minimum amount, I brought about 20-30% more than recommended)
600 rds for handgun, and 400rds 00Buck, 100rds Slugs, 100rds Bird.


Gear Brought to Class

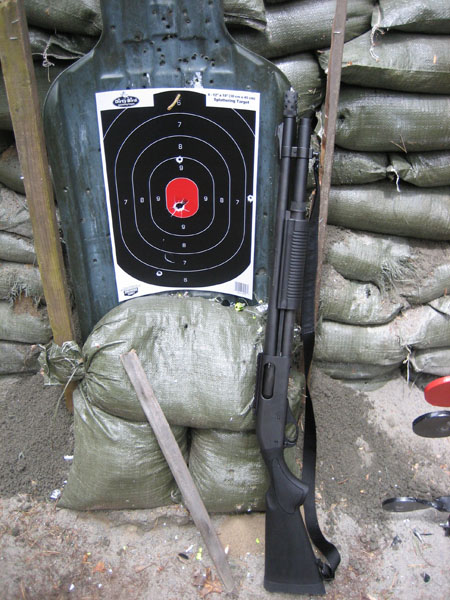
Remington 870 Express Tactical with Magpul forend, adjustable stock, and sling swivel
Magpul MS3 sling
Tacstar Sidesaddle mounted on 870
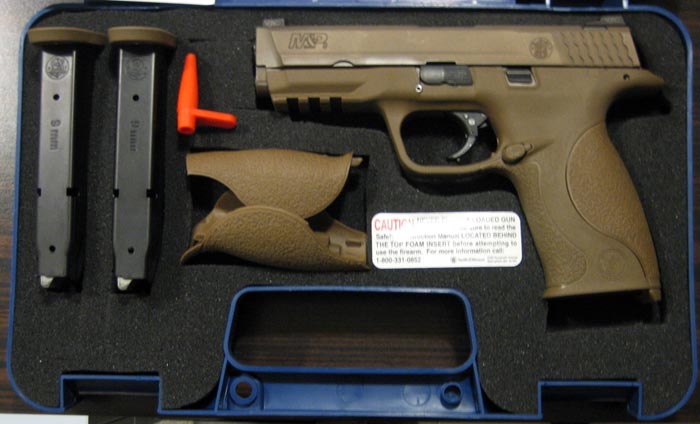
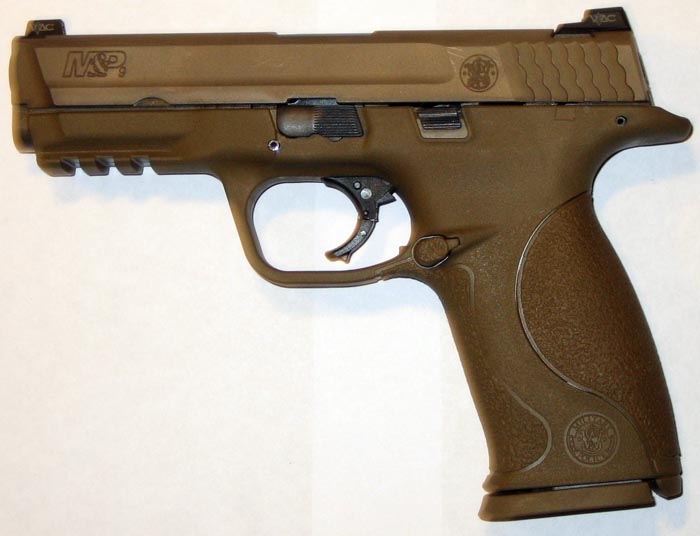
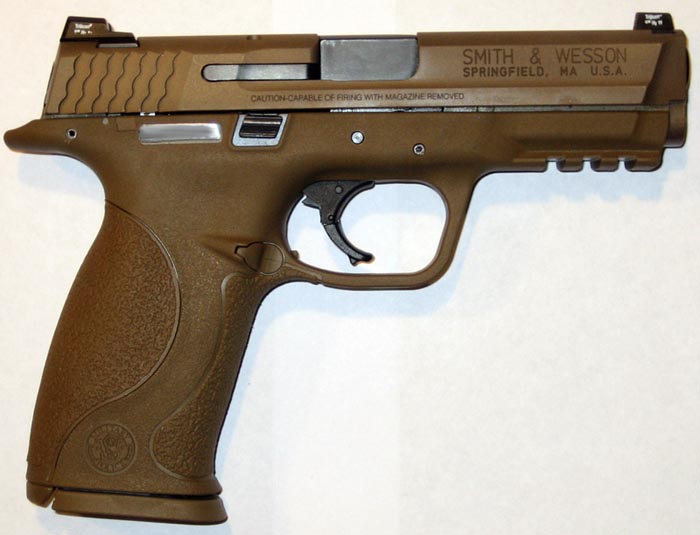
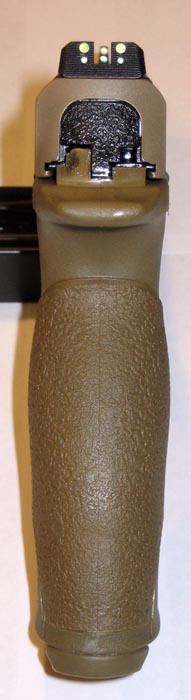
S&W M&P9 VTAC with Apex DCAEK trigger kit installed and 4 extra magazines
VTAC Brokos belt with VTAC cobra inner belt
Mounted on the belt above was a Bravo Concealment pistol kydex holster, Bravo Concealment pistol magazine pouches, 3 California Competition Works 4 round shotgun shell holders, Maxpedition dump pouch, Dark Angel Medical Pouch and leatherman


Thoughts

The class was three days long. On the first day we did strictly pistol and we went through about six hundred rounds going over our basics and one handed pistol drills.

On the second day we sighted in our shotguns and went over accessories and the importance of using blue loctite on every screw on your shotgun. I found this out the hard way on day 3 when I lost two screws from my 870 XS Frontrail sight, my extended magazine tube started causing FTE’s because it was loose and my sidesaddle was wobbling around which made feeding the gun more difficult.

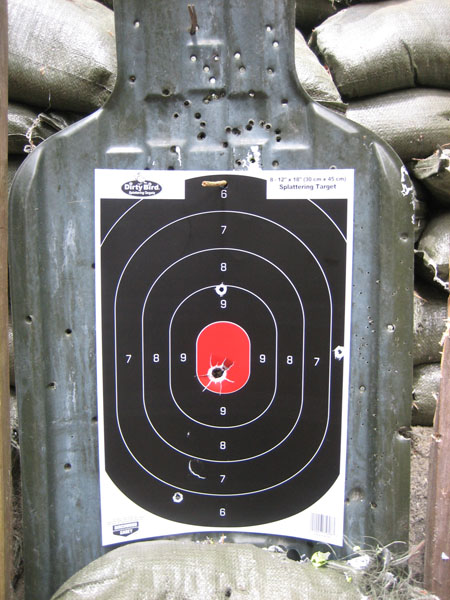
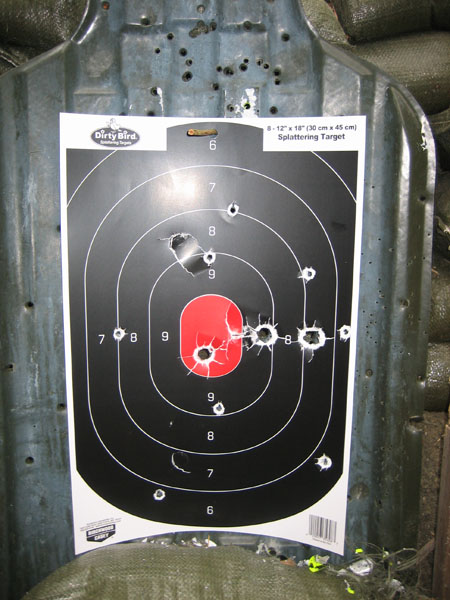
One of the most eye opening lessons on day 2 was the use of good 00 buckshot ammo. I was using Federal Premium Self Defense 00 buck  also known as Federal Premium Law Enforcement Ammunition TACTICAL (Fed Tac) during the 00 buck patterning portion of the class. Firing this ammo through my stock 870 tactical barrel I was getting very tight groups in the chest up to 15 yards and the performance was passable out to 25 yards. Several people next to me were using 00 buck made by Remington and Sellier & Bellot. Their patterns were wider and inconsistent the further back we went. The patterning was so wide that the lesser quality 00 buck was not usable past 10 yards without running the risk of hitting bystanders. Almost everyone at the class agreed that the Fed Tac 00 buck which also happens to be low recoil was the best one to use.

Another great lesson learned on day 2 was how to properly hold and fire the shotgun. I found this very useful since before this class I would come away with a bruised shoulder when firing a shotgun. Costa taught us how to fire the shotgun without getting bruised. It’s all about using the push pull method when firing. Here is a video by Rob Haught demonstrating how it works.

On the third day we did shotgun and pistol transitional drills. Everybody was safe but an important lesson that stuck with me was to watch your feet when you’re firing the shotgun off your back. It’s way too easy to blow your feet off if you’re not paying attention. Towards the end of the third day I managed to have some serious failure to eject (FTE) issues with my shotgun. There was about two hours of class left and Chris Costa lent me his spare 870 so I could finish up the class.

When I took the shotgun home and did a postmortem on the gun I found that failure to ejects were caused by a loose factory two round extension tube. The Remington factory extension tube is two pieces. The extension tube is screwed into magazine cap. The magazine cap with extension tube is then screwed down to keep the barrel in place. On earlier models of 870’s you would have a magazine cap detent and magazine cap detent spring to keep the collar from shaking loose. My temporary solution for preventing this is to use blue loctite the extension tube into the magazine cap so it handles as one unit and then screw it down against the barrel as hard as I can. This part will be replaced so I don’t run into this issue in the future.

Issues Encountered

  • Stock plastic ammunition tube follower sticks when loading ammo quickly
  • FTF’s and FTE’s caused by the barrel not being seated in the receiver properly due to the stock Remington extension tube coming loose
  • Tacstar sidesaddle came loose even with repeated use of blue loctite
  • Stock to cheek weld needs to be improved

Upgrades to fix Issues
Scattergun Technologies Magazine Tube Extension to fix the follower and FTF and FTE issues
High Speed Gear Shot Shell Tray to fix the wobbly sidesaddle issue and to increase speed of reloading
MagPul SGA Low Cheek Piece Riser Kit to fix the cheek weld issue

Final Words
I went in feeling that the shotgun was my weakest link and left very confident in my ability to use a shotgun to defend my home and family. I completely recommend taking any class that Chris Costa is offering. The class was great.

  • Share on Tumblr

LaserLyte Kryptonyte Green Lasers

by Woodsbum

Well, I have been depending on Gunguy to put up posts for me as of late due to some SERIOUS house modification/renovation taking place. By “taking place” I should reference the fact that I am doing it all…. A few friends and relatives have kicked in, but the time on my roof and slinging nails wildly takes away from my ability to get out and give you any new bushcraft type posts. I have, however, had the opportunity to install and play around with a few really nice items that I procured recently.

Enter the LaserLyte systems that I picked up for my wife’s and my AR15’s. I picked up one of the LaserLyte Carbine Green Laser Systems for my wife and I got one of the LaserLyte CM-15 Center Mass Kryptonyte Laser Sights for myself. For the list price versus the actual price, I was a bit concerned as to the quality of the laser. When they arrived, I was even more concerned because the packaging was not what I expected. It was in a simple plastic package that made me a bit more skeptical as to whether I had spent my money wisely. For $300 list price, I was expecting a box at least.

When I took it out of the packaging, the quality seemed much better than I begun to fear. The unit is solid and actually looks like it will take some abuse, but I doubt it is on par with a Vortex scope. Only time will tell on that one. The installation is quite simple and I found that the screw on covers for the adjustments do feel sturdy and of decent quality. I was, however, a bit annoyed that sight adjustments must be made with an Allen wrench. They do supply the correct size, but it is going to make field adjustments that much more difficult if I have to keep track of a small Allen wrench.

Both models are the same quality and have, thus far, not had any problems with being bumped around and dropped repeatedly after installation. While I still had a warranty, I wanted to see how durable they actually were before I got to the point where I would depend on them. Again, they are surprisingly durable.

In regards to the important part, the laser itself……  Wow. The carbine laser is very easy to see and is dead on accurate up to the 100 yards that we tested it at. The “Center Mass” one was not as visible and is definitely built for a shotgun. The pattern is very sweet, however. I will be replacing this with the Carbine model for my AR and putting the Center Mass on my Mossberg 500. That should be fun.

Laser Pattern for Center Mass

Laser Pattern for Center Mass

Several reviews from Amazon have stated that they quality was not worth the money and the laser system breaks after only a few rounds. We put 7 30 rounds magazines through each of our rifles. The sight did not deviate from where it was originally set, there was no cutting in or out of how bright it was, and there did not seem to be any issues to speak of. We will keep our eyes on the sights and make sure nothing bad happens. If it does, I will post it and link to this post.

All in all, the reduced price for this laser makes it worth the money. I don’t think that the original list price makes this a decent value, but around the $150 mark it seems reasonable.

  • Share on Tumblr

S&W M&P 9mm – VTAC Viking Tactics – Range Report

by Gunguy

I bought a S&W M&P VTAC Viking Tactics 9mm the other day. I decided on the MP VTAC model because of the combination fiber optic / tritium sights. I read some reviews stating that the fiber optic piece popped out for people but I have yet to run into that problem. The gun came with two 17 round magazines, three interchangeable backstraps, a lock, a case, a manual and a chamber flag.

I took the S&W M&P VTAC 9mm to the range yesterday.  I was shooting the pistol from the standing position at 50 feet at an indoor range. The gun came with three different back straps. I chose the medium one for the test.

I put 100 rounds of Federal Champion Target Ammunition through the pistol without a single issue.

The VTAC fiber optic sights were excellent. The trigger was crisp and short. The pistol shot on the low side because of how high the fiber optic sights sit. If I had a chance to use the MP9 in low light settings I would use the Trijicon sights that are just below the fiber optic sights. The only issue I did come across was that about every third round ejected directly back into my face. This caused me to flinch  the rest of my time with the pistol. I read that this issue maybe caused by the type of ammo that I used or not having a proper grip on the gun.

I’m going to test the pistol further next week and post an update. Until then here are some pictures of the gun. I’m new to shooting pistols so keep that in mind when you see the pictures of the targets below.

SW_MP_9_Case_2

SW_MP_9_Left

SW_MP_9_Right

SW_MP_9_Sights


SW_MP_9_Fifty_Feet

Target One at Fifty Feet


SW_MP_9_Fifty_Feet_2

Target Two at Fifty Feet


Model: M&P9 VTAC®
Caliber: 9mm
Capacity: 17+1 Rounds
Action: Striker Fire Action
Barrel Length: 4.25″ / 10.8 cm
Front Sight: VTAC® Warrior
Rear Sight: VTAC® Warrior
Overall Length: 7.63″ / 19.4 cm
Weight: 24 oz./680.4 g
Grip: Polymer
Frame Material: Polymer
Slide Material: Stainless Steel
Finish: Flat Dark Earth (FDE)

  • Share on Tumblr

Winchester 12 gauge Supreme Elite PDX1 Range Report

by Gunguy

My buddy and I came across the Winchester 12-gauge Supreme Elite PDX1 ammo while checking out a gun store a couple of weeks ago. We were impressed by the idea of a slug and 3 00 buck shot combo for home defense. The slick packaging and black shell casing definitely didn’t hurt either. The ammo cost about $12 a box with tax. At that price it’s not something that I’m going to shoot on a regular basis but I had to try it out to see if it was worth its salt.

I loaded up three rounds in my Remington 870 and fired three rounds at 15 yards / meters. I was using ghost ring sights on the 870 and the results are pictured below. My friend and I were very impressed. We wondered how the Supreme Elite PDX1  were packed so I went on the website and found that the 3 00 ought rounds of buck shot went toward the target first followed by the1 ounce slug. Let me know if you guys have any questions.

870_remington1


D_15_Yard_1

K_15_Yard_31


D_15_Yard_3


  • Share on Tumblr

PTR-91 Scope/Mount Combination

by Gunguy

Several people have asked what kind of scope and mount combination I have been running on my PTR-91 since I put up pictures with a previous post. I decided to put a Low Profile Rail Scope Mount on my PTR-91 instead of a STANAG Steel Claw Mount to keep the scope as close to the rifle as possible. I then mounted a MOA Vortex Viper PST 1-4×24 scope in a ADR-X 2 inch Offset Cantilever Ring Mount.

The above combination is rock solid and very accurate. It was rather costly but worth every penny. The scope and mount were an investment and I can use them on different rifles in the future if I ever decide to sell my PTR-91.

ptr_91_scope

  • Share on Tumblr