
Benchmade Barrage Model 581

by Woodsbum

For many years I carried an old Ka-Bar folding knife as my EDC. It holds an edge and works fine, but it was not really big enough for my hand and it has a serrated section. I am fine with serrated blades, but I would rather have all or none. This is just personal preference based upon the way I use a knife. Luckily, I was able to pick up a beautiful and functional EDC that seems to suit my needs a bit more. It is the Benchmade Barrage Model 581.

Benchmade Barrage Model 581

Benchmade Barrage Model 581

Now there are several different models of the Barrage. This one is the more expensive one with some nicer features, but there is one that is about $100 less expensive (Model 580). I have one of these as well, but never carried it or really used it much. The size and blade shape was great, but I didn’t like the handle or the steel used. Their Model 581 is much nicer. Here are the specifications:

Blade Length: 3.60
Blade Thickness: 0.121
Handle Thickness: 0.650
Blade Material: M390 Super Steel
Blade Hardness: 60-62HRC
Weight: 5.20oz.
Pocket Clip: Reversible, Black, Tip-Up, Split Arrow
Lock Mechanism: AXIS-Assist
Overall Length: 8.35
Closed Length: 4.75
Sheath Material: Sold Separately
Class: Blue

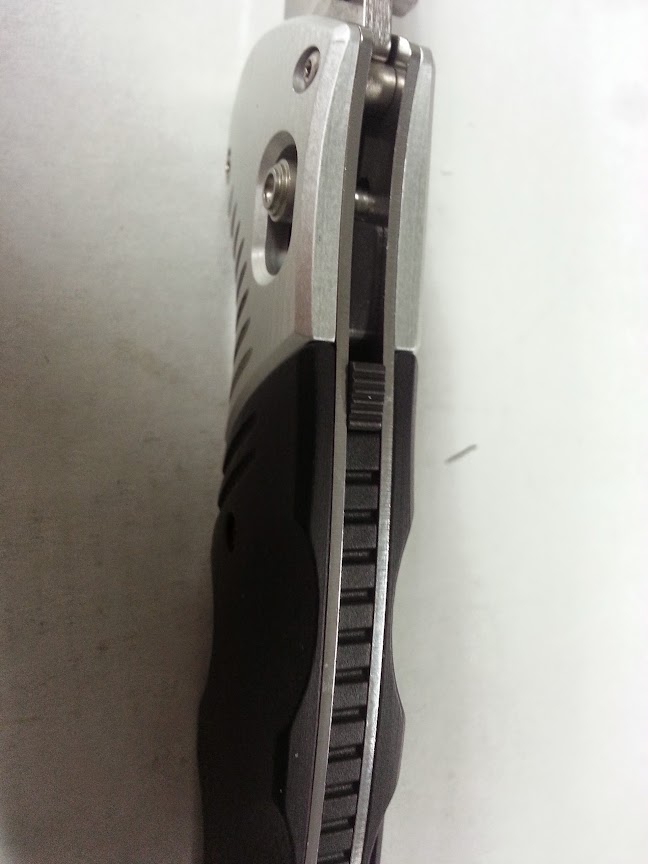
Like it’s less tricked out brothers, the 581 also has the same locking mechanism. This thumb slide locks the blade so the spring assist doesn’t allow it to open in your pocket, but also locks the blade release so it won’t close either. It is a very nice feature to ensure you don’t stab yourself in the leg when carrying the knife while working. All you really need to remember is to push down on the slide a bit with your thumb and it will easily click into either locked or unlocked position.
Benchmade locking mechanism
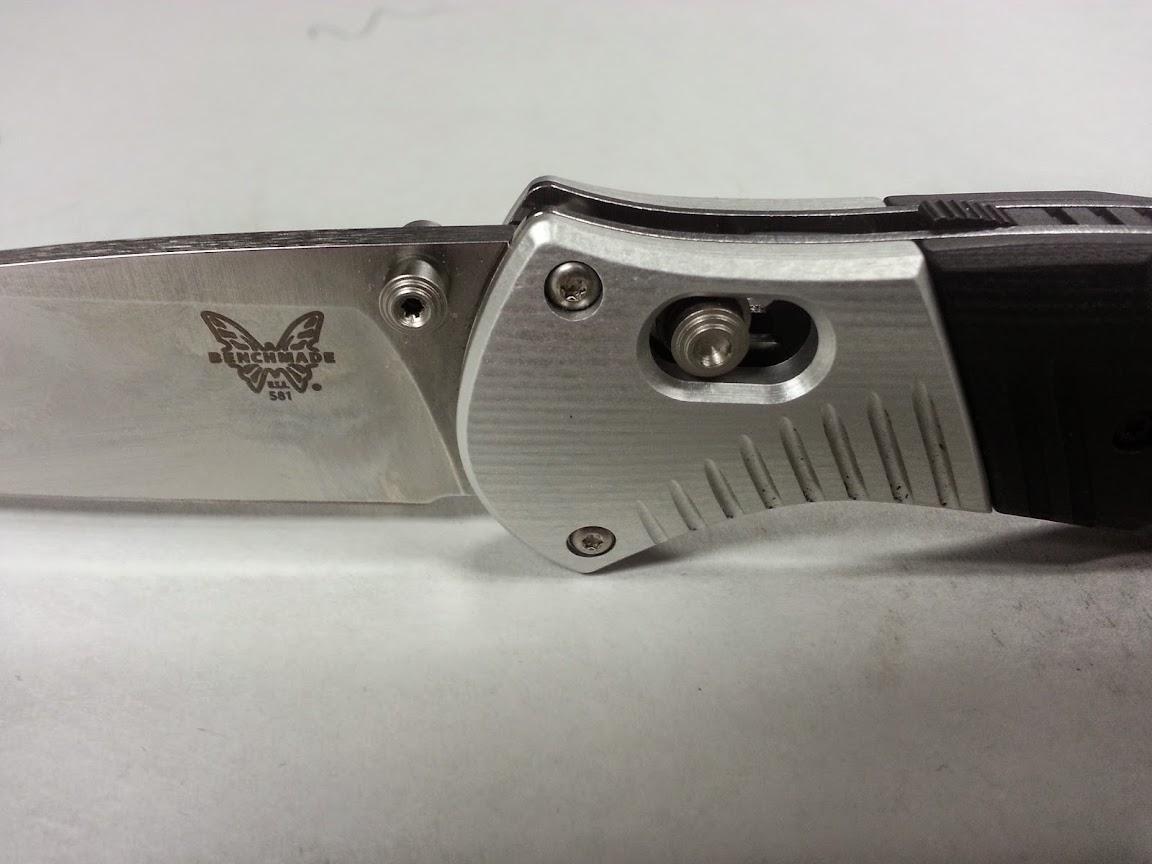
Benchmade locking mechanism

This is the blade locking mechanism. When the blade is out, just slide this guy back and it will release the blade. It is quite secure and takes one heck of a beating without failing. I have yet to have the blade release on me with either this model Barrage (Model 581) or the Model 580.

Benchmade blade locking mechanism

Benchmade blade locking mechanism

The last big difference between this model and the others is the steel that is used. Instead of the 154CM that comes on the 580’s, this has a “super steel” called M390. It is supposed to be a super performance, high tech steel that actually starts off with iron powder for better mixtures and is used in surgical cutting instruments. The edge is hair popping and it does seem to hold an edge like no other EDC knife I have ever had.

As to why I like this type knife, there are several reasons. Many knifes come in with the drop point and have a good, solid handle like this that makes it easy to grip. Here are a few other features that I personally like.

  • Drop point: For what I use an EDC knife for, this is just a perfect blade shape. It is easy to touch back up with a strop, I can do basic carving with it, and I can use most of the blade’s cutting surface for 90% of my jobs. Just my preference and usage needs.
  • Convex grind: This has a convex grind with a secondary grind for the edge. I really like this grind versus a hollow ground knife, like most EDC options out there. Again, it is just my preference.
  • Ambidextrous thumb studs: Because I use my knife with both hands, this is an important feature for me. My old EDC did not have them and I found that I had to do a lot of transferring the knife or opening it in odd manners with my left hand. This has made life much easier for me.
  • Handle material: The 580 has a Valox handle that is ultra lightweight and just doesn’t give me the personal “feel” that I want out of a knife. This 581 uses G10 and and aluminum bolster which gives me the feel and weight that I prefer. The Valox holds and my hand doesn’t slip off it, but it just feels too light and throws the balance off in my hand. Many people (my son included) like the Valox, which is why the 580 is now his….

This knife retails for around $200. This is much more money than many people are will to pay for a pocket knife. I know that. Considering what a knife snob I am and how I like my “kits” that I build for each individual purpose, spending $200 for something that will actually span all those “kits” is something that I can justify. If you are looking for a good, all around EDC knife that will supplement all your heavy use fixed blades in your kits then the 581 might be the one for you.


  • Share on Tumblr

American Sniper – Chris Kyle – Book Review

by GunGuy

American Sniper
is a remarkable story of heroism, patriotism, and self-sacrifice by an even more remarkable American, Chris Kyle. A Navy SEAL and highly trained sniper, Kyle is even more remarkable in his straightforward admittance that his accomplishments alone are not to be lauded, but the accomplishments and sacrifices of his fellow military men who sacrificed their vision, limbs, and some ultimately their lives in fighting for the freedoms that we often take for granted, yet hold so dear. It may not be much, but here is one American that is forever grateful and thankful to Chris Kyle and ALL of our brave men and women fighting for our country.

Kyle joins the ranks of such American sniper greats as Carlos Hathcock 93 confirmed kills during the Vietnam War, and whose sniper exploits were so eloquently related to the reader in these two books written by Charles Henderson; Marine Sniper: 93 Confirmed Kills and Silent Warrior: The Marine Sniper’s Story Vietnam Continues, as well as, other sniper greats such as; Chuck Mawhinney a U.S. Marine with 103 confirmed kills during the Vietnam War and Adelbert Waldron the previous U.S. Military record holder with 109 confirmed kills.

One particular aspect that I liked about how this book was written was the occasional viewpoint expressed by Kyle’s wife, Taya. Although both she and Kyle allude to problems both faced concerning each other and his absence during his military service, one can’t help but realize what a truly remarkable women Taya is and Chris was a damn lucky man to have her.

I really liked Kyle’s no apologetic statement that he enjoyed his job and took great pride in saving the lives of his fellow soldiers as they fought against the evils that they found in Iraq. Kyle doesn’t go into a lot of gruesome detail concerning that subject but he makes it painfully clear that unless you have actually been there and seen the evil that hasn’t been diluted by politicians and the media, then you really have no idea what it is like.

Kyle not only gives you a glimpse into the world that he and his fellow SEAL’s lived in during the Iraq War, but also the difficulties he faced when he came home in between tours and for good upon his retirement from the Navy. And although there were difficulties, he also shares some very humorous moments as well. I especially liked the story about the “burglar” breaking into his home while he was on leave and while he was still in bed after his wife left for work. I was laughing so hard that I couldn’t stop for several minutes.

Chris Kyle was one of the finest soldiers the United States of America has every produced and one hell of a human being and a truly great American. I highly recommend this inspirational biography of an extraordinary human being to everyone.

American_Sniper
Marine Sniper
Silent Warrior

  • Share on Tumblr

Another Foraging Resource – Eat the Weeds

by Woodsbum

Although I am one heck of a hunter, fire builder, shelter constructor, decent at tracking (how I recover game due to color issues with red on green), fisherman, and all around outdoors guy I do have a problem with foraging. This has been one area of my training that I have really been lacking in and I know it. Unfortunately, I also have no one that I hang around with in real life that is capable of pulling me along and training me. It has really become a lost art and difficult to learn on your own. This is why I buy so many foraging references and am constantly on the lookout for good references. Since I found another place that I have been creeping around in hopes of learning a bit, I felt compelled to include it here for my own future reference…..  If you find it helpful then I am also happy about that.

Eat The Weeds is a blog by Green Deane that I stumbled across a few days ago. He also has a YouTube channel that you can head over to if you so desire. It is really very good and well put together. The only problem is that he assumes that you have a starting knowledge of botany and plant identification. It is actually getting to the point where I am thinking about taking a few plant identification classes at our local college to get me started. This would be an expensive way to overcome the knowledge deficit that I have regarding greenry, but it might be the most beneficial considering. I will keep you updated if I decide to take that path.

I am also waiting to get my “acceptance” email from his forums. I hope to be granted access to that section of his site fairly soon so that I can start hitting up those bubbas about plant identification resources for us “filet and release” types.

Green does offer classes at a reasonable price, but you have to be in Florida to attend. That really does not do me any good considering I am on the entirely opposite side of the continental United States. This also doesn’t take into account the fact that the plant life down there is going to be much different than what we see up here.

As I get more information or resources, I will post them here on AOD. If you have any suggestions or good places for me to check out, please add a comment.

  • Share on Tumblr

Collapsible Grill or Pot Holder

by Woodsbum

Especially during the spring and fall months, I tend to spend a lot of time in my garage making things. Here is one of my creations that didn’t take that much to build, but is VERY useful when out bushcrafting/camping. It is a takedown grill that also turns into a pot holder for use over your campfire.

Here is a good look at my contraption:

My Pack Grill

My Pack Grill

As you can see from the picture, I made loops at the end of each of the cross pieces as well as a loop and hook on the end of the longer side pieces. This allows me to adjust the spacing, location or even take the entire thing apart for transport.

Here is a picture of it for use with a pot:

Hooked at the end to hold a pot

Hooked at the end to hold a pot

This is how it looks with a tea pot on it:
Making some tea

Making some tea

As a grill, it works quite well. I have used it to a large degree as a way to cook steaks and brauts, but I am sure it will work for any number of things you could cook on a grill. Here is a good picture of how it looks cooking some nice slabs of steak.
Cooking some steak

Cooking some steak

To make this, I just fired up a blow torch and bent the ends of the round stock metal into the desired shape. All told, I think I have less than an hour in the whole thing. This includes cutting my transport/carrier.

For transport, I actually carry it in a PVC pipe with caps that I just tie onto the side of my pack. I did this for transport so that I didn’t have to even clean the grill before I put it away. I could just burn off the extra food that was stuck onto it and then just slide it into the pipe after it cooled off.

Remember that anything you can think of as possibly useful in the bush can probably be fabricated in your garage. Just take some time and play around to see what you can come up with. All told, I love this little grill and wonder all the time as to why I didn’t build one earlier in my life. It would have saved me a lot of hassle with the Weber replacement grills that I used to carry.

  • Share on Tumblr

Impromptu Bow and Buck Saws

by Woodsbum

A while ago I was asked about the use of saws while bushcrafting. I carry a very nice buck saw that I picked up from a vendor at BushcraftUSA.com. You can see it here. Many times, however, carrying the extra weight of a complete buck or bow saw is not a viable option. Instead you can carry the blade or cutting portion of the saw and make your own frame for it. Here are a couple examples of how to build your own bow saw and buck saw while out in the bush.

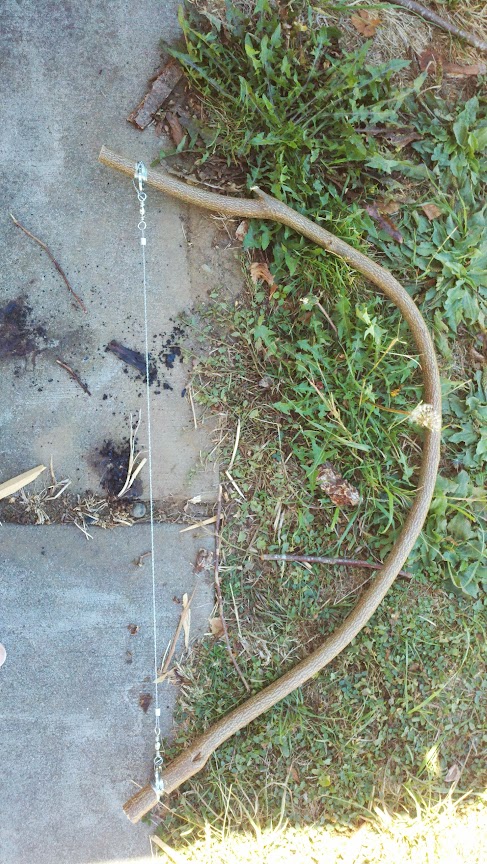
The first real “secret” to building field bow saws is making sure that you get some wood that either already has the natural bend to the shape or to get some nice, green wood that will bend without breaking. Either way you need something that can take the bow shape but is strong enough to not bend too much while under use. As you can see from the picture, it is preferable to make some notches in the ends of the wood to allow your saw blade to remain stationary while under load. The easiest way is to use your saw blade to make some slits and then use your knife to remove the chips. In the case of the saw I have pictured below, I was able to just slide the rings over the branch and rest them into the notches.  I like using snare wire to keep things in place, so that is why you see the wire around the ends of the saw blade. This isn’t necessary, but it is more standard practice for me than anything else.

Impromptu Bow Saw

Impromtu Bow Saw

In this instance, I took a dead branch that was still just green enough to bend and not break. The saw blade is one of those “survival” saws that come in a kit. Although using it is kind of slow compared to other saws and methods, it definitely works.

When making a buck saw, the hardest part is getting the middle branch to stay put under stress. If you don’t notch or drill your holes correctly, that middle brace will squirt off to the side and collapse the whole saw in upon itself. The best way to keep that from happening that i have found is to ensure you drill holes and use some sort of a pin. What I did on the saw below was a little different. I cut the notches for the cross brace and carved in some pins to insert into the holes I carved into the upright braces. This gave me both a solid up and down stability and a twisting stability from the pins. I have also seen holes drilled and dowels carved. This also works, but I was using a large knife and didn’t have a decent carving knife or a drill to use. To tighten up the whole saw frame you can just use some 550 cord or such and wind it up with a stick like you see below. It works quite well and when the cordage stretches you can take up a few more turns on the cord to tighten things right back up.

Impromptu Buck Saw

Impromptu Buck Saw

The easiest part is the slit for the saw blade. As you can also see, I again used snare wire to keep the blade on. This is just something that I do and have found works quite well. Since I have rolls of snare wire and carry a roll to the field with me in my survival kit, many field projects find themselves completed with the aid of snare wire.

Next time you are in the field and want to so some fire preparation do yourself a favor and make a saw frame. With some practice and testing you can come up with a great design that works well for your needs. In case you were wanting a step by step build of the buck saw, I have embedded a video th assist you. Again, it is quite easy and works very well.

  • Share on Tumblr