by Woodsbum
For many years, I have carried some form of compact semiautomatic pistol. Originally, it was a Glock 30 (not very compact, but small enough to carry and pack a punch). After I found that the Glock was too big for my liking, I moved over to an old Smith and Wesson SW9. Eventually the firing pin spring wore out and the factory replaced it with a M&P Shield. Now, I still carry this quite often. There is a problem with the size of this pistol, however. It is nice and compact compared to most pistols, but it still tries to pull my pants down when I wear workout clothes and still tugs a bit in a cargo pocket. I was to the point where I was actually getting annoyed.
Then I found the North American Arms mini revolvers. I call it my Noisy Cricket after the MIB movie pistol:
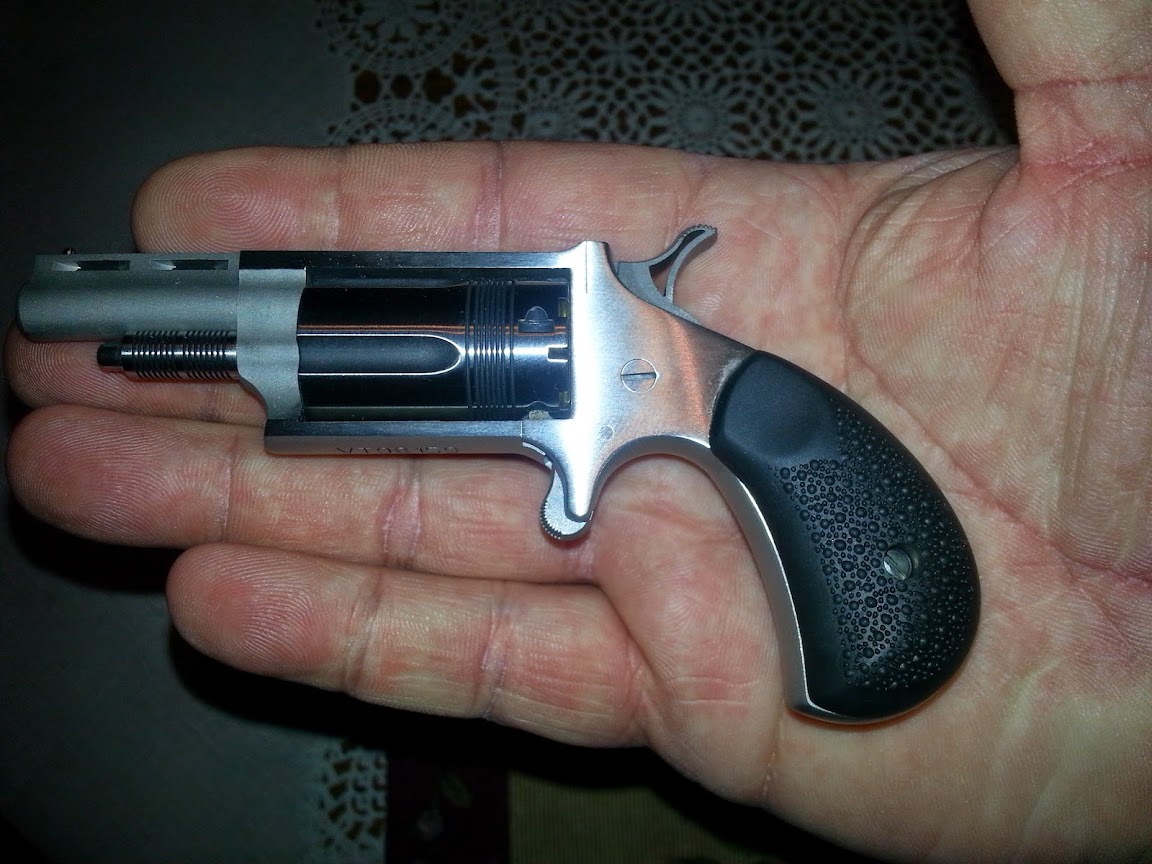
NAA Wasp
For a better frame of reference in regard to size, here is my Wasp pictured next to a 30-30, a 45-70 and a .44 mag cartridge.
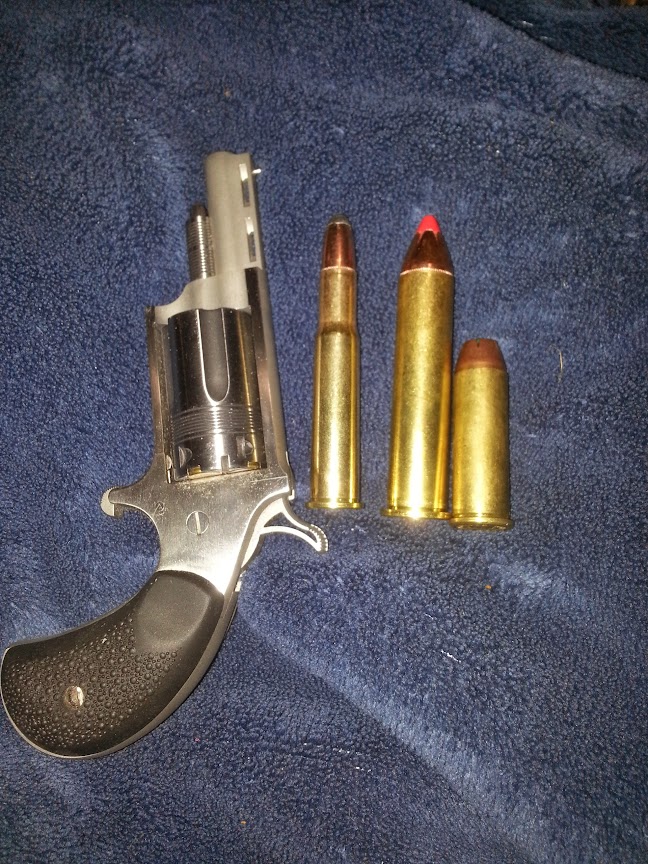
NAA Wasp next to 30-30, 45-70 and 44 mag
Now for how it shoots….. I am not as spot on with a camera, so I never remember to take pictures of my targets after I shoot them. This may also be due to the fact that I usually don’t use paper targets when plinking. Either way I am stuck just telling you how it performs, so if you want to see actual “proof” you will have to find one to play with.
With the .22 WMR rounds, it was dead on accurate. Where the pistol was pointed was exactly where the round hit. The sights are similar to how you aim a shotgun for there is no rear sight. You basically put the bead on your target and let ‘er rip! Using Mini-Mag .22 LR also resulted in the same accuracy. I was shooting Dr. Pepper and RC cans at 25 yards with this little guy….. Then came the standard velocity rounds. Oh, boy. I would have been better just throwing the rounds at the cans. It didn’t shoot a grouping, but more of a pattern. It was a pattern of a drunk, blind person wearing mittens. It was HORRIBLE. I used Remingtons, Winchester, CCI and Federal standard velocities in several different grain weights. Nothing worked to pull the accuracy back into a grouping but the CCI Mini-Mags. I did not try Stingers. Mainly because I didn’t have any.
The NAA pistol is really a great pocket pistol. With the right ammunition it is very accurate and .22 WMR is truly no joke round. There are also many accessories for this little guy to include flip handles with clips and belt buckle mounts. Considering the price and fact that this little guy gives you the ability to carry even when working out, swimming, or wearing anything that will disallow normal concealed carry without printing, NAA has got a real winner. I consider this one of my best firearm purchases and am now recommending that all my friends get one.