Author Archives: GunGuy

About GunGuy

Prep minded city guy who tries not to take himself too seriously.

GRAYMAN Satu Folder

by Gunguy

I picked up the Grayman Satu folder a few months ago. I saw the pictures on the Grayman’s Knives website and I knew the knife was going to be big. It still did not prepare me for the size of it when I opened the box. It’s one hell of a big knife.  The first thing I did was inspect it closely. The knife did not have any machining marks or scratches and all the screws were tight. The action was initially stiff. I put a little white lithium grease in the action before  I began to open and close the knife a couple of hundred times in each hand over the next several days to loosen it up. I know that may seem a bit obsessive compulsive but it’s the way I get familiar with the action of a folding knife. This way I get very familiar with the knife and opening it becomes second nature in both hands.

I primarily wanted to use this knife as a hiking knife. I was looking for something very well built that I can put in my pocket or backpack. Since I live on the east coast I have to be more discreet than those of you who live elsewhere. The knife has a really strong clip that will hold on to your pants like a leech. It might be a little to tight in case of an emergency but I’m not carrying this knife as a self defense weapon. You can definitely use it as such but that’s not it’s main purpose. I would like to test this knife further but I can’t bring myself to start chopping at branches just for the hell of it. For now it’s residing in my home waiting for it’s first trip into the woods. Until then I will have to leave you with a bunch of pictures.

satu_left1

satu_right1

satu_left3

satu_right3

  • Share on Tumblr

Gun Safe Best Practices

by GunGuy

GET A SAFE

I know, it seems expensive, but it’s worth it! It helps make sure criminals don’t get your guns. This is good for you, good for society and good for gun rights. Also get a safe that’s at least twice as big as you’d expect you’d ever need. It will fill up quick.

So now you own a safe big enough to hold your long guns and you filled it with guns, papers and valuables…but…are you really using it right? Here is a summary of information I cobbled together from various sources on the internet (so it must be true!). This is not a discussion about what style/brand of safe to buy. I hope this provokes a bit of thought – additions and feedback welcome.

STATS

More than 99% of all robberies in homes with a locked gun sized safe (400lbs or larger) resulted in no loss of the contents inside the safe. The majority of the fraction left was people who stole the entire safe (mostly due to not being bolted down). Less than 0.05% were successfully broken into on location at the home or were removed when properly bolted.

Most common attack methods on safes are (in order of most to least common).

  1. Attempted theft of entire safe
  2. Pry bar attack on door
  3. Fire ax to side of safe
  4. Cutting side/back with diamond saw
  5. Cutting torch

Most common damage to safe (ordered most to least common)

  1. Hammered removal of dial or keypad
  2. Pry marks/bent metal around door edges
  3. Side/back damage


SAFE LOCATIONS BEST PRACTICES

  1. Out of sight from exterior windows and doors.
  2. Away from public or entertaining spaces such as kitchens and living rooms.
  3. If safe is visible from outside the house, face it so contents cannot be seen when it is open.
  4. Downstairs locations are ideal to lower heat from house fires. (heat goes up…unless its an inferno and the whole house comes down…)
  5. Rule of thumb – the bigger the hassle to get it to that spot – the harder it will be to steal. The more stairs they have to carry it up or doorways and corners they have to navigate, the less likely it will be stolen.
  6. The cheaper the safe, the smaller the space you should choose to locate it. This is to minimize attack options on the thinner metal on the sides and back.


BOLTING BEST PRACTICES

  1. Ideal – concrete floor (…duh)
  2. For ground floor locations over a crawl space – Drill ¼ pilot hole through pre-made holes in safe bottom. Glue a 2×6 boards to underside of the floor. Nail board ends to the support beams on each side so the pilot holes are centered. Using larger drill bit to drill all the way through flooring and 2×6. Fasten using 2 large washers and long round head bolts (aka timber bolts).
  3. For upstairs locations with standard home flooring – Open ceiling under safe location and do the same as #2 above.
  4. If bolting to floor is not an option, but the safe can be located in a small closet – Buy a piece of metal plate 3/8 to 1/2inch thick large enough to fit entire floor area of closet. Bolt the safe to the plate using round head bolts. Safe cannot be removed due to the oversize metal square bolted to bottom – at worst it can be tipped over onto its face through the doorway. (this method is difficult and requires 2-3 people to implement and floor must be strong enough to support this increased weight)

Note: Bolting can be successfully negated on elevated safes (i.e. with legs) by cutting the bolt between the safe and the floor with a hacksaw. Consider this when buying a safe.


ITEM STORAGE BEST PRACTICES

  1. Store breakables on bottom shelf if you safe is not bolted down. Most unbolted safes are knocked over at some point during the robbery attempt.
  2. Put most valuable objects on very bottom shelf. Most attempts to pry/cut/torch/chop into a safe are performed near the top of the safe between waist and chest high.
  3. If you have large amounts of ammo, store it at the top of safe. A top heavy safe is more unwieldy to steal than a bottom heavy safe.
  4. Use metal cash boxes inside safe to hold cash and important papers – they will provide an additional 10-30 minutes of fire protection, plus it requires taking much more time to cut/torch a much larger hole so they can be removed. (contents are a pita to get out while the box is inside the safe unless it’s a vertically spacious shelf). Store jewelry and watches separately the same way.
  5. Use a dehumidifier to prevent rust. There are many plug in models for less than $100 and less effective/less costly ones for cheaper.
  6. Do not put a gun into the safe that is a dramatically different temperature physically – condensation can form and cause rust.

SAFE COMBO BEST PRACTICES

A touch pad can be coated with different things to reveal which keys are frequently used. From there a savvy burglar can make a few educated guesses before being locked out for several minutes. You should clean your keypad regularly.

  1. Use 6 or more digits that are not a phone number and doesn’t form a word
  2. One repetitive number is ok. e.g 567784.
  3. Do not use multiple repetitive numbers. E.g 588774 – these have a slightly higher probability of being guessed if they know what keys are being used. (don’t ask me why – I ain’t a math guy)
  4. Do not end the code in 0 (zero) this is the most common last digit.
  5. Do not start your code with 1 since this is the most common starting digit
  6. Second most common starting digit is 0 due to the usage of birth dates (e.g. 031475) as codes…don’t do that.


Lastly, doing all of the above is not help whatsoever if you leave the bypass key where it can be found. The contents of your safe is only as secure as your bypass key.

Here is a video about choosing the right safe.

  • Share on Tumblr

Magpul Dynamic Carbine 1 Review

by GunGuy

I spent 3 great days in Yakima last month taking Magpul’s Dynamic Carbine 1 course taught by Jon Canipe and Caylen Wojcik. It was the ammo panic that made it possible, some students cancelled making room for those of us who contacted Magpul later. Magpul asked us to fill out some non-disclosure and other information forms that had to be submitted along with the proof of citizenship etc. docs about 3 months prior the class. After a few weeks I finally heard back from Magpul, but with the good news: they accepted my friend and I to the class and we were offered the required count (1250 rounds) of 5.56 ammo at $7 per box of 20.

The class took place at the range on Sun Targets road about 20 minutes from Yakima. The weather was quite warm and during the day progressively got warmer (60F in the morning to about 75F during the day). After a brief introduction the instructors reminded to us about the ITAR and said that the regulations are enforced more and more now, with some heavy charges for stuff like sending a plastic stock to Norway.

Without going into too many details, I can say that the way the course is taught has changed dramatically since Chris Costa and Travis Haley left Magpul Dynamics. Lots of stuff is thrown out and things have been simplified. Jon Canipe’s (our main carbine instructor) style of explaining and teaching stuff was precise and to the point, without any military hardcore yelling and suited everyone, except to one female student who joked about multiple repetitions of the f word. Caylen Wojcik, who teaches Precision Rifle and DMR classes, added a lot of interesting info on using carbines at longer distances. We successfully engaged a 12” plate at 450 yards located on a steep hill with non-magnified red dot sights. Both instructors, were super attentive and addressed course related questions in-depth offering their enormous knowledge.

At the end of each day, instructors ran a small competition that combined all the skills learned during that day. A friend of mine won the 1st day’s timed rifle shooting string from 3 positions: standing, kneeling and prone and got a new STR stock as a prize. I won the 2nd day’s timed competition drill (those IDPA drills helped a lot): 3 man size targets had to be engaged at the center of mass circle, any shots outside automatically meant disqualification. The twist was we had to use 3 mags with 5 rounds each, shooting the 1st target 1 time, the 2nd target 2 times, 3rd 3 times, again the 2th target 4 times and finally the 1st target 5 times. The prize included the STR stock and M3 sling (both Magpul products). The 3rd day’s mini competition was the most impressive one: 20 rounds on metal plate targets at various distances, whoever shoots them with least number of rounds wins. Jon himself showed it first. He used an Aimpoint T1 optic sight and engaged all 5 targets in a fast sequence with 1st round hits! That was very impressive, because he shot the same ammo as we did (55gr) and but didn’t practice with us that day. The competition was won by one of the students who took Caylen’s Precision Rifle class. With wind gusts up to 10mph that student repeated almost identically what Jon did just 5 minutes before and got a bunch of new model PMAGs an MS3 sling.

I’m still digesting tons of information we were taught and resting as 10 hour days in the hills of Yakima is not something I usually do on a regular basis. I definitely recommend this class and other ones to anyone who wants to learn AR fundamentals, push their skills to a new level or just simply refresh the existing ones. The Designated Marksman Rifle and Precision Rifle courses are on my list now.

Here are a few pictures:
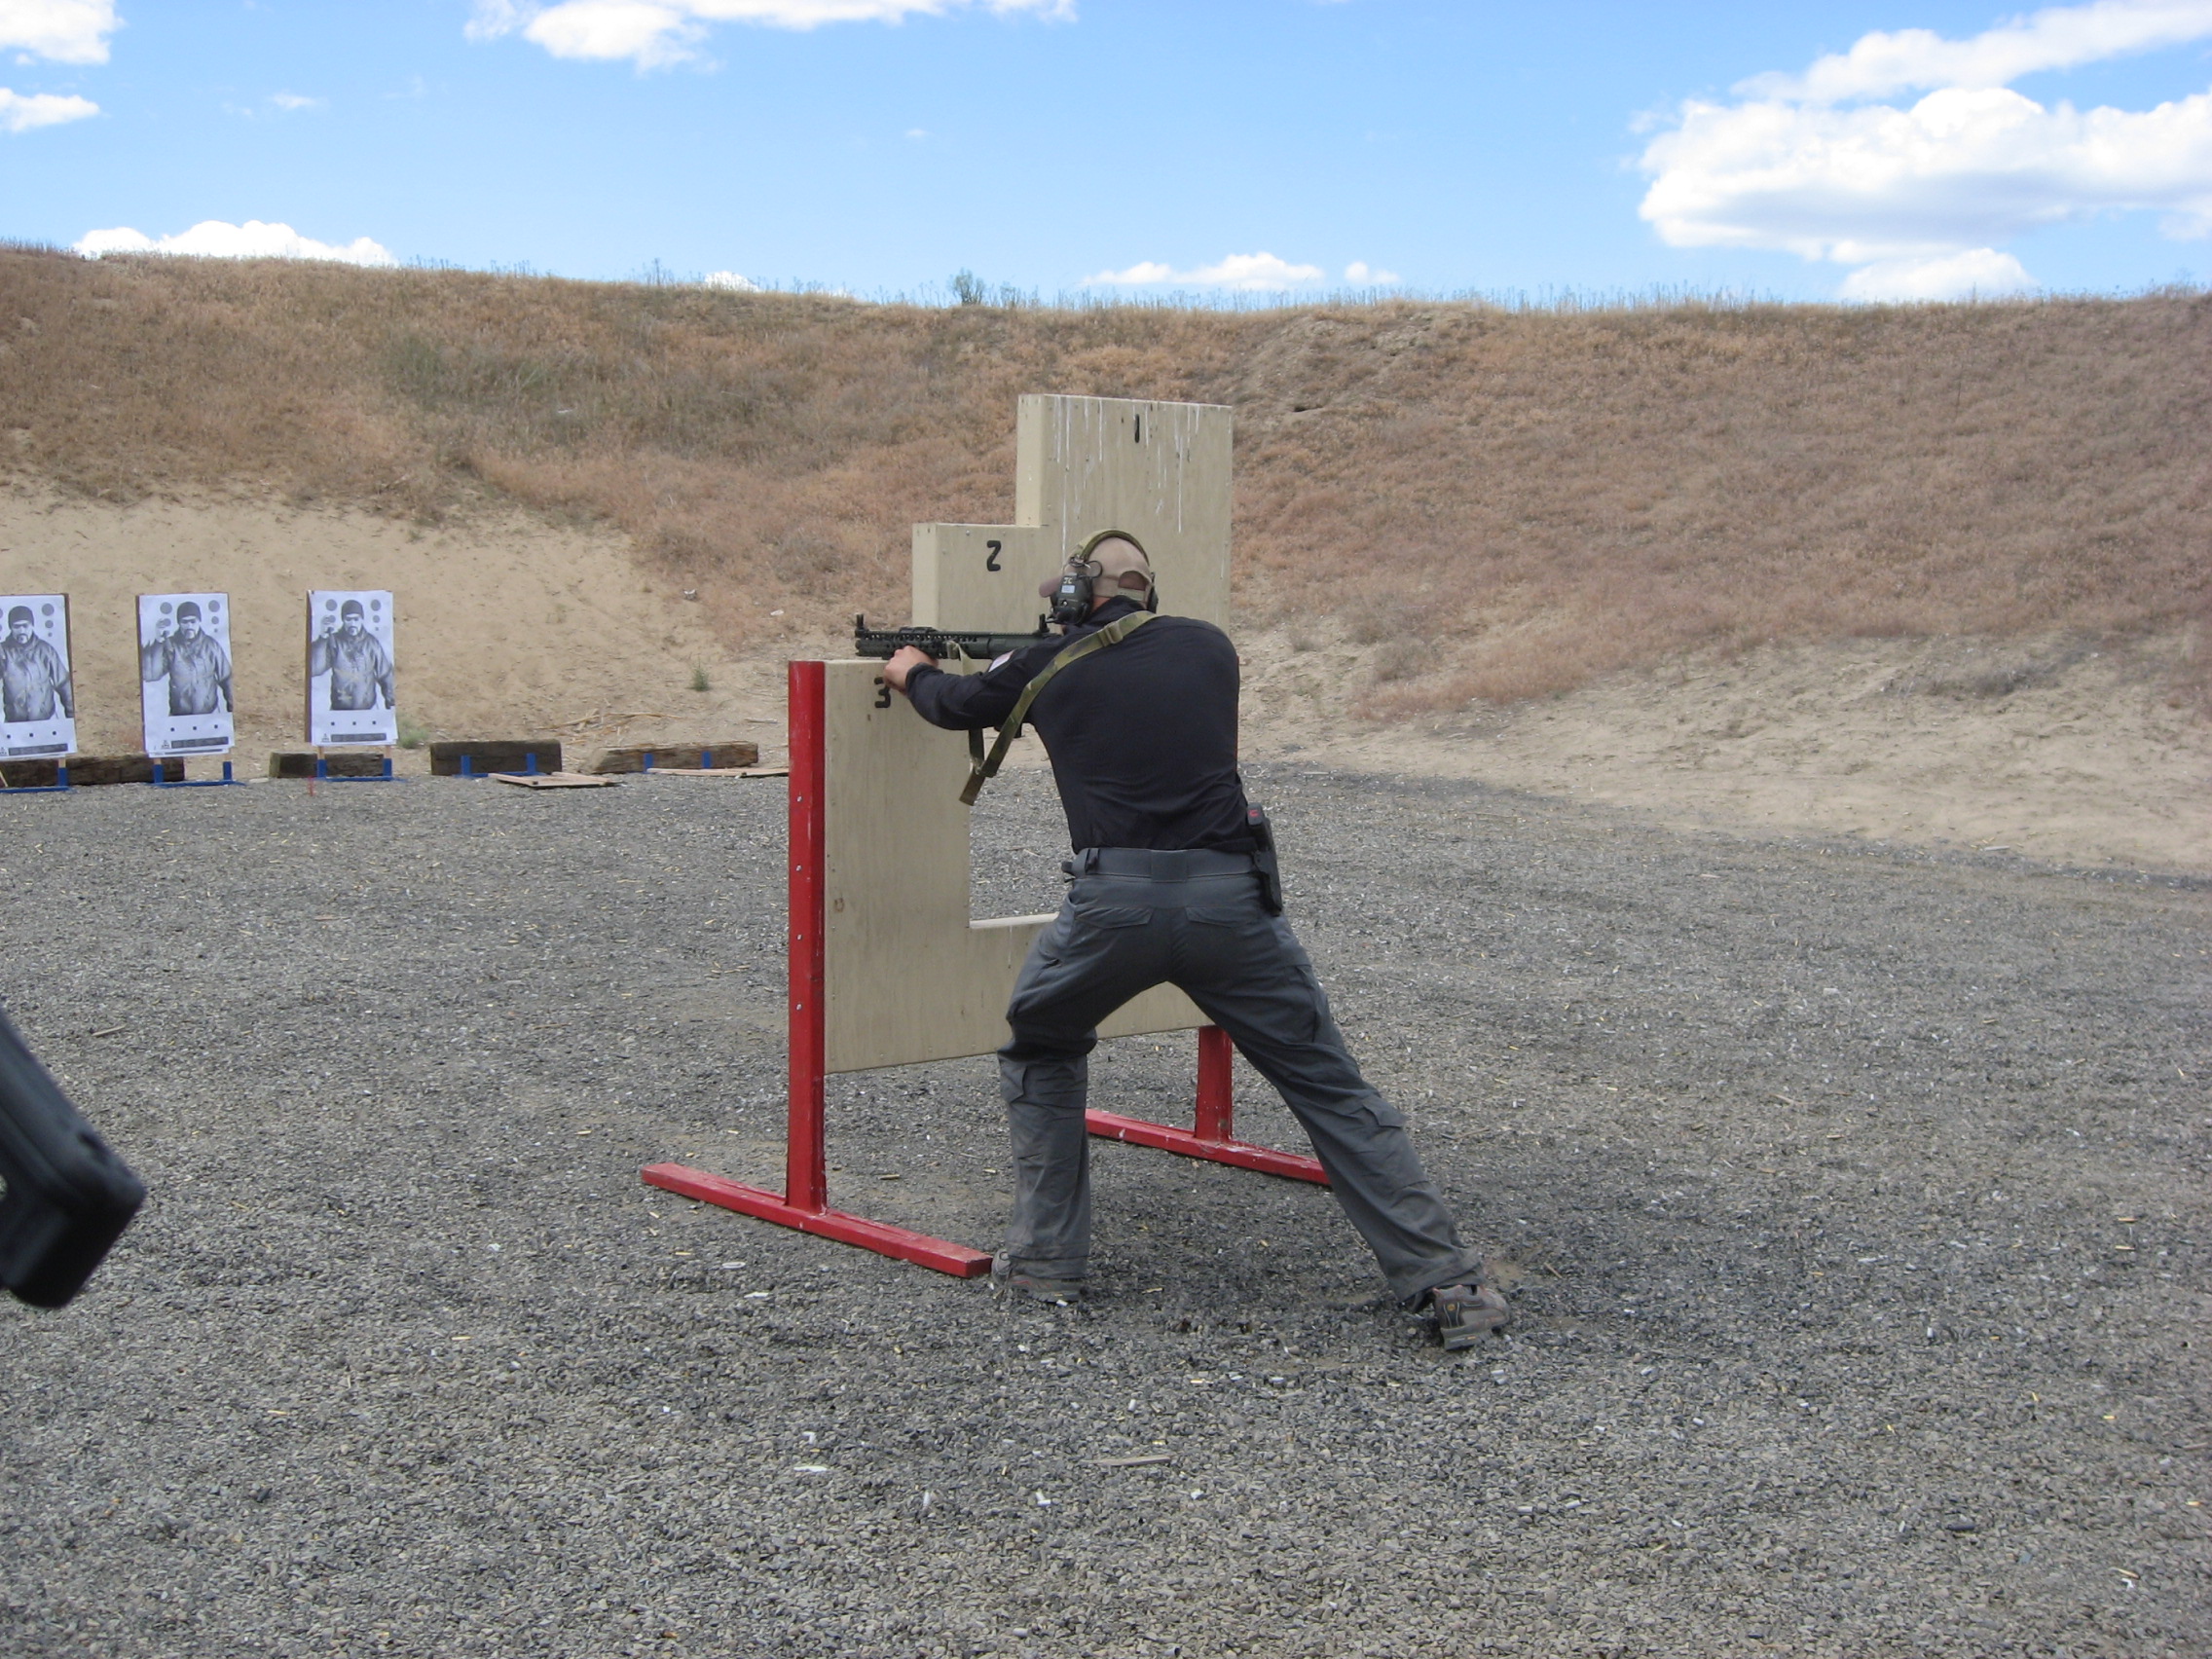
Jon is teaching engagements from behind a barricade, notice his “space” gun with the new slim profile Magpul BUIS:

Magpul_Carbine_1

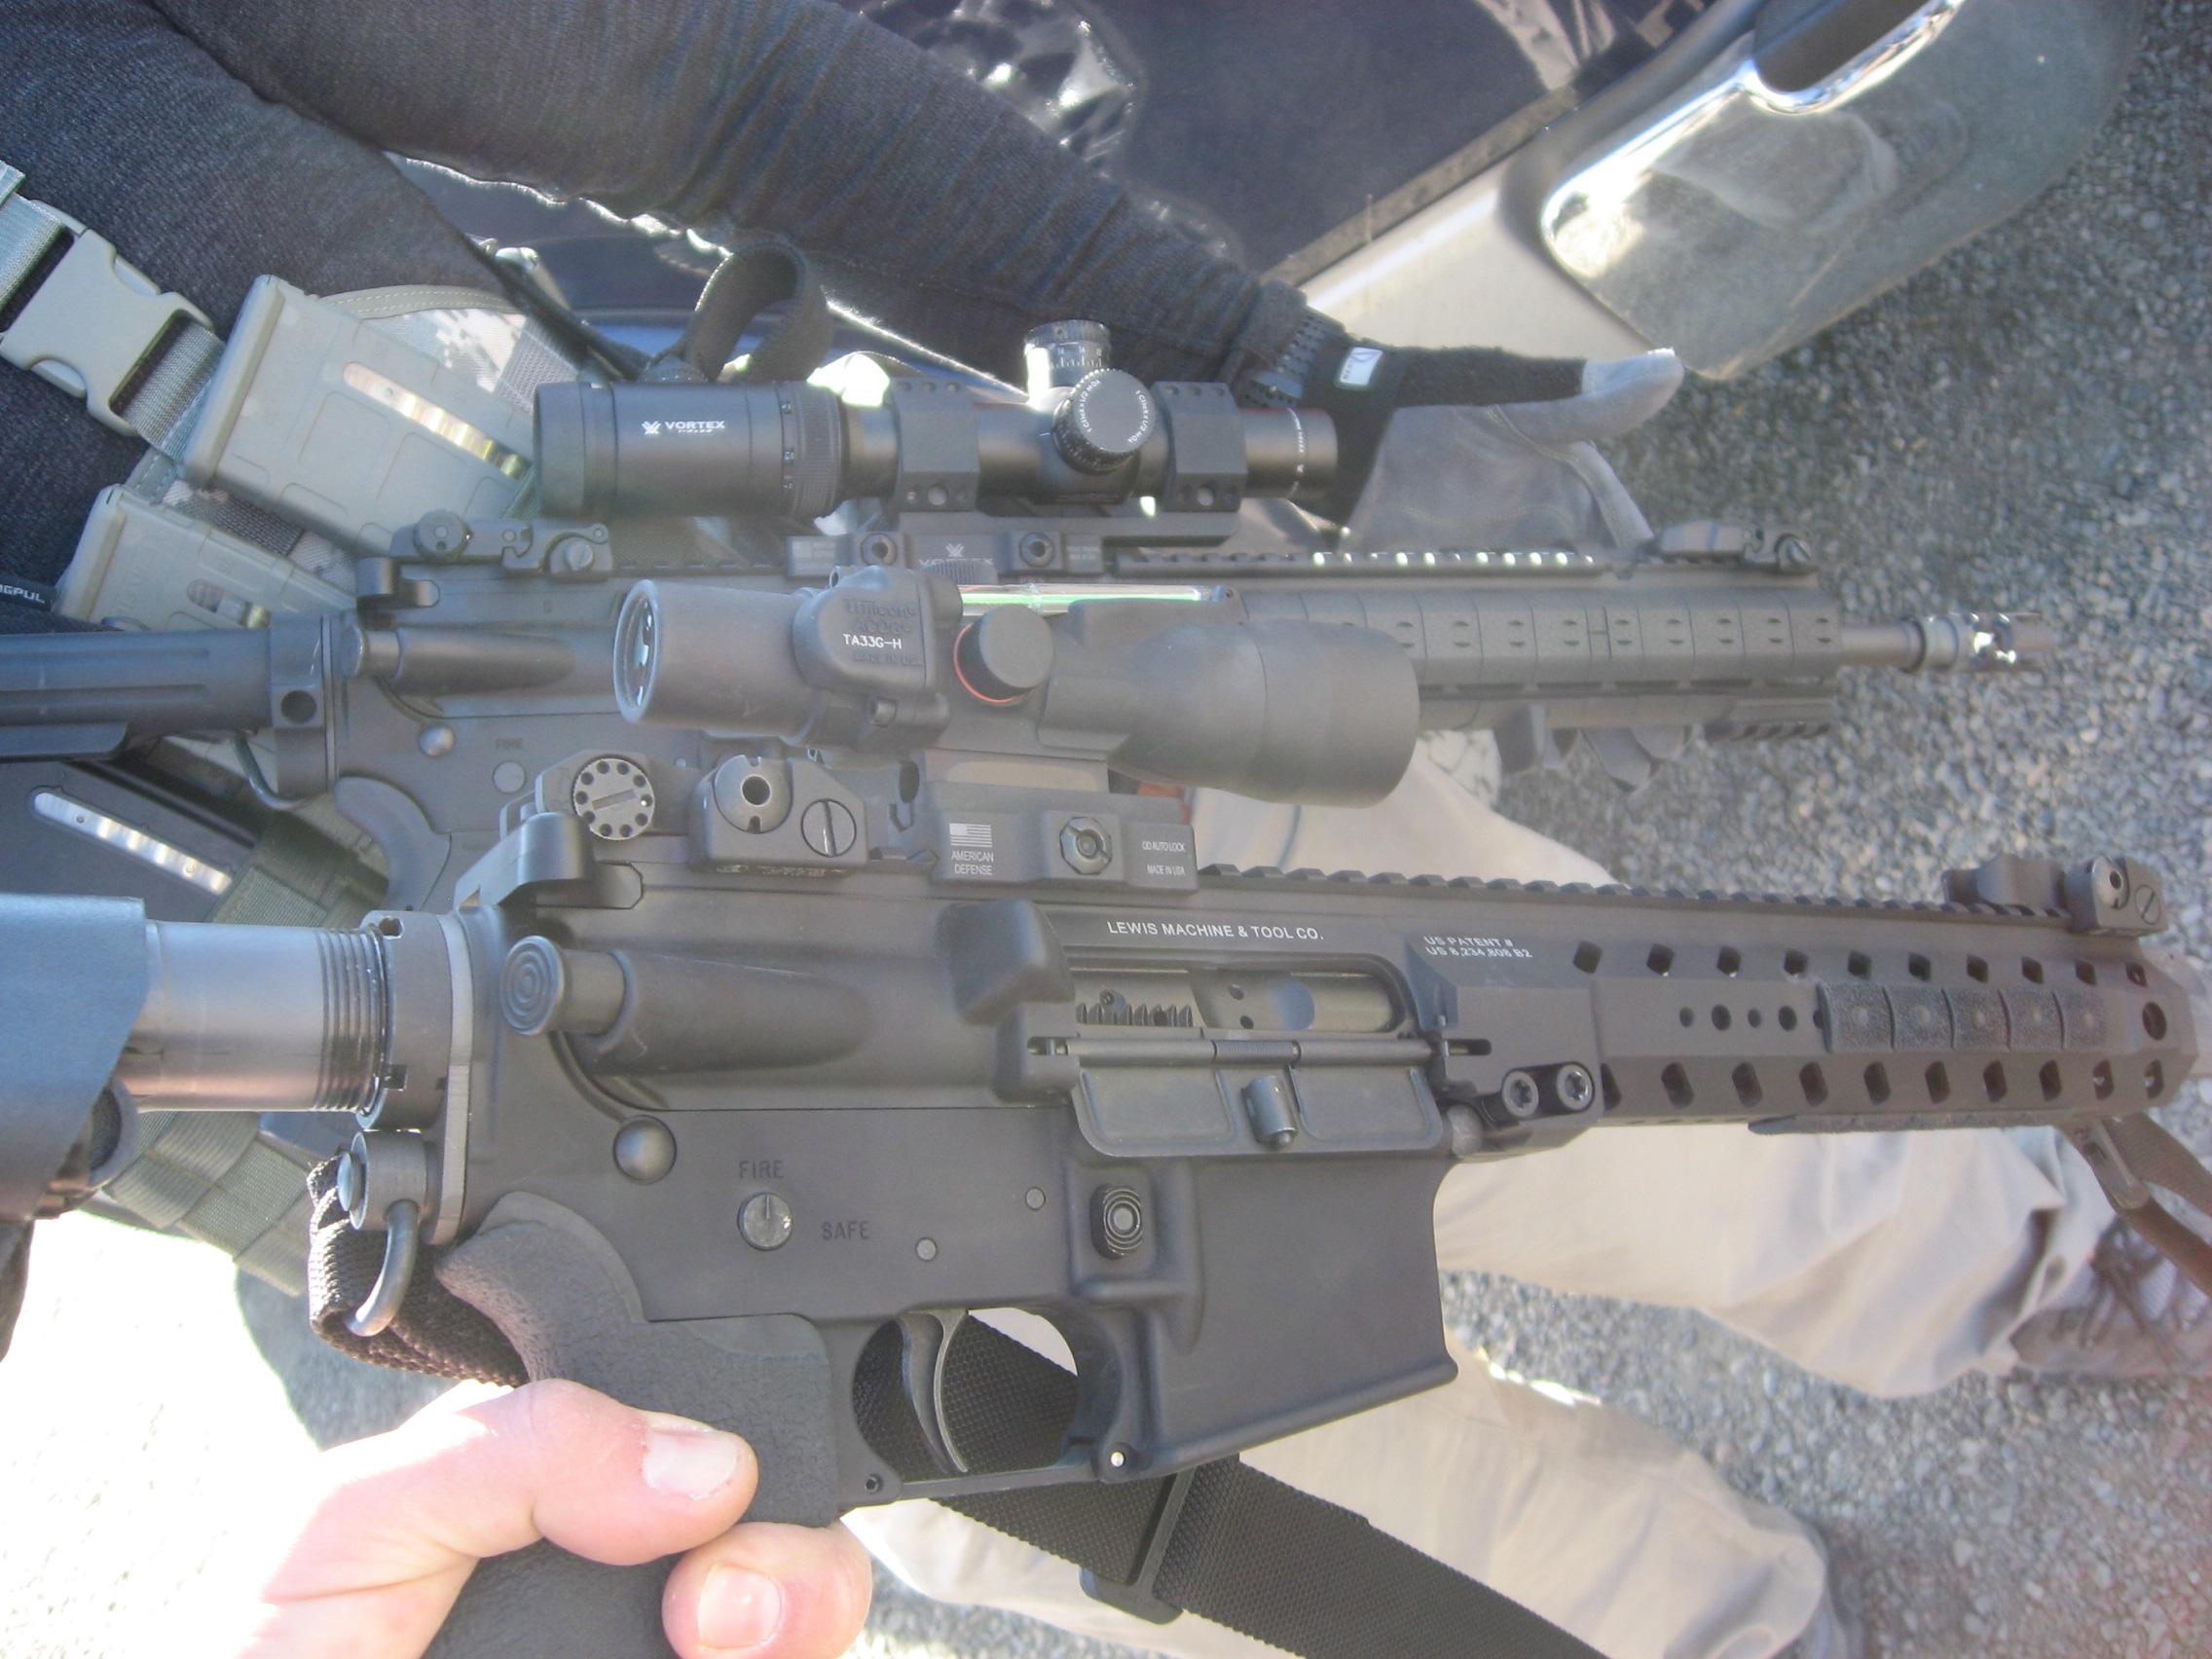
PWS MK114 and LMT AR – These bad boys were hitting steel at 450 yards

Magpul_Carbine_2

Mid Distance Range

Magpul_Carbine_3


  • Share on Tumblr

Oregon Firearms Academy Low Light / Night Fire Class

by GunGuy

I had the opportunity to take a Low Light / Night Fire Class at the Oregon Firearms Academy this past November. The instructors in the class were utmost professionals, knowledgeable and easy to talk to. For those of you who are planning on taking this class in the future keep in mind that Oregon in late November is cold. The staff at OFA were kind enough to have a fire going outside and a covered heated area to keep away the frost. The temps hovered in the 20’s and once the sun went down the temps dropped into the teens and the cold took a toll on all of us.

We started the class at 11 am with about 45 minutes of class room instruction going over safety, differences in hand held and weapon mounted flashlights, techniques and then moved out to the range. Once on the range we went over how to use the flashlights in conjunction with our firearms and strong hand shooting with and with out barriers in place. The daylight live fire prepared us for the low light and night fire portion and we worked out any kinks before the night fire commenced.

During the class we covered shooting in low light, partially lit like a parking lot, complete darkness, strobe lights if there were cops or emergency vehicles around and they popped a couple of smoke grenades at the end to show you how it would be in a fire or disaster situation. There was a strong emphasis on holding the flashlight with the support hand, firing two shots with your strong hand and then moving in one direction after turning the light off. The most important thing was to move after you use the flashlight, even if it was accidental, because the bad guys would shoot at the light.

At one point after it got dark the OFA staff had us do a side by side of all of the hand held flash lights and my $25 Led Lenser V2 flashlight was just a little less bright than everybody’s more expensive lights. I like the idea of running flashlights that run on readily available AAA’s and not on CR123a’s. The downside of AA and AAA flashlights is that if you put alkaline batteries in them they might leak. So you have to check the batteries on a semi regular basis. Alternatively my weapon mounted Streamlight TLR-1 used CR123a’s and was brighter than the hand held so the choice is yours. The instructors commented on having a weapon mounted light and a handheld if you are military and or a law enforcement officer. If you are a civilian two hand held flashlights would be your best bet because if you drop one, you have an extra. This point was reinforced as I dropped mine at one point during the class and I couldn’t see anything in the dark. Luckily the guy next to me had an extra and hooked me up.

Here is a quick run down of what I took away from the class.

  • Fighting is a cave man thing. Too much technology can be a hindrance.

  • Keep your equipment simple. Complicating things under stress will mess you up.

  • OFA staff recommended weapon mounted lights in the 200-1000 lumens range for rifle and in the 200-300 lumens range for handgun.

  • Use the light in short bursts. After you use your light on purpose or accident you have to move.

  • A light is for illumination. Don’t illuminate with the gun. Have a hand carry as well.

  • Lights can also be a liability. The tell everyone around you where you are.

  • When using a flashlight and you use a lanyard have it around your hand but not around your wrist. Having it around your wrist allows someone to pull you off balance if they grab the light.

  • A Tiger ring for the flashlight allows more freedom of movement for your hands but it isn’t for everyone.

  • Night sights are not a necessity. You can use spillage from your light to light up your pistol sights.

  • Tritium half life is 12 years and Tritium night sights will give off adequate light for 5-7 years depending on your eyesight.

  • Lasers are a mixed bag, some rely on it too much. They focus on the target and not on their sights.

  • Using strobe flashlights makes it difficult to see peoples hands and disorients the other person and yourself. Supposedly strobe lights are good against dogs.

  • The bright led flashlights beams dissipated in fog, rain and smog where the incandescent lights cut through a little better.

  • A concern for weapon mounted lights is if they get stuck and don’t turn off the bad guys will shoot at the light.

  • In a house the higher lumens will reflect off picture frames, mirrors, white wall. Low lux flooding beams can be more useful in this situation than high lux because they do not splash back as much.

  • Have a red or green filtered light  to look at things up close, such as your targets, so you don’t lose your night vision. If you use the white light it will take 20-45 minutes to regain full night vision.

  • Don’t take shortcuts with your arms, you can shoot yourself, the middle of your chest is home base. Don’t cheat and have your hand behind the back of the gun.

  • Share on Tumblr

Ontario RAT 5 After Action Report

by GunGuy

I took the Ontario Rat 5 with me to a bushcraft class about a month ago. The knife made short work of splitting pieces of wood in half using another larger piece of wood as a hammer. While using the RAT 5 for fine work such as making notches in branches in order to set traps and making frames it was lacking. The RAT 5 had a flat grind which did not allow me to perform fine woodworking easily. My lady had a Mora knife which had a Scandi /Double Bevel edge and she had a much better time performing the exercises during the class. Her experience with the Mora knife allowed her to make cuts in the wood easily. In the end it all came down to the type of grind a knife had when we were practicing our wood cuts.

The RAT 5 and Mora knives held up very well after 5 hours of wood carving. Both are carbon steel blades. I added Black Magic grip tape to the top and bottom of the RAT 5 knife in order to give it a better grip. I left the Mora knife as is because of it’s fine rubber grip. In an ideal camping / survival / bushcraft situation I would have both but if I were to consider just carrying one knife I would go with the Mora knife. I have some pics of the knives, wood carvings and knife edge types below.


RAT_5_Bottom

RAT_5_Top

Mora_Knife

Knife EdgeTypes


  • Share on Tumblr