Tag Archives: Remington 870

Remington 870 Shotgun Range Report Plus Mods

by Gunguy

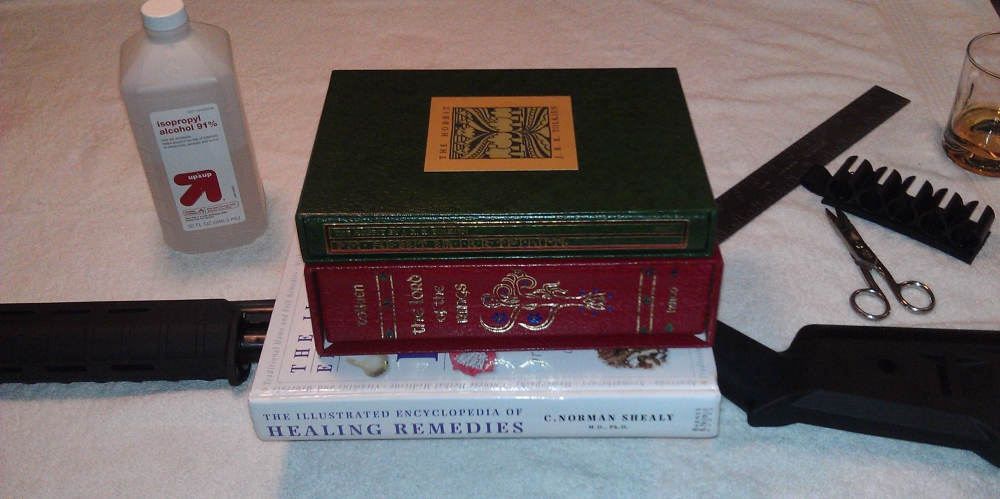
I purchased a Remington 870 Express Tactical Shotgun several months ago. The shotgun was very accurate using the iron sights and I was shooting excellent groups with slugs at a 100 feet with out any trouble. After zeroing the shotgun I wanted to make some improvements. The default stock on the Remington 870 Tactical Express was pretty awful. The shotgun kicked like a mule and I started to flinch after less than a dozen rounds. I was very happy with a Speed Feed stock that I purchased for my Mossberg 590 over 10 years ago so I decided to get one for my Remington 870 as well.

I initially was going to go with the pistol grip Speed Feed III stock but after reading reviews stating that the grip was better suited for larger hands I decided to go with the Speed Feed I stock which holds four shells, two on each side.

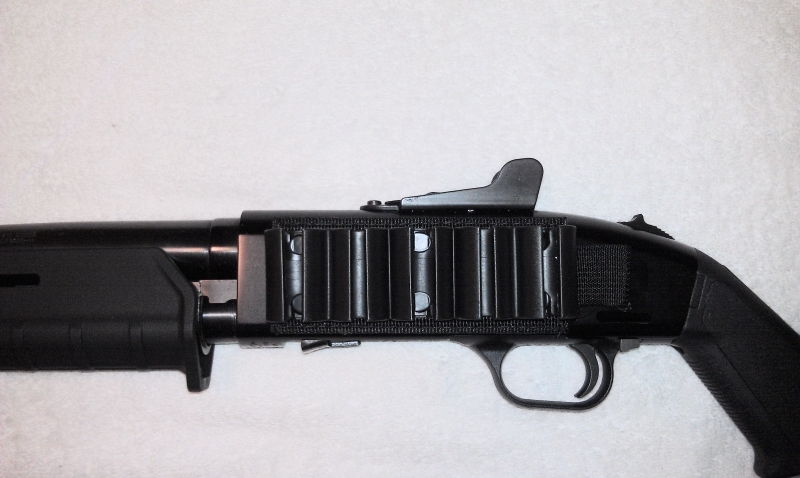
In addition to the stock I added a six shell  TacStar Sidesaddle shot shell holder and your average run of the mill sling.   The only thing missing on the shotgun was a flashlight. I’ve tried the Elzetta Tactical flashlight mount that I used on my Mossberg 590 but it pinched the magazine tube and bound up the spring and prevented proper loading of the shells. I considered one of the Sure Fire fore grips but the battery life on the flash lights is abysmal. The short battery life span plus the price tag on the Sure Fire fore grip, around $400, made me look for another solution.

I’m considering several different options but I have not made up my mind just yet.

After I installed the stock and shot shell holder I took the shotgun to the range and put about 50 rounds of slug and 00 buck shot through it. The Speed Feed stock reduced the felt recoil of the shotgun noticeably. The stock 870 was pretty light weight with 6 shells in the magazine tube. After putting on the after market accessories I could keep 16 shells on/in the gun. The additional weight was noticeable but because of the placement the shotgun was still well balanced.

The 870 Tactical came with a factory installed 2 round magazine extension, picatinny rail and an intimidating tactical choke tube. The tactical choke kept coming loose through out my time at the range. I found myself constantly tightening it and checking to see if it was in tight enough.

I could put a drop of blue loctite on the threads but for a defense weapon and the occasional trip to the range I’m not going to bother. With my sparse additions I could store the shotgun with 16 rounds at the ready in case of an emergency. I have the shotgun loaded with Winchester 12-gauge Supreme Elite PDX1 shells and in case a home defense situation arose I believe it would more than suffice.

See the pictures below of the groups, the stock shotgun and the shotgun after the accessories were put on.

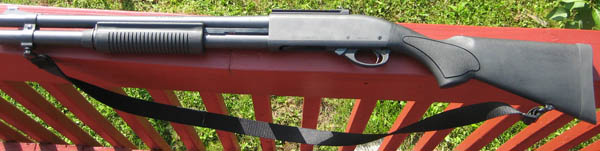
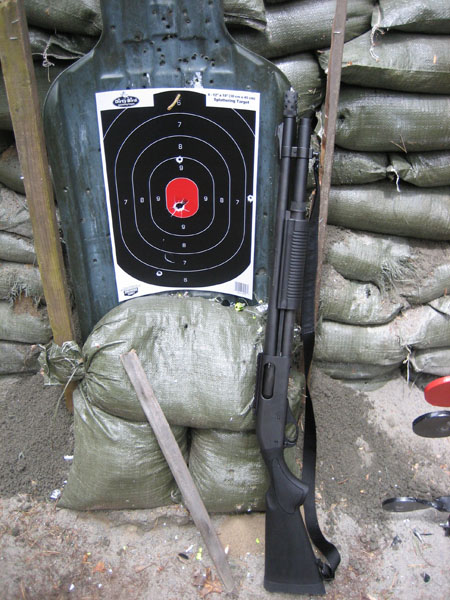
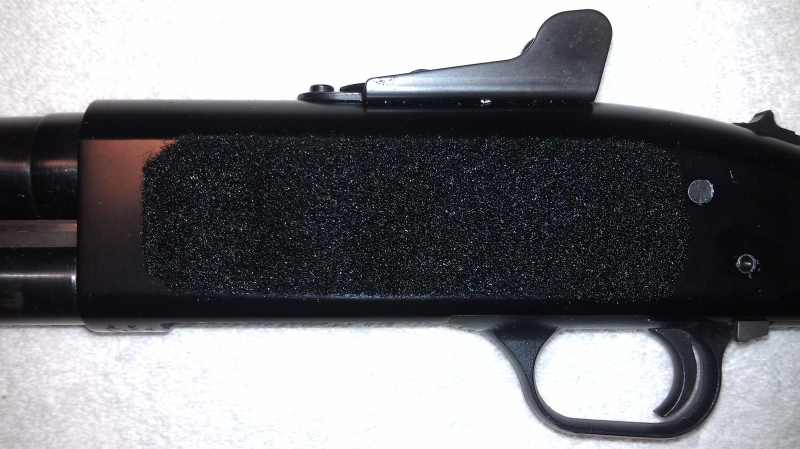
Stock Remington 870 Tactical Express

Stock_870

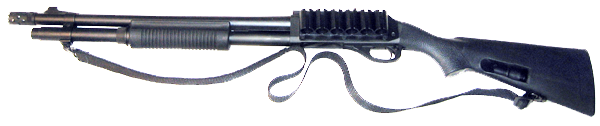
Remington 870 Tactical Express with Accessories Left Side

870_left

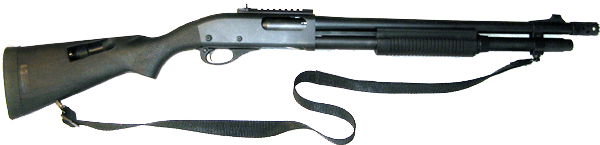
Remington 870 Tactical Express with Accessories Right Side

870_right

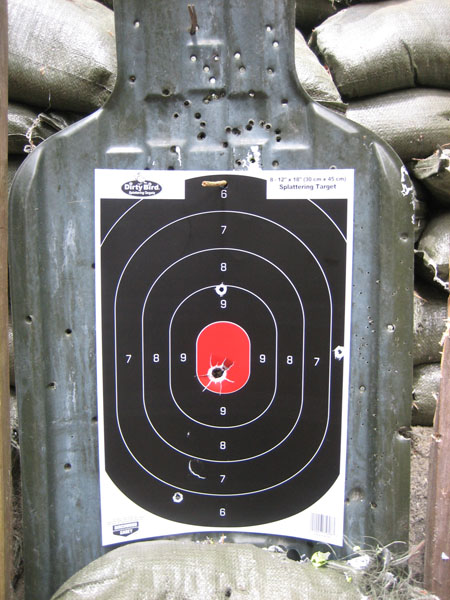
Remington 870 Tactical 15 Meter / 45 Foot Target

15_meter_zeroed

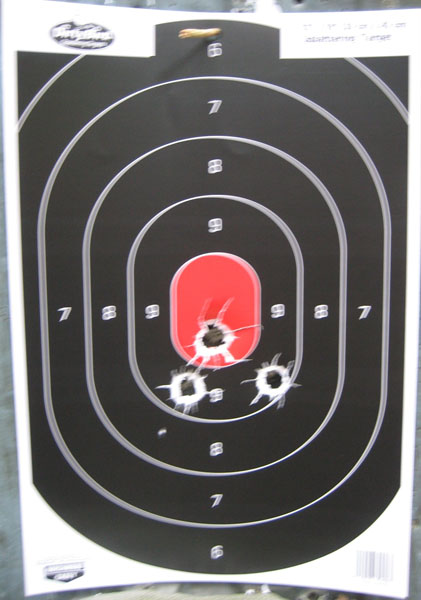
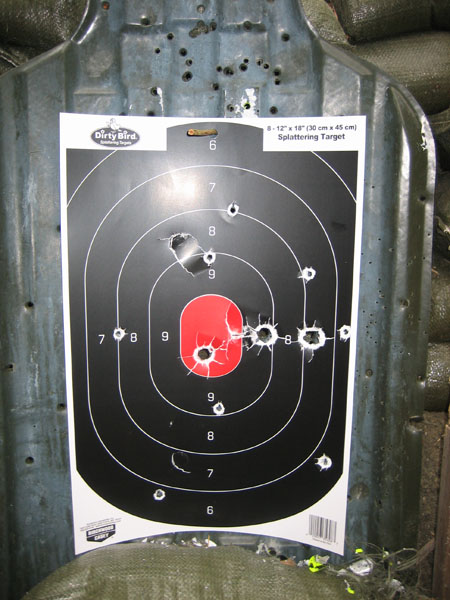
Remington 870 Tactical 33 Meter / 100 Foot Target

33_meter

  • Share on Tumblr

Costa Ludus Shotgun Class After Action Report

by GunGuy

Class Attended

Shotgun Employment

Instructor
Chris Costa

Class length
3 Days

Class Description
This course is designed to give the beginner, intermediate or advanced shooter the proper Shotgun fundamentals. Starting with mindset, the class focuses on the core foundation of proper manipulation and function of shotgun employment to include the use of Slugs, 00Buck patterning, and ammo change overs. This course will leave the shooter with a proper shotgun foundation in manipulation.


Ammo
(minimum amount, I brought about 20-30% more than recommended)
600 rds for handgun, and 400rds 00Buck, 100rds Slugs, 100rds Bird.


Gear Brought to Class

Remington 870 Express Tactical with Magpul forend, adjustable stock, and sling swivel
Magpul MS3 sling
Tacstar Sidesaddle mounted on 870
S&W M&P9 VTAC with Apex DCAEK trigger kit installed and 4 extra magazines
VTAC Brokos belt with VTAC cobra inner belt
Mounted on the belt above was a Bravo Concealment pistol kydex holster, Bravo Concealment pistol magazine pouches, 3 California Competition Works 4 round shotgun shell holders, Maxpedition dump pouch, Dark Angel Medical Pouch and leatherman


Thoughts

The class was three days long. On the first day we did strictly pistol and we went through about six hundred rounds going over our basics and one handed pistol drills.

On the second day we sighted in our shotguns and went over accessories and the importance of using blue loctite on every screw on your shotgun. I found this out the hard way on day 3 when I lost two screws from my 870 XS Frontrail sight, my extended magazine tube started causing FTE’s because it was loose and my sidesaddle was wobbling around which made feeding the gun more difficult.

One of the most eye opening lessons on day 2 was the use of good 00 buckshot ammo. I was using Federal Premium Self Defense 00 buck  also known as Federal Premium Law Enforcement Ammunition TACTICAL (Fed Tac) during the 00 buck patterning portion of the class. Firing this ammo through my stock 870 tactical barrel I was getting very tight groups in the chest up to 15 yards and the performance was passable out to 25 yards. Several people next to me were using 00 buck made by Remington and Sellier & Bellot. Their patterns were wider and inconsistent the further back we went. The patterning was so wide that the lesser quality 00 buck was not usable past 10 yards without running the risk of hitting bystanders. Almost everyone at the class agreed that the Fed Tac 00 buck which also happens to be low recoil was the best one to use.

Another great lesson learned on day 2 was how to properly hold and fire the shotgun. I found this very useful since before this class I would come away with a bruised shoulder when firing a shotgun. Costa taught us how to fire the shotgun without getting bruised. It’s all about using the push pull method when firing. Here is a video by Rob Haught demonstrating how it works.

On the third day we did shotgun and pistol transitional drills. Everybody was safe but an important lesson that stuck with me was to watch your feet when you’re firing the shotgun off your back. It’s way too easy to blow your feet off if you’re not paying attention. Towards the end of the third day I managed to have some serious failure to eject (FTE) issues with my shotgun. There was about two hours of class left and Chris Costa lent me his spare 870 so I could finish up the class.

When I took the shotgun home and did a postmortem on the gun I found that failure to ejects were caused by a loose factory two round extension tube. The Remington factory extension tube is two pieces. The extension tube is screwed into magazine cap. The magazine cap with extension tube is then screwed down to keep the barrel in place. On earlier models of 870’s you would have a magazine cap detent and magazine cap detent spring to keep the collar from shaking loose. My temporary solution for preventing this is to use blue loctite the extension tube into the magazine cap so it handles as one unit and then screw it down against the barrel as hard as I can. This part will be replaced so I don’t run into this issue in the future.

Issues Encountered

  • Stock plastic ammunition tube follower sticks when loading ammo quickly
  • FTF’s and FTE’s caused by the barrel not being seated in the receiver properly due to the stock Remington extension tube coming loose
  • Tacstar sidesaddle came loose even with repeated use of blue loctite
  • Stock to cheek weld needs to be improved

Upgrades to fix Issues
Scattergun Technologies Magazine Tube Extension to fix the follower and FTF and FTE issues
High Speed Gear Shot Shell Tray to fix the wobbly sidesaddle issue and to increase speed of reloading
MagPul SGA Low Cheek Piece Riser Kit to fix the cheek weld issue

Final Words
I went in feeling that the shotgun was my weakest link and left very confident in my ability to use a shotgun to defend my home and family. I completely recommend taking any class that Chris Costa is offering. The class was great.

  • Share on Tumblr

Winchester 12 gauge Supreme Elite PDX1 Range Report

by Gunguy

My buddy and I came across the Winchester 12-gauge Supreme Elite PDX1 ammo while checking out a gun store a couple of weeks ago. We were impressed by the idea of a slug and 3 00 buck shot combo for home defense. The slick packaging and black shell casing definitely didn’t hurt either. The ammo cost about $12 a box with tax. At that price it’s not something that I’m going to shoot on a regular basis but I had to try it out to see if it was worth its salt.

I loaded up three rounds in my Remington 870 and fired three rounds at 15 yards / meters. I was using ghost ring sights on the 870 and the results are pictured below. My friend and I were very impressed. We wondered how the Supreme Elite PDX1  were packed so I went on the website and found that the 3 00 ought rounds of buck shot went toward the target first followed by the1 ounce slug. Let me know if you guys have any questions.

870_remington1


D_15_Yard_1

K_15_Yard_31


D_15_Yard_3


  • Share on Tumblr

Mossberg 590 Velcro Side Saddle / Shot Shell Tray How To

by GunGuy

I’m a big fan of Mossberg shotguns. I’ve owned several over the last twenty years except for a brief stint with the Remington 870’s. I’ve apologized for my cheating ways and now I’m back in the loving embrace of a Mossberg.

I added a Velcro HSGI shotshell tray to a used Mossberg 590 that I picked up recently. Here are some notes and pictures to get you on your way to duplicating this project.

Supplies Needed

Step 1: I prepped the side of the shotgun by wiping it down with Isopropyl alcohol several times and then let it dry.

Velcro_Side_Saddle_1

Step 2: Using the ruler and utility knife I cut the Velcro a little longer than the shot shell carrier and a little shorter then the height of the side of the receiver. The size of the Velcro strip was 5 .25 inches wide and 1.5 inches high. I used scissors to round the corners so they would not curl up.

Velcro_Side_Saddle_2

Step 3: Carefully I placed the Velcro just in front of the trigger group pins so I could have access to them when field stripping and also allow the serial number to be seen. The adhesive is very tacky so and it won’t come up once you put it down on the gun.

Velcro_Side_Saddle_3

Step 4:  I stacked several books on top of the newly laid piece of Velcro and let it sit for 24 hours until it cured.

Velcro_Side_Saddle_4

Step 5: Once the adhesive cured I put the shot shell carrier on the shotgun and gave it a test run by pulling it off and putting it on several times. I have a shotgun class coming up shortly and I’ll give it a thorough breaking in then.

Velcro_Side_Saddle_5

  • Share on Tumblr