Bow Making Outing – Part 1

by Woodsbum

This past weekend I met up with a few other guys and started a new project to build my first bow. The whole process is actually fairly easy and straight forward. Well, it was up to this point at least.

We used the following instructions to do our project: link but there were additional instructions at this link. The hardest part was actually finding the wood. I ended up getting a 10 foot chunk from Home Depot and cut the middle portion out. It is better than anything else I could find, but it is definitely not the quality needed for making a good bow. With a backing, however, it is usable.

The first step was to cut the wood to length. They recommend using the length of your “wingspan.” Basically measure from finger tip to finger tip with your arms outstretched. For ease of measurement, I just cut mine at 76 inches. This allowed me to divide it into 4 equal 19 inch sections. You can easily read the instructions that contain the measurements so I won’t bore you wit those details. I only suggest that you pick an overall measurement that won’t be a pain in the rear to actually mark out on the wood.

This is basically what we are building.

Bow we are building

Bow we are building

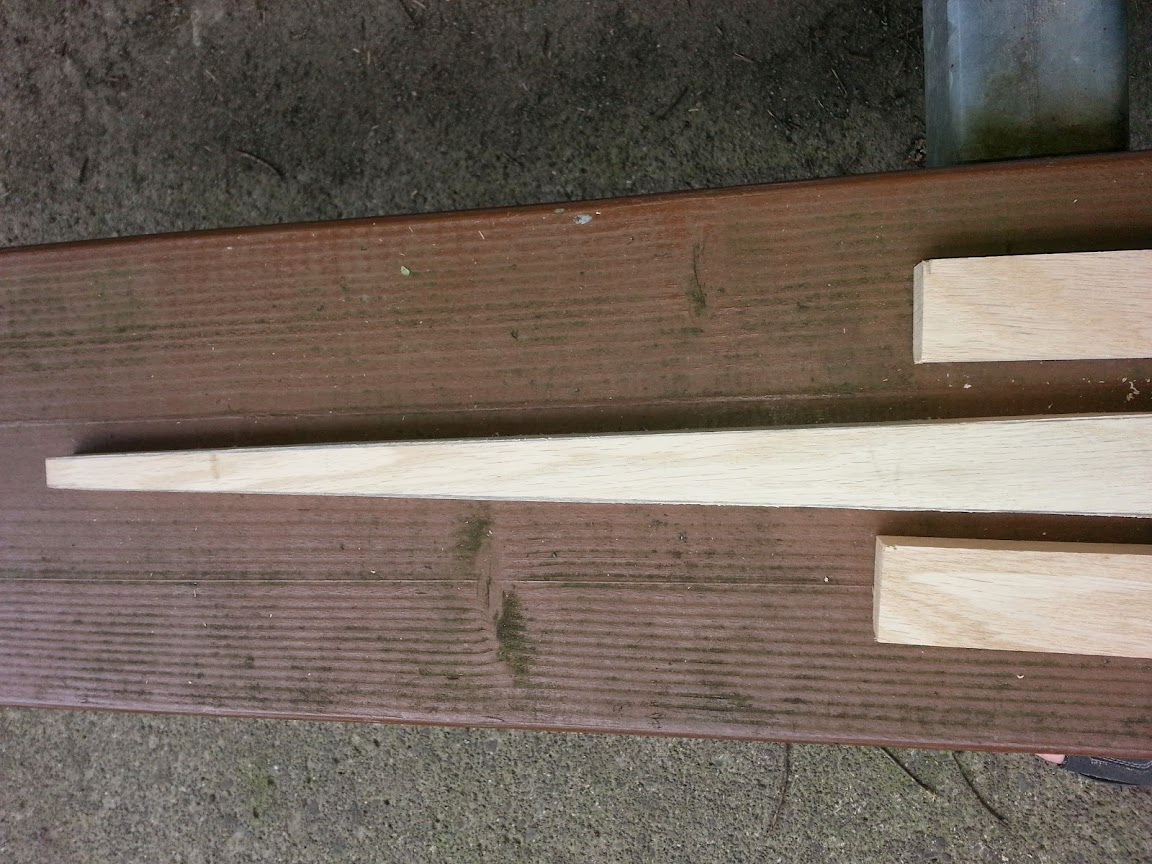
Here is a side view of the bow, tillering board and the rasp I was using to shape the wood.
Tools and bow

Tools and bow

You can see the tillering board, some of my junk in the background of the first picture, a couple blanks on the right side and a finished example of what we are building. The second picture really shows you the rasp to get for shaping the bow. I used this rasp and went mostly with the grain as opposed to the others going across the grain. My results were a rough shaped bow in about 2 hours versus the others not even having one of the 4 sides completed.

For those of you who want to make something all spiffy and nifty just remember that this is a basic bow. It won’t earn you any longing stares of envy from others at a shooting range, but it seems to be a great starting point to learn. In all reality, it isn’t that bad for something you are making yourself.

I do have a couple tips for you that I learned (the hard way) after shaving off the 2 ends of the board.

  1. Be really careful of your lines.
  2. Straddle the board to hold one end with the other end tied off/clamped down/etc.. This position gives you good working area and access as if it were a shave horse or something.
  3. Use long strokes with the wood. It keeps the sides much smoother and cleaner.
  4. Don’t rush.

Here is a good picture of the rasping progress after about 30 minutes. Granted, I got much quicker and better as I went along.

Bow being made

Bow being made

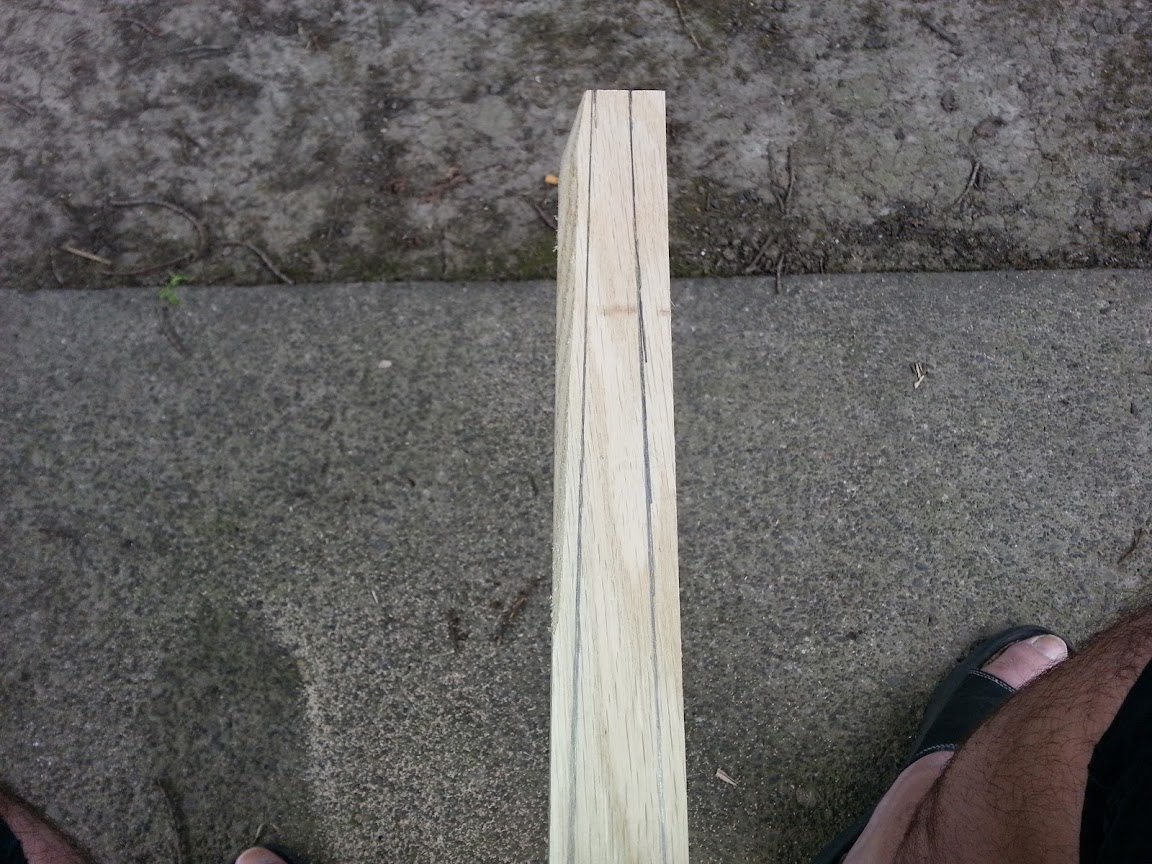
I only had a chance to work for 2 hours before I had to go back to see the wife before she left for work. Here is one end of the bow. The other end looks just like this.

Prepped end

Prepped end

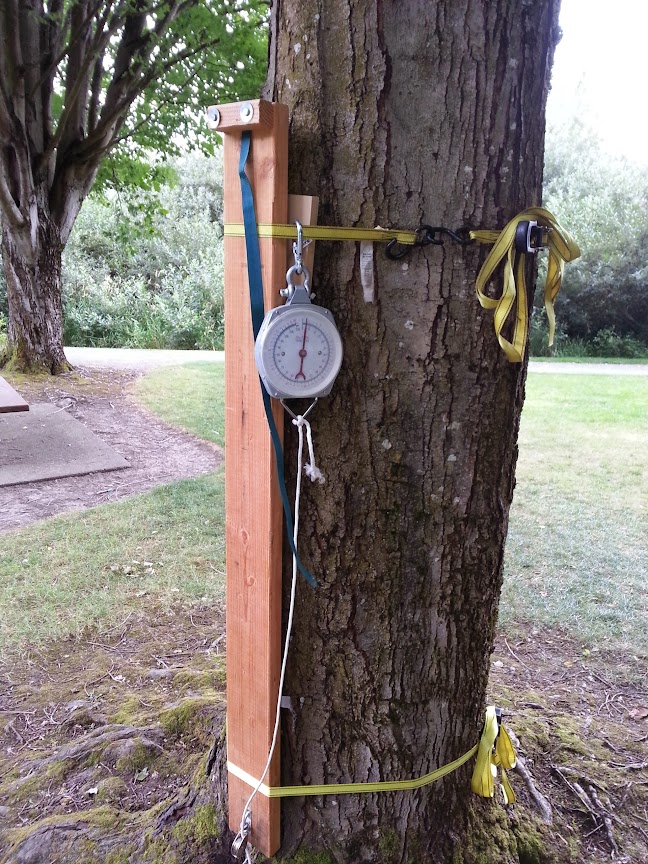
There are more tools that I need to make to finish up this project. This is one of them: a scale and frame to attach the tillering board to.
Scale and frame to tiller our bows

Scale and frame to tiller our bows

I also have some more rasping to do. It will take a while to get everything done, but keep checking back for Part 2 of this build. Anything else I learn along the way, I will post up so you can learn from my mistakes.

This is a picture of all the books that Rick brought with him and has used to get to his current skill level in bow making. Several of these titles will be added to my collection eventually. This really seems like it will be a very addicting hobby.

Some books I will have to add to my collection

Some books I will have to add to my collection

  • Share on Tumblr

The H60 Firestarter

by Woodsbum

Being a complete gear freak has its benefits at times. I ran into a phenomenal piece of gear that I feel needs a post. During an outing with several BushcraftUSA members, I saw the absolute best firesteel I have ever seen. One of the people there works for a company that builds and sells the H60. It is absolutely incredible.

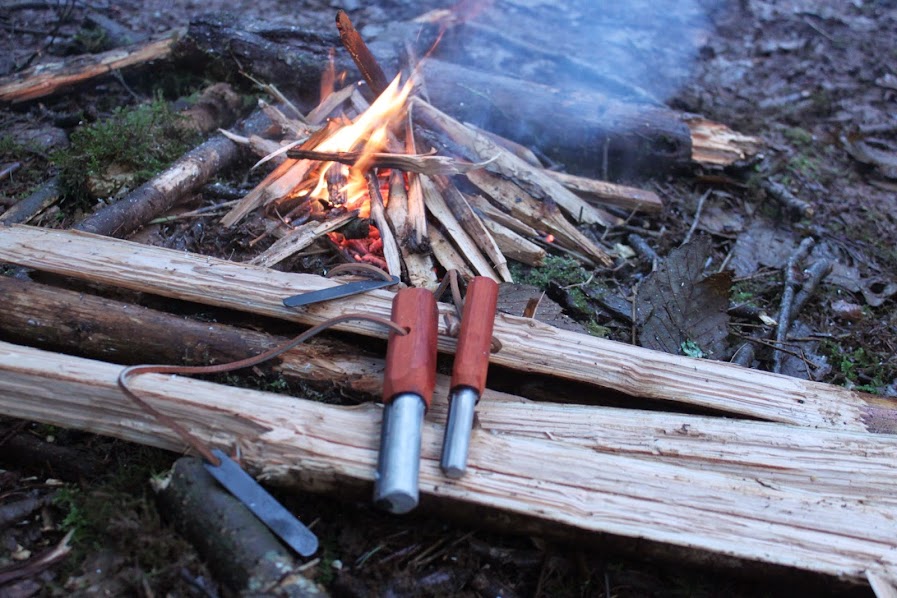
Let me start off by telling you a bit about the H60 itself. Here is a picture of what they look like.

H60 Firesteel

H60 Firesteel

They have a magnesium rod on one side and a normal ferro rod on the other. The handle is made from wood and it includes a striker that is attached via a leather lanyard. What makes this firesteel special are really two things:

  1. The quality of the product that allows it to produce the incredible sparks it can throw.
  2. The warranty.

Here is another picture of the H60 with an Izula-II for size comparison.

H60 and Izula-II

H60 and Izula-II

As you can see, it is fairly large. This design gives you ample amounts of magnesium and wood to use to get a flame going. I have taken the H60 and shaved off the magnesium and wood handle into a twig bundle (Apache match) and ignite the entire bundle with a single strike of the ferro rod. This thing throws sparks like a fiend.

Since I couldn’t catch a good picture of the actual rod sparking, I had to grab a bunch of other people’s pictures for this post. Here is a SMALL set of sparks that the H60 throws.

H60 tossing sparks

H60 tossing sparks

The guy who sells these had his son running around playing with one. The son was able to strike the ferro rod and throw a spark, NO JOKE, 10 feet. The two of them were running around throwing sparks at each other like it was a water fight. The distances that these sparks were going was simply amazing.

When I heard about the lifetime warranty on this piece of gear, I quickly purchased one. The H60 has a LIFETIME warranty. This includes the following:

  • Manufacturer defects
  • Wear from normal use

Yes, you heard that right…..  WEAR FROM NORMAL USE!!!

I have slowly gotten away from using a firesteel because I have gone through so many of them in the past. They wear down fairly quickly during my camping season and thus I picked up using flint and steel. I can find new flint/chert with relative ease and the steel strikers last forever it seems. Now that I discovered the H60, I have a great piece of gear that I can use when I feel extremely lazy and don’t want to blow an ember into flame.

The H60’s run around the $25 range and can be purchased through this link here. If you do end up getting one, please let him know that you found the information on this site. I won’t get anything for it, but it will at least let him know that people do love his product.

  • Share on Tumblr

APEX M&P Duty / Carry Action Enhancement Kit Review

by Gunguy

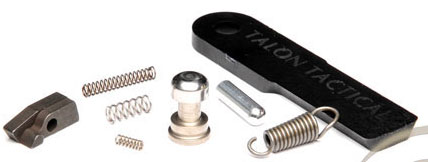
I purchased the APEX Duty / Carry AEK kit about a month ago. The installation was a pain in the ass because I did all the work on my kitchen table but the effort was well worth it. Keep in mind that you will not be able to install the Apex Ultimate Striker Block part of the kit if you do not have a bolted down vise or a SW MP Sight Mover. After you install the entire kit you will need a sight mover at the range so you can rezero your sights.

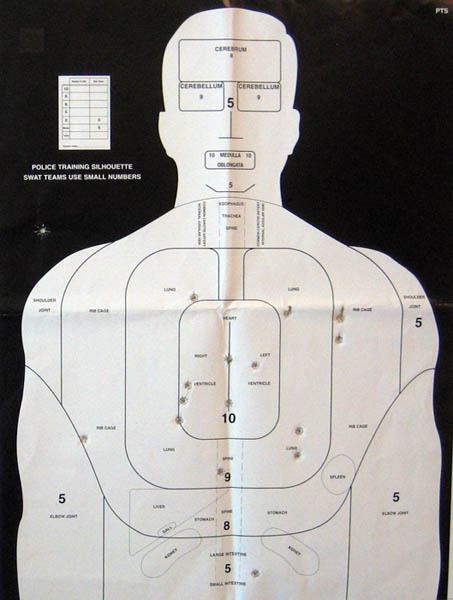
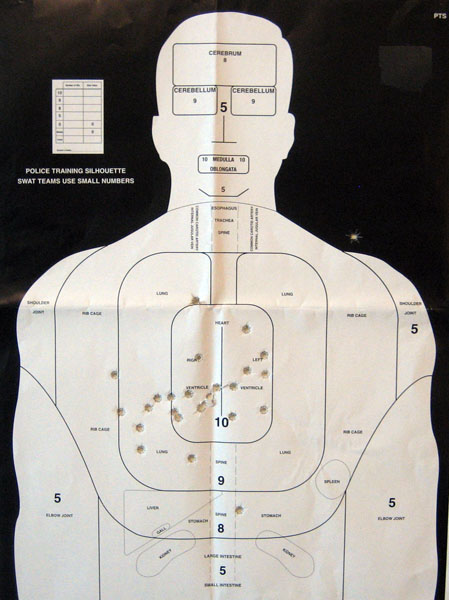
Before I installed the Apex kit the trigger on my MP9 was mushy and had a false reset.  After the kit installation the trigger was smooth and the trigger reset was pronounced. The trigger reset was a 100% better but it’s not as defined as in my Sig 229. The greatest thing about installing the Apex kit was that my groups at 50 feet were considerably tighter. You can see the before and after results below.

APEX Duty / Carry AEK

APEX_Duty_Carry_AEK
Before Apex AEK at Fifty Feet

before_apex_aek

After Apex AEK at Fifty Feet

after_apex_aek

  • Share on Tumblr

Tested Some Tactical Slings

by Woodsbum

I took the wife and son out shooting this last weekend which gave me the opportunity to test out several tactical slings for our AR’s. I borrowed some from Gunguy, wasted my money on a couple, and also borrowed a few from another friend of mine. Here is the list of what all slings we tried out:

Let me preface this whole post by giving you guys an idea of what I wanted in a “tactical” sling for our AR’s before I really get too far into things. We wanted slings where we could carry our rifles in a manner that would allow us to use both hands if needed without slipping off our body. This immediately discounted traditional hunting slings. These type slings tend to slip off the shoulder when using both hands to perform various tasks. You can carry it across your back, but this makes it difficult to still under or around objects (read trees and brush) without getting caught up. This left us only a few options, most of them “tactical” type solutions. Our main requirements were as follows:

  1. Allow easy transition from using both hands to having rifle ready for usages
  2. Make movement in and around brush/trees easy without getting caught up
  3. Be adjustable

To add to the confusion and difficulty in finding a solution, my wife also wanted to make sure that the sling was comfortable to use and easy to adjust…….   Now you see my dilemma.

Our testing facility was quite vast and really tranquil. We took a trip up to the mountains above the city we live in and picked a nice, open valley to test and shoot. Between our two rifles we blew off around 750 rounds of .223. I also carried 2 9 mm pistols to see if the slings interfered with shooting or carrying my pistols. Between .223, 9 mm, 30-06, 12 gauge and .22lr we expended around 2000 rounds in total. Not a whole bunch, but enough to give us an idea of how restrictive these slings really were overall.

The first thing that we found was that 1 point slings were not for us. Not only did they allow the rifle to bounce around hitting us with the barrel while we did other things, but when we slid the rifle to our side to be out of the way my wife would jam the muzzle in the dirt while bending. These definitely did not fit the “easy movement” aspect of our trial. My bruised shin also agrees with these findings……

Now on to the 2 point slings: Quickly, we figured out that the adjustments on the Viking and the Blackhawk! were not as easy to maneuver as we had hoped. The Viking’s adjustment mechanism was reminiscent of the ALICE pack. It was not just a simple slide to loosen or slide to tighten type scenario. Neither my wife or I could fully get the process down that well. We both did, however, love how wide the strap was that went across the shoulder. It was by far the most comfortable system for her. If she never had to adjust the length, she would have picked this strap hands down. The Blackhawk! strap adjustment uses a plastic cam lever clip thing. It takes some true manual dexterity to operate this device with one hand and not drop your rifle. It looks similar to this (my picture didn’t come out very well so I had to shop Google for something you could actually see).
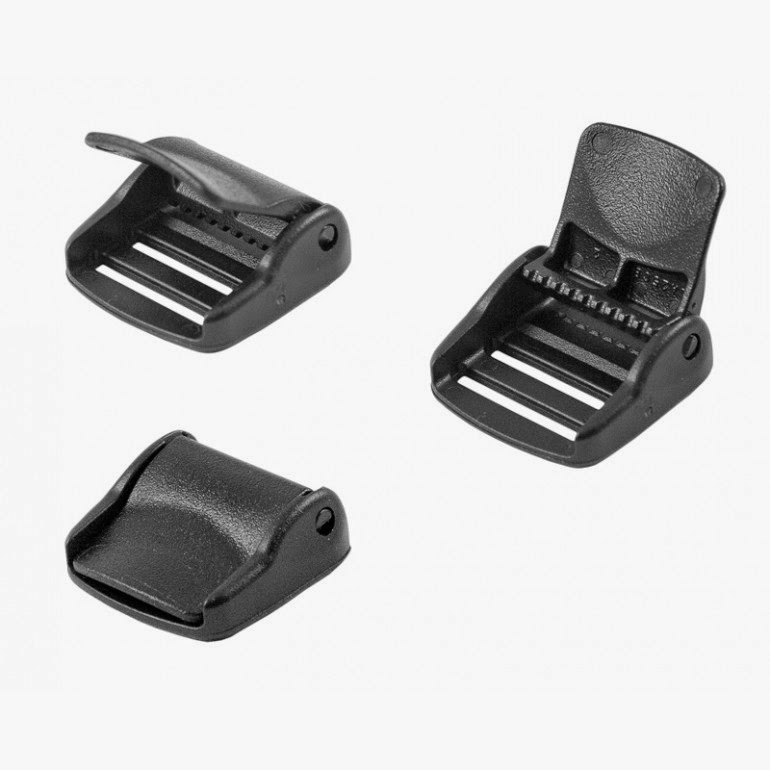
Adjustment clip

Adjustment clip

This left the Magpul and the Blue Force slings. I love the slide adjustment on both. There is a little webbing handle that you grab hold of and just slide into position. The sling actually stays put when adjusted as well. The Magpul used a loop for a handle while the Blue Force had a piece of webbing that was sewn back upon itself to make an actual handle. The top sling in the picture below is the slide and handle for the Blue Force. The bottom one is the Magpul. As you can see, they are both very similar in function and design. Well, they are close enough that I don’t really see that much need to debate or investigate their design. They both work quite well.
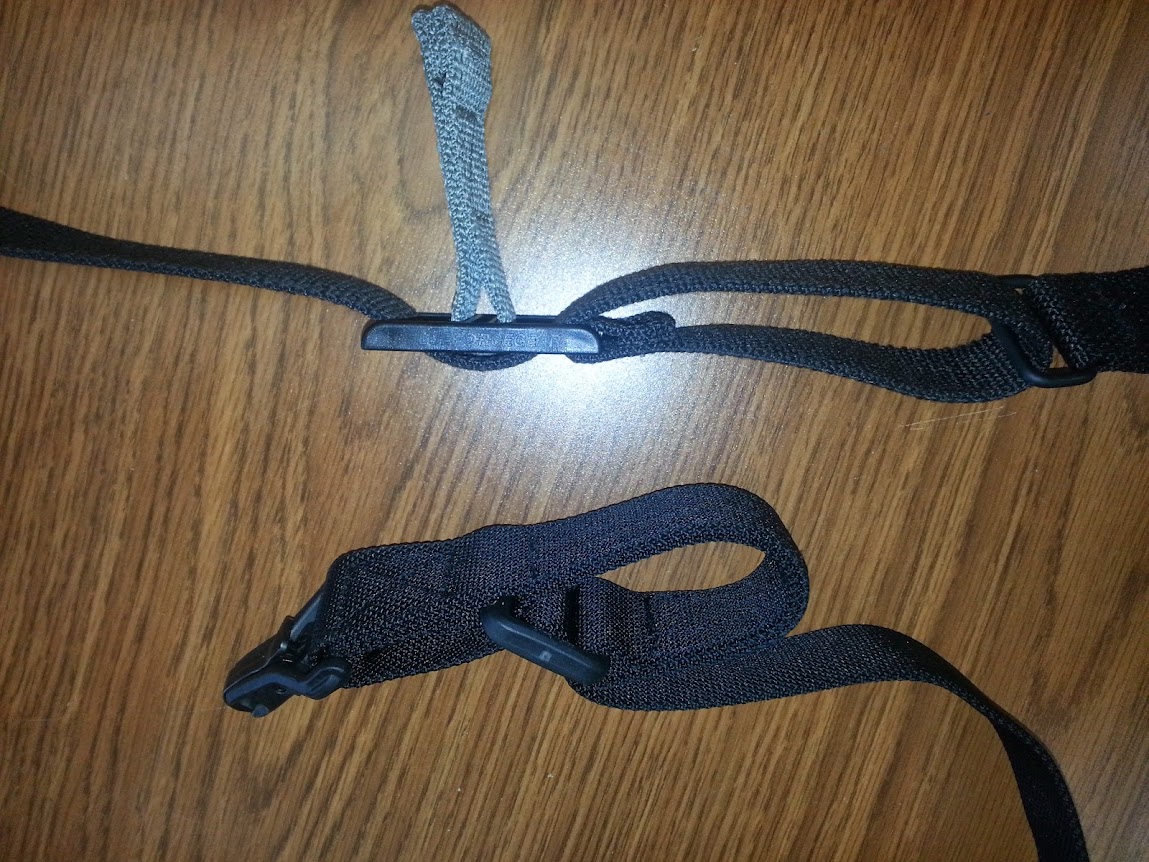
Slide mechanisms

Slide mechanisms

The two things to note about these slings is as follows:

  • The Magpul has built in clips. It doesn’t work efficiently when clipped to normal rifle sling swivels. The clip binds a bit if you are not careful.
  • The Blue Force does not have easy disconnects. You will have to attach the webbing to the rifle using old school slider clips. This isn’t a huge issue for me, but might be a deal breaker for others.

Here is a good picture of the Magpul attachment clip. These are on both ends so having a good ring to attach to seriously cuts down on the binding issue.

Magpul attachment clip

Magpul attachment clip

As it all turns out, I like the Blue Force and will purchase one of those next paycheck. The wife really liked the Magpul, but wants me to figure out a way to pad the straps for her. This might be another post in the making as I figure out how to modify the strap with pads. Hopefully she doesn’t want it Hello Kitty or something creepy like that……

My final words regarding the different slings we tested are quite simple. The slider type adjustment systems are far easier to operate than the other systems we played with. Lastly, webbing is webbing. It is all very uncomfortable after a while. As long as it met my original criteria and didn’t damage my rifle, I was happy. When you go shopping for yourself, make sure you set a couple of criteria that meet your needs and weigh all the options available against those metrics. These


  • Share on Tumblr

The Modern Survival Manual: Surviving the Economic Collapse

by Gunguy

The Modern Survival Manual is based on first hand experience of the 2001 Economic Collapse in Argentina. In it you will find a variety of subjects that the author considers essential if a person wants to be prepared for tougher times: -How to prepare your family, yourself, your home and your vehicle -How to prepare your finances so that you don’t suffer what millions in my country went through -How to prepare your supplies for food shortages and power failures -How to correctly fight with a chair, gun, knife, pen or choke with your bare hands if required -Most important, how to reach a good awareness level so that you can avoid having to do all that These are just a few examples of what you will find in this book. It’s about Attitude, and being a more capable person and get the politically correct wimp out of your system completely. I highly recommend it.

Surviving The Economic Collapse

Surviving The Economic Collapse

  • Share on Tumblr