by Woodsbum
For those of you who read my site regularly, this will come as no surprise. I not only like food, but I love doing research. Today I had someone pass along a post someone did about making their own MRE type meals. They called them Mountain Man MRE. What I like about his approach is the way that he takes the time to explain each step in the process of making a full meal. Truly, this is a great post and even if you don’t like the food he prepared you can made necessary modifications as needed.
****************************************************************************
Humans have been preserving their harvest well before modern conveniences like pressure canners and deep freezers were invented. Preserving the harvest was the art of delaying nature’s natural effect on food – spoilage.
Being resourceful… and just plain hungry, our ancestors figured out ways to make food safe to eat long after living food was dead. Fermenting, smoking, drying, grinding, pounding, salting, and/or curing were preservation methods Native Americans, frontiersmen, long hunters, mountain men, and pioneers used.
None of the above, are you?
Maybe you hike, camp, or hunt. What I’m about to share will even be useful to hungry desk jockeys looking for a protein-rich, healthy snack you won’t find in the processed-food vending machine at the office.
The vast majority of us are not mountain men/women or Amazon explorers (not the online store). We’re simply on a modern-day journey of self-reliance. You have to eat now and later. Learning to preserve foods with traditional methods is a skill you’ll be glad to own when the power grid fails.
In the meantime, let’s make a Mountain Man MRE (Meals Ready To Eat). The MRE will consist of four items; pemmican, jerky, parched corn, and dried blueberries. Here is another article on our site for pemmican with dried fruit mixed in. Parched corn is being added to the MRE with a brief tutorial. Today’s post will focus on making jerky in traditional fashion – over an open fire.
Modern and old ways will meld together. For instance, I used our electric Excalibur dehydrator for drying corn to parch and made jerky over a fire pit. This is my modern version of traditional trail foods eaten by Native Americans, fur traders, and mountain men.
Our Mountain Man MRE’s need to meet the following criteria:
- Convenience – similar to pre-packaged, processed fast food – only ours is whole food and healthy
- Storable – long-lasting without modern refrigeration
- Transportable – dense, compact, and light-weight (less than 1/2 pound)
- Tasty – an acquired taste by some but I love this primal stuff
Onto the first item of your MRE…
How to Make Jerky
If this is your first attempt at making jerky, you may want to read how to safely dry meat in my Definitive Guide to Making Jerky.
Being a Mountain Man MRE, this was a fine opportunity to dry meat over an open fire. I’ve cooked many meals over campfires but never made jerky this way.
What new stuff did you do today?
Every new preserving technique we own, no matter how small, is one step closer to food independence.
Step 1
Start a fire with hard wood to create a coal bed. A fire pit is nice if you have one. A charcoal grill may work for you.
Step 2
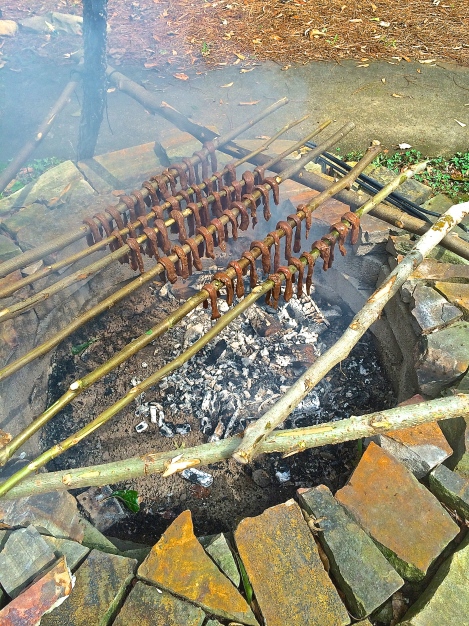
Design a way to hang the meat. I used poplar and sweet gum saplings lashed to my outdoor kitchen tripod.
Step 3
With a bed of coals underneath the rack, place the meat over the heat. The rack was about two feet over the fire.
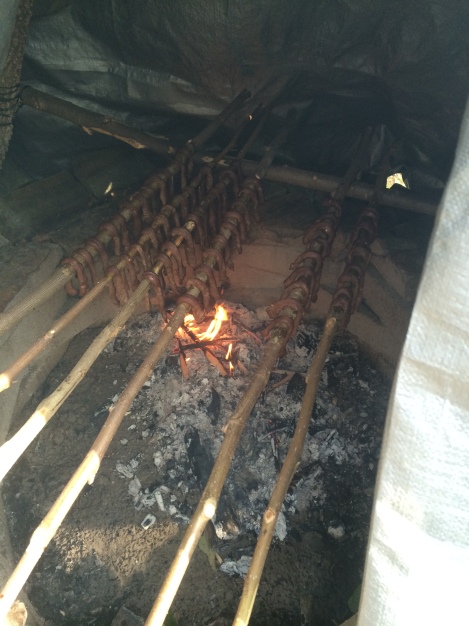
Then the rain came down. I improvised and wrapped a tarp around the tripod which did two things; protected the fire, and created a smoke chamber accidentally.
Step 4
Wait. The meat took about 4 hours to dry on the fire. I keep the coals going from time to time by adding wood at the back of the fire pit. The key here is to keep a constant heat (shoot for 225-250º F) inside the smoke house. Low and slow. You not cooking the meat.
Step 5
Check for doneness. If the jerky strips bends and no fibers are exposed at the bend, it’s not ready to be used for pemmican. You want a very dry meat that can be ground into powder.
Now you’re ready for the next item on our MRE package…
How to Make Traditional Pemmican
Down and dirty (traditional) pemmican consist of dried meat and rendered fat. I’ve seen a few fat-free pemmican recipes on the internet but that idea is just plain ludicrous and feeds the big fat lie. Stick with healthy, grass-fed fat for a satiating trail food. Ever heard of rabbit starvation? If you hate the thought of eating fat, substitute honey as a binding agent instead of tallow. Peanut butter pemmican is another option.
For today’s recipe, we’re using rendered tallow and jerky made over an open fire – mountain man style!
Disclaimer: This was my first attempt at jerking meat over a fire. Not an easy task in the rain – but doable. After the jerky was ready over the fire pit (approximately 4 hours), for added safety, I tossed it into our Excalibur for an extra hour. Also, modern kitchen appliances were used to grind and prep the jerky. The old school method is to place the dried meat on a stone and pound it to a powder. Gotta gather me some stones next time!
Step 1
You’ll need equal parts of tallow and ground jerky. Here’s how I render tallow. You may add dried fruit to the mix if you like. I prefer the taste without the fruit.
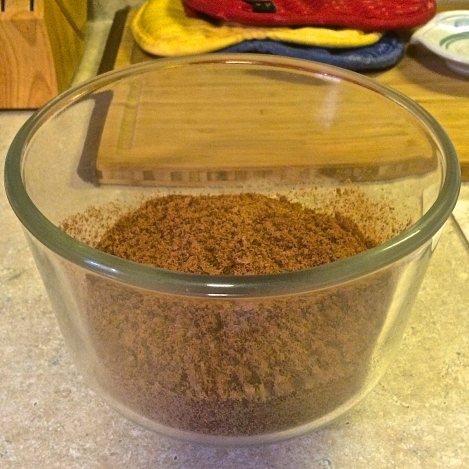
For time’s sake, I used our Vitamix blender to turn jerky strips into a fine powder. Dump the powder in a mixing bowl while your tallow is warming on the stove.
When heating the tallow, don’t allow it to get so hot that it smokes/burns. Low to medium heat here.
Step 2
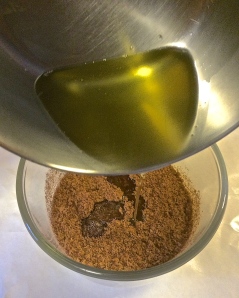
Pour a small amount of tallow into the powdered jerky and stir. Don’t pour all the tallow in at once. It’s easier to add more tallow than to grind more jerky.
Step 3
You’ll know when you’ve got enough tallow mixed in with the jerky when it compresses without crumbling.
Add too much tallow and the pemmican’s jerky flavor will be overwhelmed by tallow. Mix while your tallow is warm to better saturate the meat powder.
Step 4
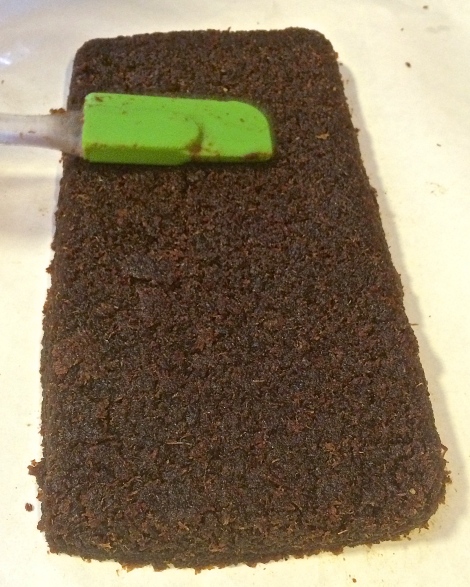
When the right consistency is achieved, add mixture to a loaf pan. Press it down evenly into the bottom of the pan. Place a piece of wax paper on the counter and, with one motion, drop the upside down loaf pan onto the paper. Lift the pan and you should have perfect pemmican. Another option is to form pemmican patties or balls. I’ve thought about sprinkling powered sugar on top and slipping these on the snack table at faculty meetings. 😉 I’ll video the response and get back with you.
Wrap the wax paper around the loaf and place it in the refrigerator until the tallow hardens. Slice into individual serving sizes and wrap in wax paper. Place in a container (ziplock bag or paper bag) for your next adventure. Wax paper and ziplock baggies have redundant uses… wax paper = fire starter; ziplock bags = container.
Or – go fur trader style and stash your fresh pemmican in a “parfleche” – an untanned animal skin bag. For further reading on the benefits of this amazing trail food, check out my article on Bread of the Wilderness.
Pemmican may be eaten as stand alone snack/meal or added to beef up wild onion soup for a hot trail meal.
Add the third item to your MRE…
How to Make Parched Corn
Dried corn that has been roasted is called parched corn. Removing/reducing he moisture content makes the corn last a long time. Parched corn is easier on the teeth than plain dried corn. You’ve bitten a popcorn kernel before, right?
Ideally, you’d walk out to your corn crib and grab a few ears. If you’re like me, you may not have access to dried corn on the cob. Dirt Road Girl and I took a road trip looking for dried corn. We stopped at a local organic farm we buy from, but their corn crop was gone and stalks plowed under.
We ended up buying two green ears for this experiment. I shucked them and tossed them into our dehydrator as a test – along with a bag of frozen organic grocery store corn. The bag corn was cut from the cob. Traditionally, you’d want the whole kernel. We adapted and used the cut corn. Dehydrating corn on the cob was a big waste of time.
Step 1
Heat a pan/skillet over medium heat. You can parch corn in a dry pan or with oil added. I tried both and found the dry pan batch tasted the best. You’d think bacon fat would make anything taste better. Not with the corn.
Add salt or other spices (optional) to the pan and cover the bottom of the pan with a single layer of dried corn. Shake the pan to keep the corn from scorching. A spatula is also helpful for stirring. Keep the pan and corn moving for a few minutes until it turns golden brown. Dump that batch and add another.
Step 2
Allow it to cool and bag and tag your snack. Pretty simple.
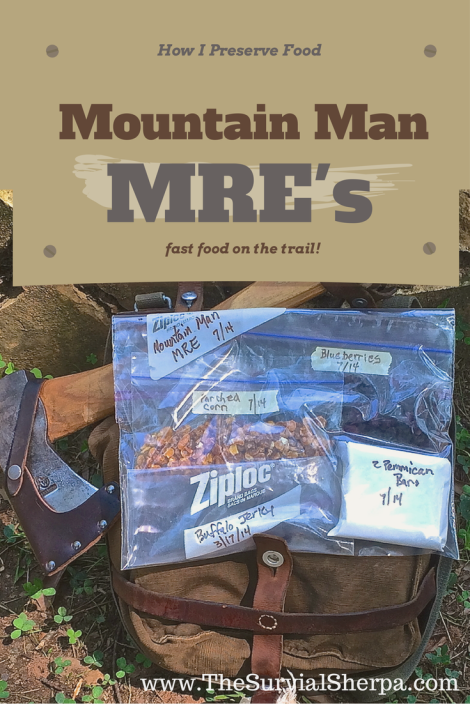
Pictured above is the full-meal deal: Two bars of pemmican, one bag of parched corn, one bag (about 8 pc.) of water buffalo jerky, and a bag of dehydrated blueberries. The entire Mountain Man MRE weighed less than 1/2 pound (0.418 # to be exact).
Where’s the bread? Since I don’t eat bread, I didn’t include traditional hardtack in the MRE. Survival News Online has a great how-to for your reference if you’d like to make your own.
Hopefully, this light-weight, nutrient dense MRE will keep you moving on your next outing. Toss it in your coat pocket or haversack and you’re set for mobile fast food on the trail!
To see how a few of my Prepared Blogger friends preserve foods, check out our “How We Preserve Foods” round robin below with over 20 articles to help you achieve food independence!
Keep Doing the Stuff of Self-Reliance,
Todd
****************************************************************************
Now I am not sure how many people will actually go out and make these full meals for themselves. To be totally honest, there is little doubt in my mind that I will. There is a huge chance that I will take the time to do the fruits and pemmican to supplement my already massive jerky batches that I do. The parched corn just doesn’t seem like something I would like considering how bad my stomach reacts to greases. If I could find a way to parch it without actually frying it, I might give it a try. That would mean that I was grilling it, however, and the individual kernels will almost definitely fall through the grates during the attempt….
Have fun and stay safe everyone!!!


