by Woodsbum
This post isn’t very backwoods, gun, or gardening related. It is however AWESOME!!!!!
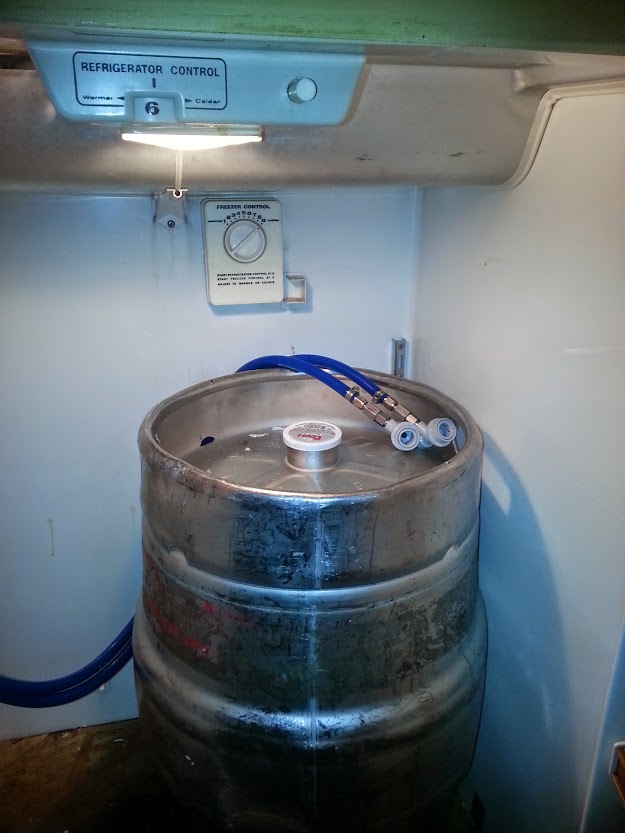
After many years of putting it off, I finally did the work needed to get my kegerator up and running. As you can see from the picture below, I will have two CO2 beers and one nitrogen beer on tap. There are a few pieces that I am still waiting on to arrive, but for the most part I am done with all the hard part.
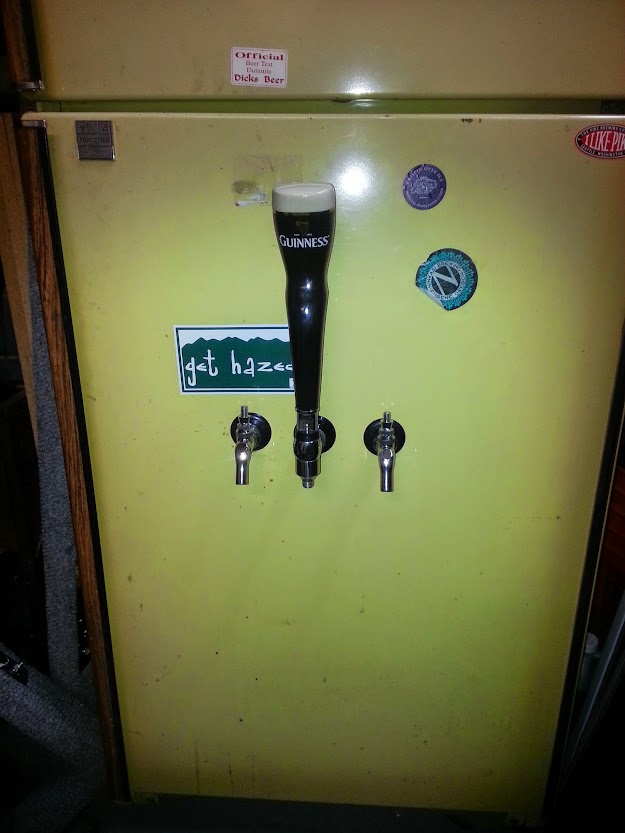
The beauty!!
The refrigerator was given to me by my brother a while ago. It ended up quitting me for about a year. I then REALLY examined the wiring and found that all I needed to do was tighten a connection. Been working ever since. There was already one hole drilled and a pretty worn/nasty spout installed. He also ran a CO2 hose through the side, but was down in the corner so that kegs could very easily pinch a line. I did a few modifications to make it my own (read as BETTER!!!).
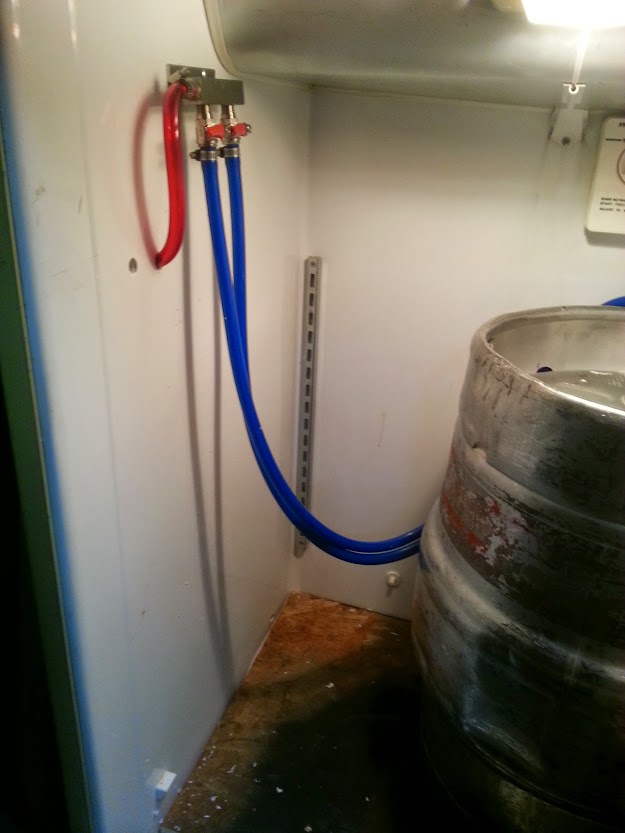
CO2 lines installed
As you can see, I installed a manifold for my CO2 so that I could run two beers off the one tank. I color coded it so that it would look nice as well. The second hole you see is for my nitrogen lines. That, my CO2 regulator, sankey coupler, and spout for my Guinness faucet should be here today. It was tough, but I drilled the hole just barely big enough for the hose. I did this so that it would stay nice and tight without me having to squirt expandable foam all over the place. I also built a floor for the kegs to sit on out of some scrap wood I had laying around. This has helped keep things in place as well as protecting the bottom of the refrigerator from the kegs as I swap them out.
Ball locks on gas lines.
Another thing I did was for ease of swapping couplers and kegs around as I changed out beer. If you look, I put
ball lock keg fittings on all my gas lines and I put
sankey to ball lock quick disconnect conversion kits on my couplers. By doing this, I can easily swap out between American and European sankey couplers, “M” couplers, or just use the ball lock system for homebrew in corny kegs. It gives me much more freedom in my beer choices. I also did this for my nitrogen system so I can swap in the same fashion. This means that I can use my Guinness coupler (U coupler), sankeys or hook up a corny there as well.
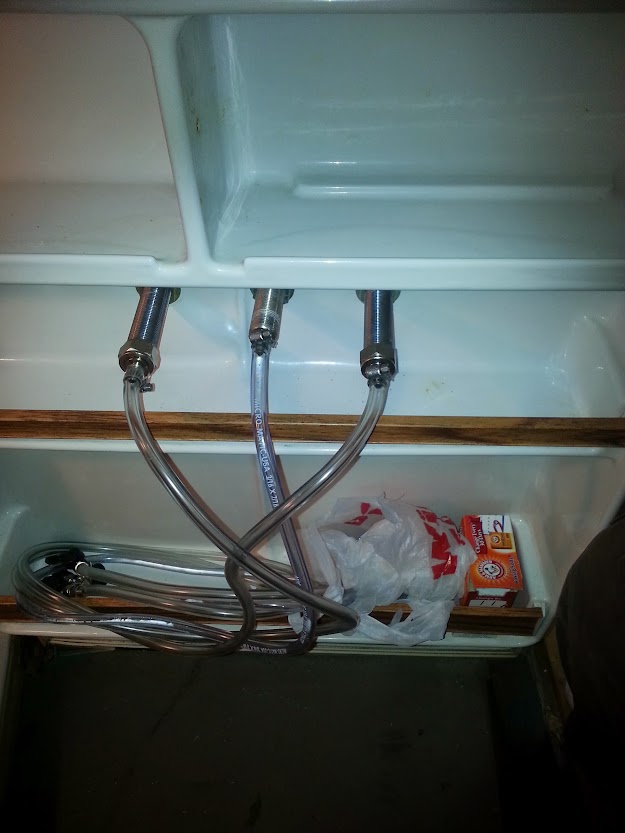
Beer lines to my shanks.
I did the same thing with the beer lines. You can see the ball lock connectors in the door tray. I put the Guinness between the two
Perlick faucets so that it wasn’t as odd if I was not running all three beers at once for whatever reason.
To drill the holes, I used a 1/2 inch hole saw. They are about $10 from Home Depot for a good one. It really wasn’t that big of a chore and it really came out well.
The faucet handle situation does need to be rethought a bit. The actual tall, bar style handles I have don’t fit correctly where I have the spout. The handles hit the door and thus don’t close out the faucet properly. This is a serious problem and I will have to do some thinking about how to fix this.
Since I already have my tanks and such, I will end up building myself a tank stand/holder to keep them safe. My CO2 tank actually was originally a soda machine tank, but I reallocated it for a while to do some welding. It already has food style CO2 in it, so hopefully my welds don’t get sick since it wasn’t a welding mix.
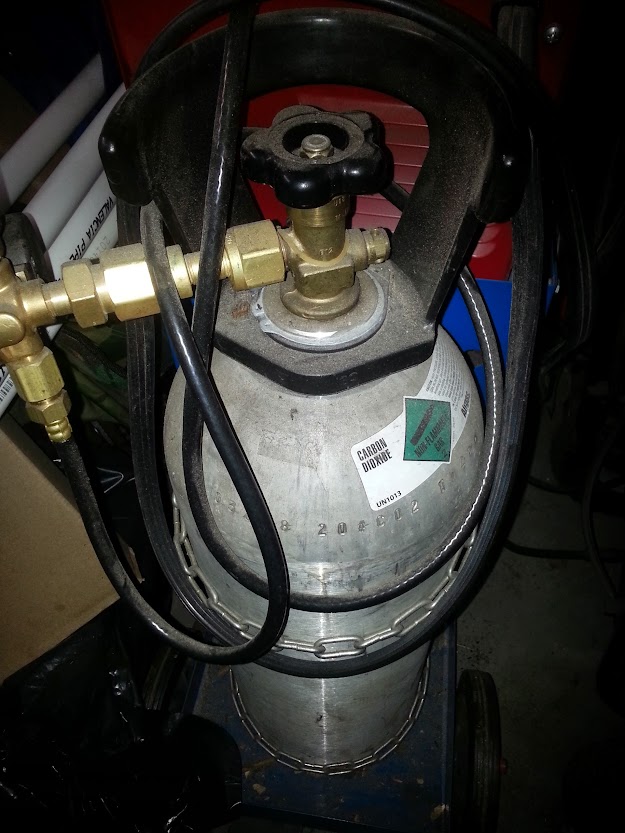
CO2 tank
Like I mentioned, my regulator for this will be here today. My nitrogen tank will be ready today as well so I can hook up the lines and this bad boy!
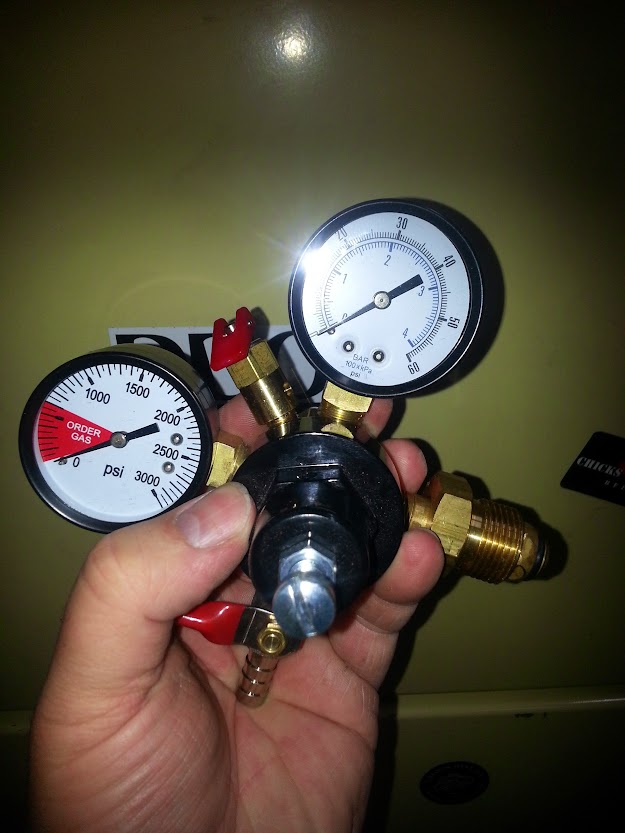
Nitrogen regulator
I was a little surprised by the differences between CO2 and nitrogen regulators. Notice how the second gauge goes all the way to 60 PSI? Guinness for instance should be run around the 30 mark from what I have been told and have read. It will be a fun experience to “test it out and drink the practice runs.”
Since I have not decided what to do for a drip tray yet, I will have to also do some thinking there. I have been considering re-purposing something completely obnoxious for the task, but can’t find anything worthy as of yet. There is no doubt that I will think of something, however. I might just weld up something out of steel. We will have to see.
If you decide to do your own kegerator, do yourself a favor and do it right from the beginning. I have seen many that were done in a haphazard fashion that were just given away a while later because it didn’t fit the person’s needs. Spend the money for the right parts and just get it done.
Happy beer drinking!!!!