by Woodsbum
A couple of years ago I decided that I wanted some sort of a take down rifle to store in my truck, take on hikes in a pack, or just have available so I had a very small form factor rifle to carry with me and put it together if the need arose. Several different models cropped up when I searched, but none really fit the mental “mold” I was looking to fill. Then I came across this rifle that disassembles and is carried in the actual stock of the rifle. It is the Henry Survival. This rifle is based upon the AR-7 that was used by US military pilots as a survival rifle.
Here are a few pictures of Henry’s production rifle:
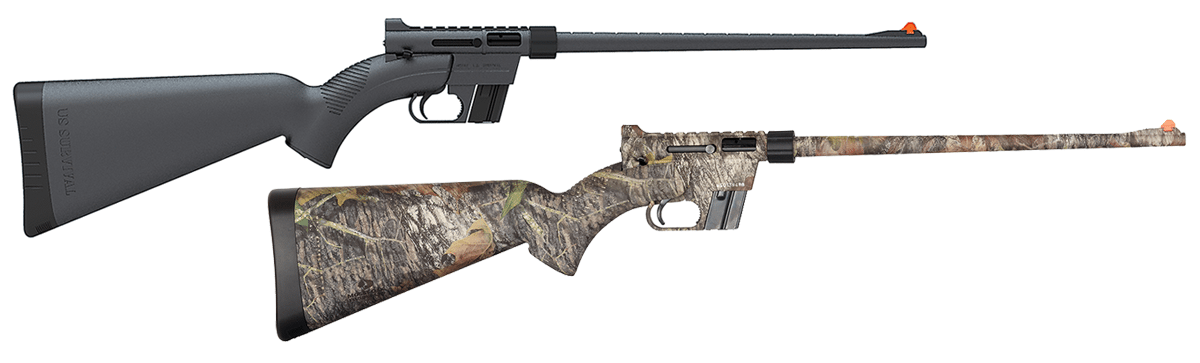
Henry Survival AR-7
Henry Survival AR-7
As you can see, the rifle is very compact and is marketed as even being capable of floating. I personally have not tested this, but I have a friend who did. He said that it took on a little water, but it did float. As unscientific as this is, I only have this one personal account of someone testing the floating ability of this rifle and was not there to witness it. Henry does have a nice picture of one that is sitting on the edge of a stream with water beaded all over it as proof. I must remind you that this is sitting in a puddle and not floating, however.
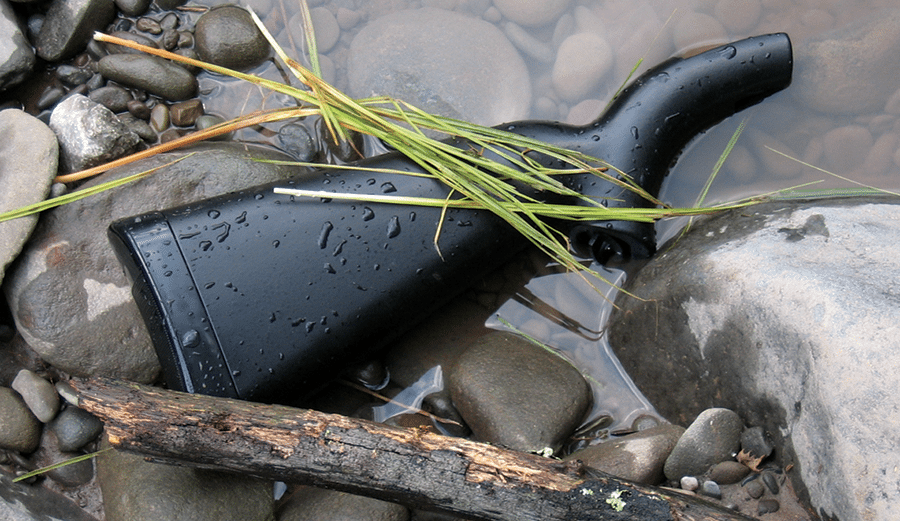
“Floating” AR-7
There are a few things that I don’t like about the production Henry Survival AR-7. First off, the stock is horrible to hold and try to use. It is oversized and difficult to get a decent grip on to shoot a decent grouping. The receiver is not in perfect alignment with the stock and thus makes it even more awkward to try and properly hold the rifle. Secondly, the sights themselves are horrible. The rear sight is a “peep” that nothing more than a hole drilled in sheet metal and held to the rear of the receiver by a single screw. If you bump it or it gets wet the sights are then useless. This really doesn’t matter anyway because the barrel won’t hold “minute of beer can” at anything more than 20 feet. You shoot more of a pattern than a grouping. Everything combined makes for a really nice idea and lightweight “survival” rifles, but practicality makes it not much more than a gimmick. Needless to say, I was really disappointed with my $210 purchase.
At this point, I was hell bent on finding a way to make this a decent rifle that still fit the “mold” of what I originally desired. So, I broke down what was important to me: accurate, small footprint, able to be disassembled, simple construction, dependable. I reviewed what I had: inaccurate, “floats”, small form factor, able to be disassembled, simple construction, undependable. The two lists seemed to me as pivoting on two major design flaws: the barrel and the stock. This is the point where I went online and flexed my “Google-fu.”
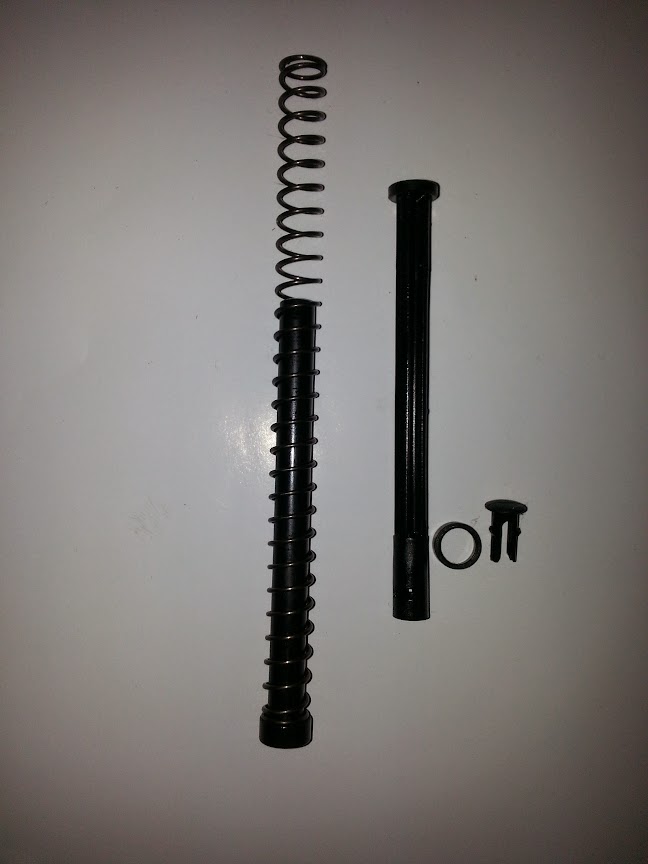
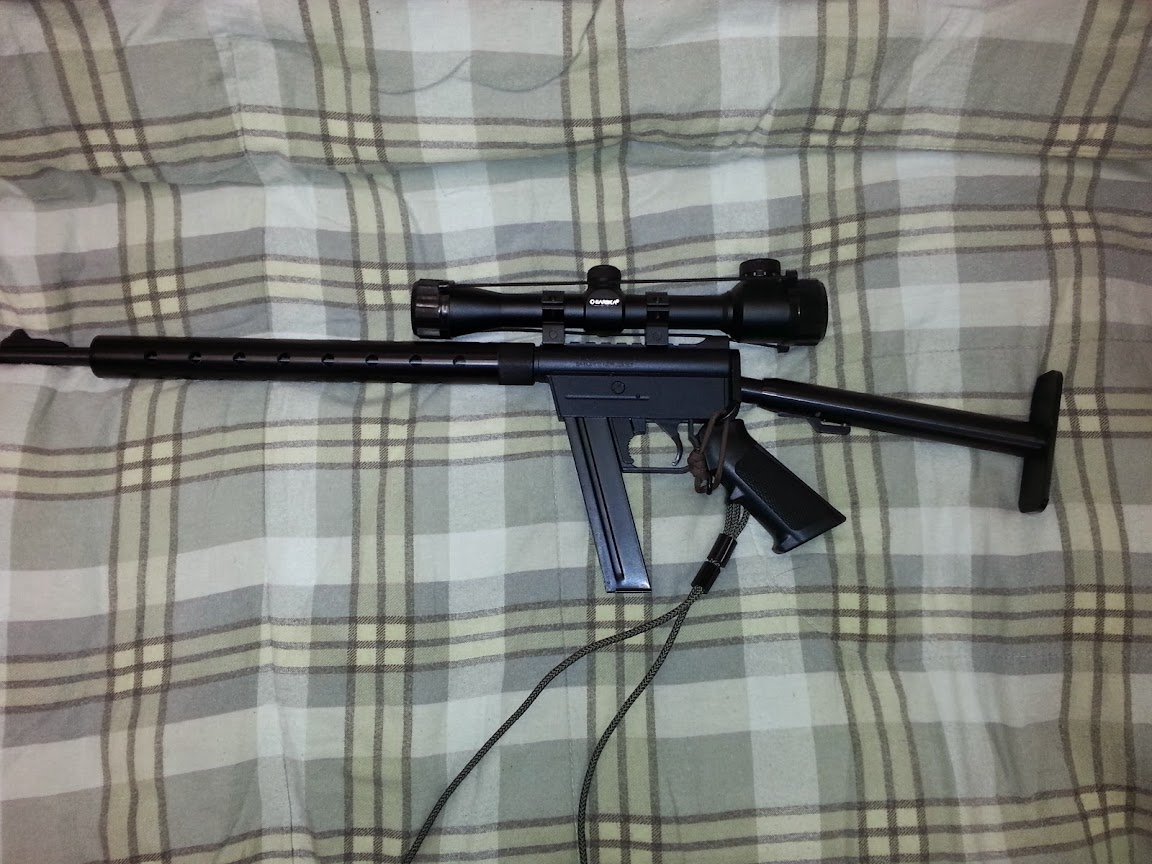
I came across this website. AR7.com seemed to have about everything I needed to fix my little Henry so I ordered a barrel and a stock. Here is a picture of all the parts and pieces that I had accumulated through the purchase of the rifle and upgrade. The barrel and stock on the assembled rifle at the top are what I purchased from AR7.com

AR-7 Stuff
As you can see, the stock is collapsible and the barrel has a heat shield over it so I can actually hold the barrel without getting my little paw burned if the barrel gets hot. The hand grip is actually one from any AR platform, but has just been reamed out a little bit to fit over the mounting bracket attached to the new stock. The green cord is just a US military surplus M9 pistol lanyard that I had laying around. I did make a spacer with a hole drilled in it for attaching the lanyard so I would have a usable 1 point sling. Here is a parts list from AR7.com and other online vendors:
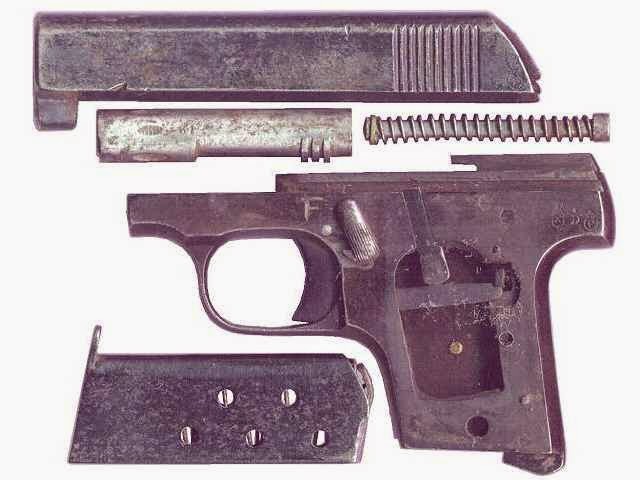
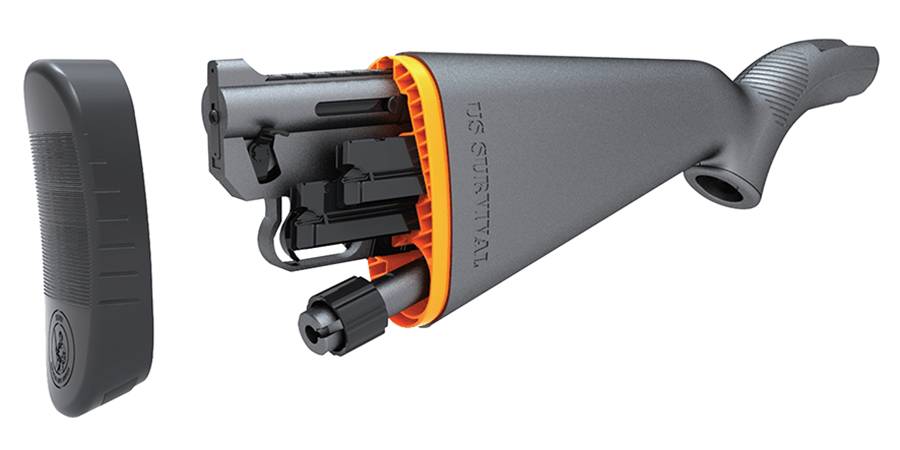
Before I discuss the several other things I did to make this such a wonderful rifle, I would like to show you how small the disassembled footprint is and what it looks like all assembled. It will literally fit in a small Camelback pack and leave room for Clif bars, flask, toilet paper, and any other number of necessities.

AR-7 Disassembled
AR-7 Assembled
The scope I chose was a cheap Barska 22 Plinker I got from Big 5 for $20 on sale. I really don’t need anything expensive or high speed because it is just a .22 and it is going to get beat up while bouncing around in backpacks. In all reality this scope has performed much better than I had anticipated and I have been very pleased with my $20 purchase. I honestly recommend this scope for anyone with a .22 if they can get it at a good price.
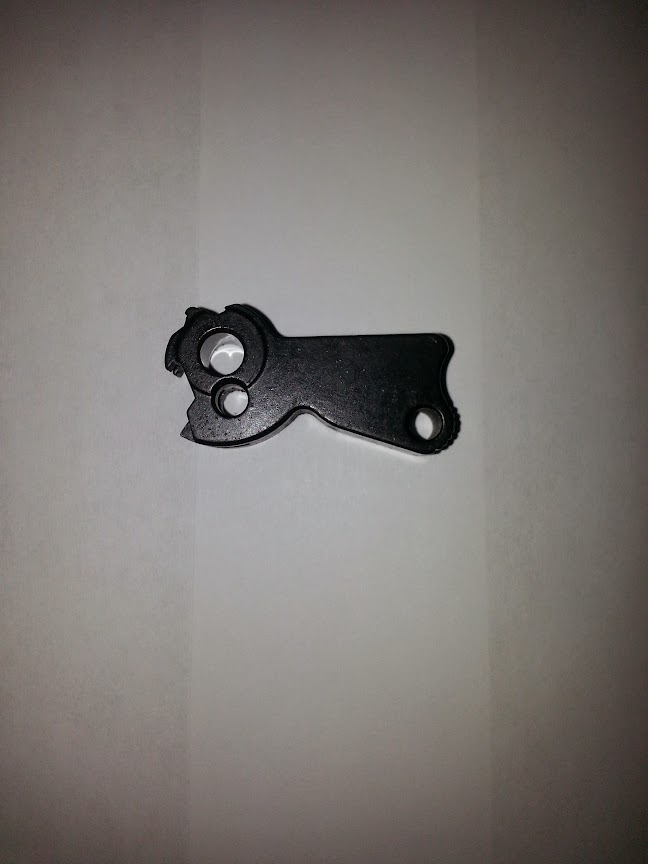
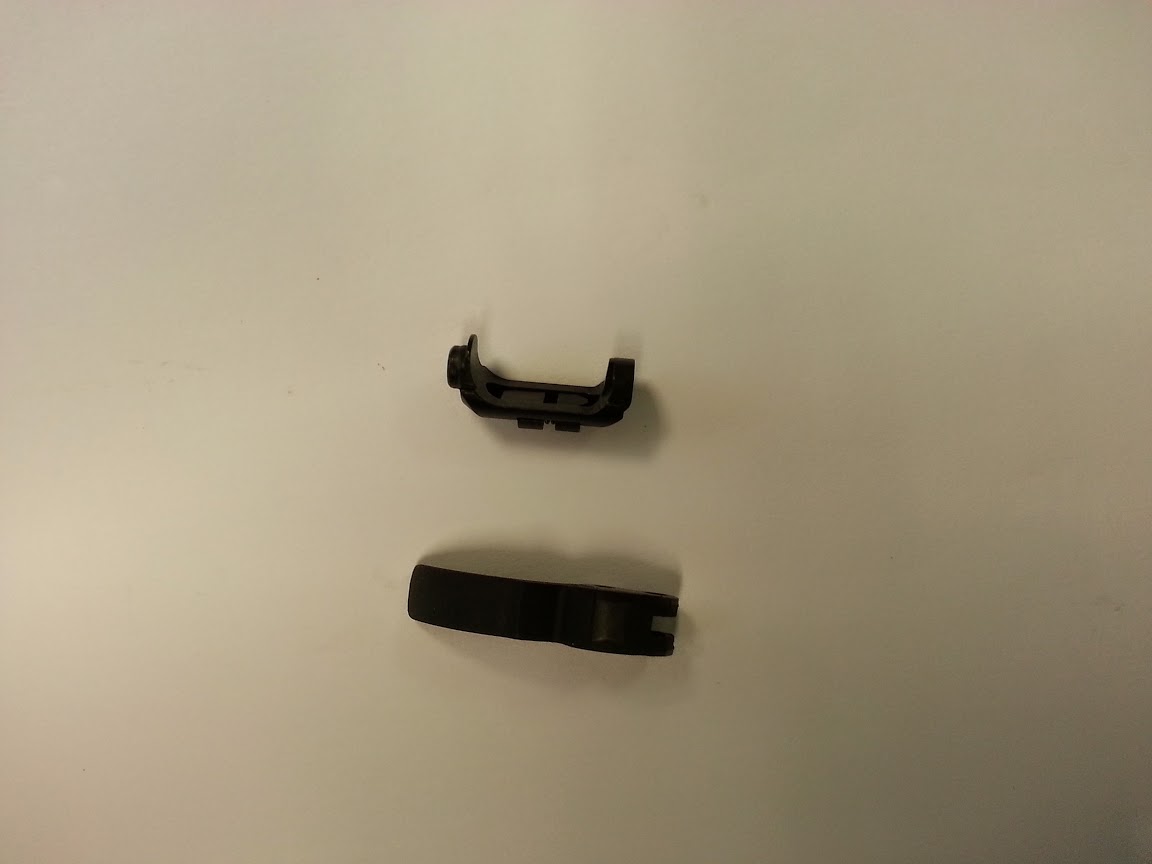
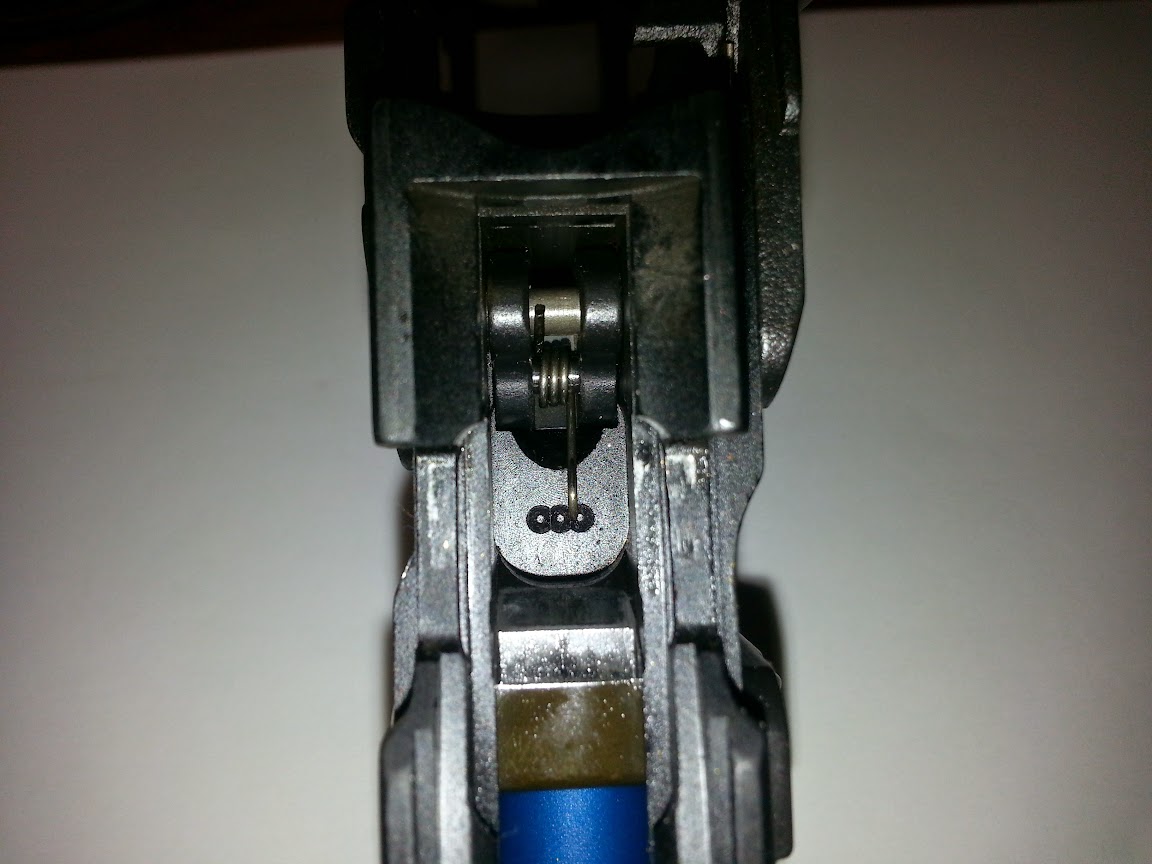
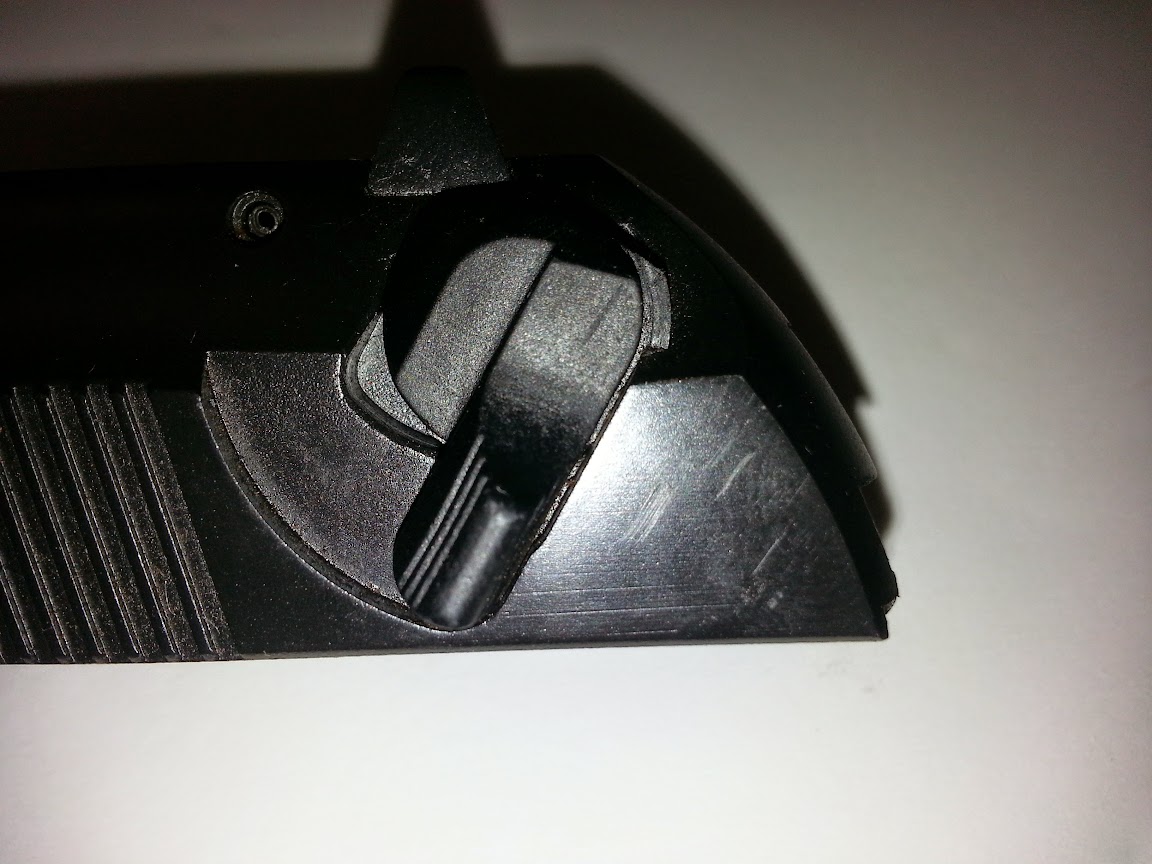
This is a picture of the spacer/mount point I had to make to attach the lanyard. There is a gap here by design from AR7.com, which I don’t understand. It makes no sense as to why this gap was here, but I am glad that it was so I could make this little guy to attach my sling.
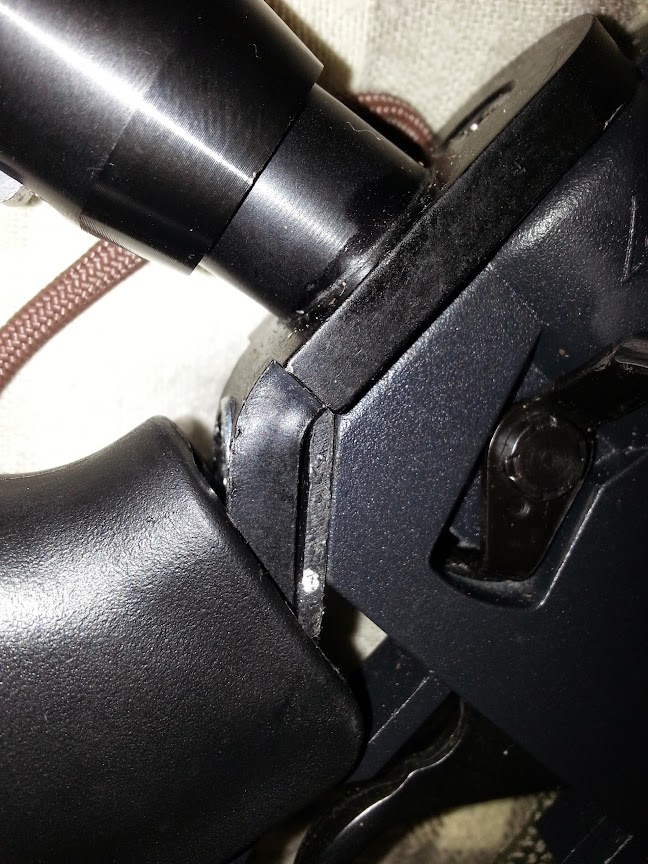
Homemade Spacer/Mount Point
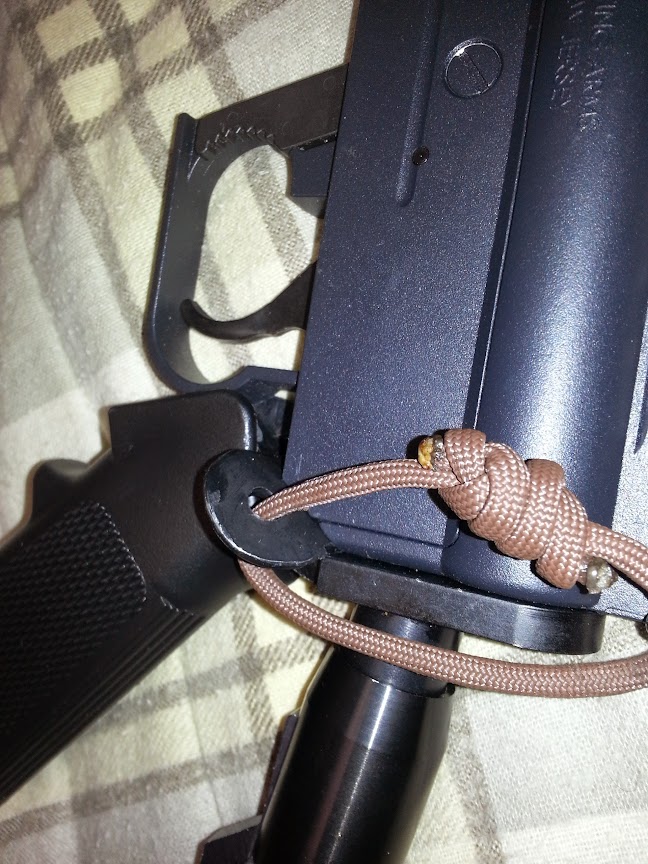
Homemade Spacer/Mount Point
Last but not least, I will tell you about my issues with finding magazines that will work. The Henry 8 round magazines work perfectly fine and seldom stovepipe if you lube your action enough. Being overly motivated at times, I wanted some higher capacity magazines. This led me to purchase these from various manufacturers.

AR-7 Magazines
I am not going to give you the manufacturers because none will work properly out of the box. You will have to file, bend, cuss, test, re-test, cuss some more and eventually end up with a magazine that will work about 90% of the time without issue. I did find that mine are about 95% functioning since I poured a bunch of synthetic grease into them and keep the action of my rifle dripping with lube. It reminds me of how you have to treat an M249 to keep it functioning. In the picture you can see that all have been filed and bent a bit to allow proper bolt clearance. I am unsure as to why the manufacturers can’t ship magazines that actually work, but this is what you have to work with on this rifle. These 5 represent 3 different manufacturers as an interesting note. If you find some that just work without issue, please let me know.
As a final note, I love how this rifle turned out. It really ended up as a VERY accurate shooter that is comfortable to shoot, dependable, with the right magazines, and disassembles into an easy to carry form factor. If you decide that you are going to get one of these rifles, I suggest you add an additional $150 to your budget and get the aftermarket stock and barrel. It has turned this little guy into a tack driver that almost rivals the accuracy of my Ruger 10-22. The overall price is higher, but look at how much more tactic-cool the final product looks!
Seriously, I do highly recommend this setup.