Category Archives: Classes/Education

Classes and any sort of education, whether they are formal or informal, that scream for a few words to be written about them.

First Aid Kit

by Woodsbum

It seems that a very hot topic among people I speak with is field medicine. To be specific: first aid kits and tourniquets. After finally getting tired of having to repeat my same spiel on the dangers of tourniquets improperly used and how first aid kits tend to have WAY too much stuff in them, I felt almost forced to put fingers to keyboard and make a post.

Fist off, I want to let everyone know that I am not an “armchair commando” when it comes to field medicine. I was a paramedic/EMT for 4 years and then joined the Navy, where I was a Hospital Corpsman for 9.5 years. Overall, I have almost 14 years of direct patient care in both field and hospital settings with 9 years being in a pre-hospital setting. I was ACLS, BTLS, ATLS, PALS, NALS, EMT Instructor, BLS Affiliate Faculty, Combat Lifesaver Instructor, the list goes on. In another words: I am not a trauma surgeon or a contributor to AMA journals on pre-hospital trauma treatments, but I have quite a bit of hands on experience and training.

This being said, I have seen a lot of problems with most “field” first aid kits being produced and sold today in addition to the severe lack of proper training given to people in their use. My opinion is that there is WAY to much emphasis based around the idea that people will be able to get to a hospital in a timely manner. A prime example of this is the overuse of the tourniquet. The tourniquet is an easy way to say, “Everything below this point will be chopped off and you better know a good prosthetics person.” The fact that all the “weekend commandos” now carry one and there are classes designed to promote tourniquet use absolutely drive me nuts. Having worked on ambulance in rural settings and done such things as pull people’s extremities out of heavy equipment, I have NEVER had to resort to a tourniquet. Between the proper use of the following techniques, I have been able to avoid contributing to a patient’s reason for amputation:

  • Direct Pressure
  • Pressure Dressing
  • Elevation
  • Splinting as needed
  • Constriction Bands NOT tourniquets
  • Ice if available

Even the idea of using a Israeli emergency bandage is a far superior idea than drawing that dotted line with a tourniquet that says, “Cut off appendage here.”

As I step off my anti-tourniquet soap box, I will admit that they do have their place IF they are used properly and appropriately. They just need to be used as a last resort and not a replacement for the other less invasive/damaging options.

Enough about how dependence upon hospital settings have increased the use of the tourniquet as a way to control bleeding. Let’s take a quick look at some of the things that I carry. Now I want you to know that, because I had to use them and have been too lazy to replace the items since my last outing, there are two items that I carry that are not in this picture. Sorry for that, but I just grabbed my pack and came in to take pictures. When you look at this you can definitely see that these items are not my shiny little kit that I hope never gets used. These items are exactly what I carry and can cover you in almost any situation with the proper training.

My first aid kit excluding 2 4x4's and moleskin

My first aid kit excluding 2 4×4’s and moleskin

Let me go through each item so you have a good idea of what each is.

  1. Waterproof case: In my kit, I chose the old issue first aid kit case that really isn’t waterproof but it was handy and works. It also has an ALICE cover that attaches to the left side of my butt pack or I can remove the case and just throw it into whatever pack I have at that time.
  2. ABD: Military issue Abdominal Battle Dressing. This is the clear wrapped bandage in the brown paper wrapper. This thing will take care of eviscerated abdomen, severe chest injuries, or even be used as a soft splint if need be. It unwraps to be fairly large and has long tails to tie it around whatever you have applied the bandage to. The dressing portion of the bandage is very absorbent and quite thick.
  3. Battle Dressing: This is the OD green thing on the left side. It is a smaller version of the ABD. Not only can it be used as a dressing, but it also can be used to tie off a splint if you have to. Of course that is worst case scenario since the patient’s clothing is always a better choice.
  4. Three Triangular Bandages (cravats): These are not only great for scarves and headgear, but they work very well as slings, splint ties, bandages to hold on dressings, constriction bands, tourniquets if all else fails, hold ice/snow, filter big stuff out of water, or even as gaiters to keep some of the crap out of your socks if need be. These are very multipurpose and you can see that I use them a lot.
  5. Sutures: Yes, I have had to sew myself up in the field. Yes, it hurts. I am not John Rambo. Yes, I still have the scar. No, you can’t see it…..
  6. H Shaped Bandages: These are great for knuckles and such. Basically any point that bends, but is not too big. I keep them in my kit as a way to make myself feel better if I bust up a knuckle. I carry both types that have the adhesive strips that will stick well to a flat-ish area or an articulating area.
  7. Larger Bandages (read large Bandaids): These work well for skinned elbows, knees, extremity cuts, small head lacerations, etc. They stick a lot better than a 2×2 or 4×4 with silk tape.
  8. Kwik-Scan Thermometers: You put these things on someone’s forehead to check their temperature. No, it is not as accurate as a real thermometer but I can carry several in my kit quite easily. They are great for checking for fever (possible infection of a cut for instance) to a low body temperature (cold injury). Great things to carry with you if you are not anywhere near a hospital and won’t be for a period of time.
  9. Butterfly: I carry a couple butterfly closures. These are great for when you don’t have a total need for suturing something closed.
  10. Cling: Rolled gauze is amazing for so many reasons. It holds bandages on SO well, can be twisted to make splint straps, etc. Great piece of gear to take.
  11. 3M Silk Medical Tape: I like the 3M stuff because it sticks SO much better than the Curad brand. It can also be twisted to make cordage.
  12. Alcohol and betadine based swabs: These are antiseptic swabs to clean wounds. The alcohol ones will also catch on fire if need be if you can’t get something else burning.
  13. Abdominal Patch/Dressing: I keep these not only for what I call “bigger spills” of blood, but they can easily be cut and used to cover eyes as well. In a worst case scenario, I have also offered them up to my female campers who needed a sanitary pad. They are better than nothing.
  14. Trash Bag: That is the rolled up blue thing in the middle. They can be wrapped around entire torsos in the case of any open thoracic or abdominal injury, can be used to keep bowels moist in the even of an evisceration, and can even be used to gather condensation if placed over a plant to gather water. Cut out some holes and you can even keep your patient partially dry in the rain.
  15. (Not Pictured) Moleskin: This is for blisters or to cover wounds so that you are not slowed down by a bulky bandage. When moleskin gets wet, granted that it was applied correctly in the first place, it tends to almost make a second layer of skin. This stuff is great to keep you going until you can get back and get something treated properly. I have sutured up lacerations, cleaned everything REALLY well, and then put moleskin over the thin dressing to keep Marines out in the field for additional weeks before they get seen to remove the sutures. Mines is not here because I gave my chunk away to someone who had blisters and I forgot to replace it since I have not been out in the woods for almost 4 weeks.
  16. (Not Pictured) 4×4 Gauze Dressings: These are sterile and allow you put them directly on a wound, then use about anything around to cover that wound as a bandage. These I forgot to replace because I was showing off and starting fires with them…..  Don’t ask.
  17. (Pictured Below) Metal straw: I picked up several of these from 7-11. They are branded as Slurpee Straws. I use them to blow up fires mostly, but in the case of a severely compromised airway I can use one for an emergency tracheotomy, in the case of severe chest injury they can be modified for use as a chest tube, or (most importantly) to drink my Apple Pie drink using only the best moonshine/everclear that can be had at the time.

Slurpee Straw of AWESOMENESS!!!

Slurpee Straw of AWESOMENESS!!!

Quick point for those that are not familiar with medical terminology: Dressings cover wounds. Bandages cover dressings. Many “bandages” have a “dressing” built into them to cover the wound, but not all. Having some sterile dressings in your kit to sit directly on a wound is important to keep that wound from getting infected. Toss some into your kit.

As you can see, I don’t carry medications. There are no splints or splinting material. You won’t see any straps to make a litter. All these items can be improvised if needed. Headaches can usually be fixed with some strong coffee as can many respiratory ailments. Of course any serious medical conditions need immediate medical treatment, but you should have your medications with you in those instances. Why should I keep track of and hump Albuterol inhalers for people if you have a COPD? I don’t. I can, however, use my Swiss Army knife and sutures to remove/repair injuries to myself caused by severe “dumb-arsery.”

Lastly, I will say that in my truck I do carry airways (nasal, oral, and masks), Ringers Lactate, sphygmomanometer, stethoscope, surgical kit, BVM, splints, and all sorts of other goodies. There is NO reason, however, for someone to carry all the other crap with them. The average person really needs to realize that purchasing gear does not make them a combat medic. The dependence upon gear and ignoring the idea that education will provide more options in a crisis really needs to stop. Quick applications of products that the user doesn’t fully understand will only cause more injury. Even though it might look “sweet” on your battle belt, there is no reason for anyone to ever use a tourniquet as a first step in control of hemorrhage. There are better solutions that don’t include removal of a hand for a minor laceration.

Just remember: All bleeding eventually stops!

  • Share on Tumblr

Razor Six Hand to Hand Combat Knife 101 AAR

by GunGuy

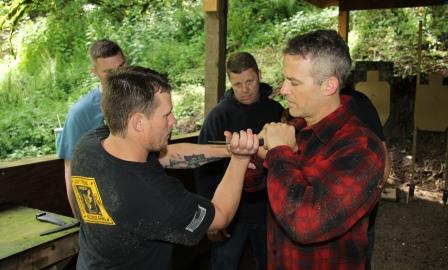
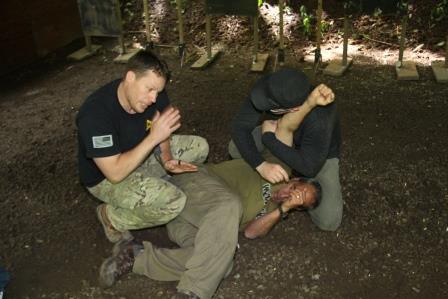
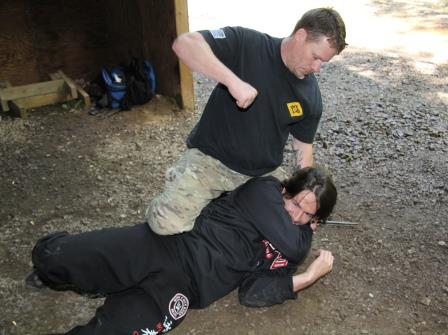
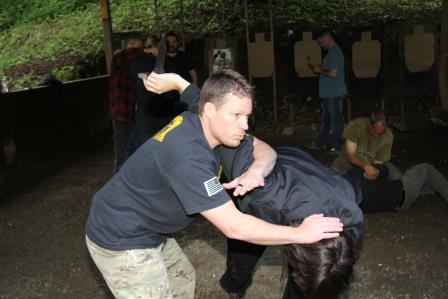
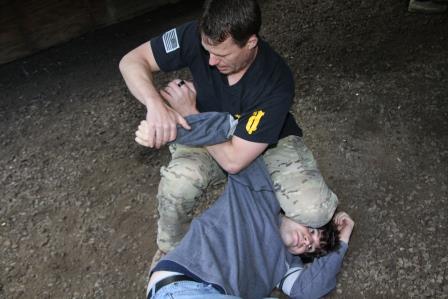
Last Saturday I had the pleasure of taking the Hand to Hand Combat Knife 101 class offered by Razor Six Tactical and taught by Josh Long. The training took place at a beautiful piece of property in Oregon. Rob Hicks the founder of Razor Six Tactical was onsite as well and I had a chance to tour the impressive training facility with him and talk about an exciting product he has in development.

Once everyone arrived we did a quick meet and greet of the 10 participants and had a safety brief. We started with a 30 minute presentation consisting of slides and videos depicting the serious damage inflicted during a knife fight. Josh stated that the first rule of knife fighting is that you are going to get cut. Once you accept that fact you can move forward and take the training to heart.

After the class room portion of the course we went down to a covered pistol shooting bay for the hands on drills where we used Boker rubber training knives. Josh broke down the training into easily digestible points. We drilled the different parts which stacked on top of each other to allow us to have a simple and effective strategy to engage someone attacking with a knife.

The class lasted 6 hours with an hour for lunch. The gravel base of the training area reinforced the “train hard”/”fight easy” mindset which prepared us for real world situations. Towards the end of the class we had the opportunity to drill our moves with the use of a shock knife to get the adrenaline pumping and induce more reality into the training. The shock knife was set to low and wasn’t that painful. It was more of a mental hurdle that needed to be over come and made the training more realistic.

I went into this class with an open mind and not knowing what to expect. Overall I learned that you have to take the initiative and move with speed to take your opponent down. Being hesitant when put into a situation where your life is threatened can get you seriously hurt and or killed. There is no honor in a knife fight as your sole purpose is to win. I’m looking forward to taking more classes with Razor Six Tactical. 

Gary Cornilles (Photographer) 2014

Gary Cornilles (Photographer) 2014

Gary Cornilles (Photographer) 2014

Gary Cornilles (Photographer) 2014

Gary Cornilles (Photographer) 2014

Gary Cornilles (Photographer) 2014

Gary Cornilles (Photographer) 2014

Gary Cornilles (Photographer) 2014

Gary Cornilles (Photographer) 2014

Gary Cornilles (Photographer) 2014

  • Share on Tumblr

Oregon Firearms Academy Low Light / Night Fire Class

by GunGuy

I had the opportunity to take a Low Light / Night Fire Class at the Oregon Firearms Academy this past November. The instructors in the class were utmost professionals, knowledgeable and easy to talk to. For those of you who are planning on taking this class in the future keep in mind that Oregon in late November is cold. The staff at OFA were kind enough to have a fire going outside and a covered heated area to keep away the frost. The temps hovered in the 20’s and once the sun went down the temps dropped into the teens and the cold took a toll on all of us.

We started the class at 11 am with about 45 minutes of class room instruction going over safety, differences in hand held and weapon mounted flashlights, techniques and then moved out to the range. Once on the range we went over how to use the flashlights in conjunction with our firearms and strong hand shooting with and with out barriers in place. The daylight live fire prepared us for the low light and night fire portion and we worked out any kinks before the night fire commenced.

During the class we covered shooting in low light, partially lit like a parking lot, complete darkness, strobe lights if there were cops or emergency vehicles around and they popped a couple of smoke grenades at the end to show you how it would be in a fire or disaster situation. There was a strong emphasis on holding the flashlight with the support hand, firing two shots with your strong hand and then moving in one direction after turning the light off. The most important thing was to move after you use the flashlight, even if it was accidental, because the bad guys would shoot at the light.

At one point after it got dark the OFA staff had us do a side by side of all of the hand held flash lights and my $25 Led Lenser V2 flashlight was just a little less bright than everybody’s more expensive lights. I like the idea of running flashlights that run on readily available AAA’s and not on CR123a’s. The downside of AA and AAA flashlights is that if you put alkaline batteries in them they might leak. So you have to check the batteries on a semi regular basis. Alternatively my weapon mounted Streamlight TLR-1 used CR123a’s and was brighter than the hand held so the choice is yours. The instructors commented on having a weapon mounted light and a handheld if you are military and or a law enforcement officer. If you are a civilian two hand held flashlights would be your best bet because if you drop one, you have an extra. This point was reinforced as I dropped mine at one point during the class and I couldn’t see anything in the dark. Luckily the guy next to me had an extra and hooked me up.

Here is a quick run down of what I took away from the class.

  • Fighting is a cave man thing. Too much technology can be a hindrance.

  • Keep your equipment simple. Complicating things under stress will mess you up.

  • OFA staff recommended weapon mounted lights in the 200-1000 lumens range for rifle and in the 200-300 lumens range for handgun.

  • Use the light in short bursts. After you use your light on purpose or accident you have to move.

  • A light is for illumination. Don’t illuminate with the gun. Have a hand carry as well.

  • Lights can also be a liability. The tell everyone around you where you are.

  • When using a flashlight and you use a lanyard have it around your hand but not around your wrist. Having it around your wrist allows someone to pull you off balance if they grab the light.

  • A Tiger ring for the flashlight allows more freedom of movement for your hands but it isn’t for everyone.

  • Night sights are not a necessity. You can use spillage from your light to light up your pistol sights.

  • Tritium half life is 12 years and Tritium night sights will give off adequate light for 5-7 years depending on your eyesight.

  • Lasers are a mixed bag, some rely on it too much. They focus on the target and not on their sights.

  • Using strobe flashlights makes it difficult to see peoples hands and disorients the other person and yourself. Supposedly strobe lights are good against dogs.

  • The bright led flashlights beams dissipated in fog, rain and smog where the incandescent lights cut through a little better.

  • A concern for weapon mounted lights is if they get stuck and don’t turn off the bad guys will shoot at the light.

  • In a house the higher lumens will reflect off picture frames, mirrors, white wall. Low lux flooding beams can be more useful in this situation than high lux because they do not splash back as much.

  • Have a red or green filtered light  to look at things up close, such as your targets, so you don’t lose your night vision. If you use the white light it will take 20-45 minutes to regain full night vision.

  • Don’t take shortcuts with your arms, you can shoot yourself, the middle of your chest is home base. Don’t cheat and have your hand behind the back of the gun.

  • Share on Tumblr

SAR Tracking Course

by Woodsbum

One fine, Western Washington day I was talked into taking a SAR tracking class. It was at the end of January, wet, cold and duck season had just ended so I was available. At first, I was afraid of getting into another one of those classes where everyone tries to “one up” the next person with regard to their experience or knowledge. Many classes I have been to end up being that way, so with some definite apprehension I paid the money and took the drive to the first day of class.

The first day was nothing more than an evening PowerPoint presentation. We met each other and got to know our instructor a little bit. Our class was taught by Fernando Moreira. He was originally from Portugal, did some time in the military there, and while in the USA came to realize that the skill that he had developed throughout his life was actually something that he could made money from. He has some great stories and is a fountain of knowledge.

Our second day started pretty early. We met at Sauvie Island, OR to head out and get dirty.

Fernando getting us started.
Tracking class, 1st day

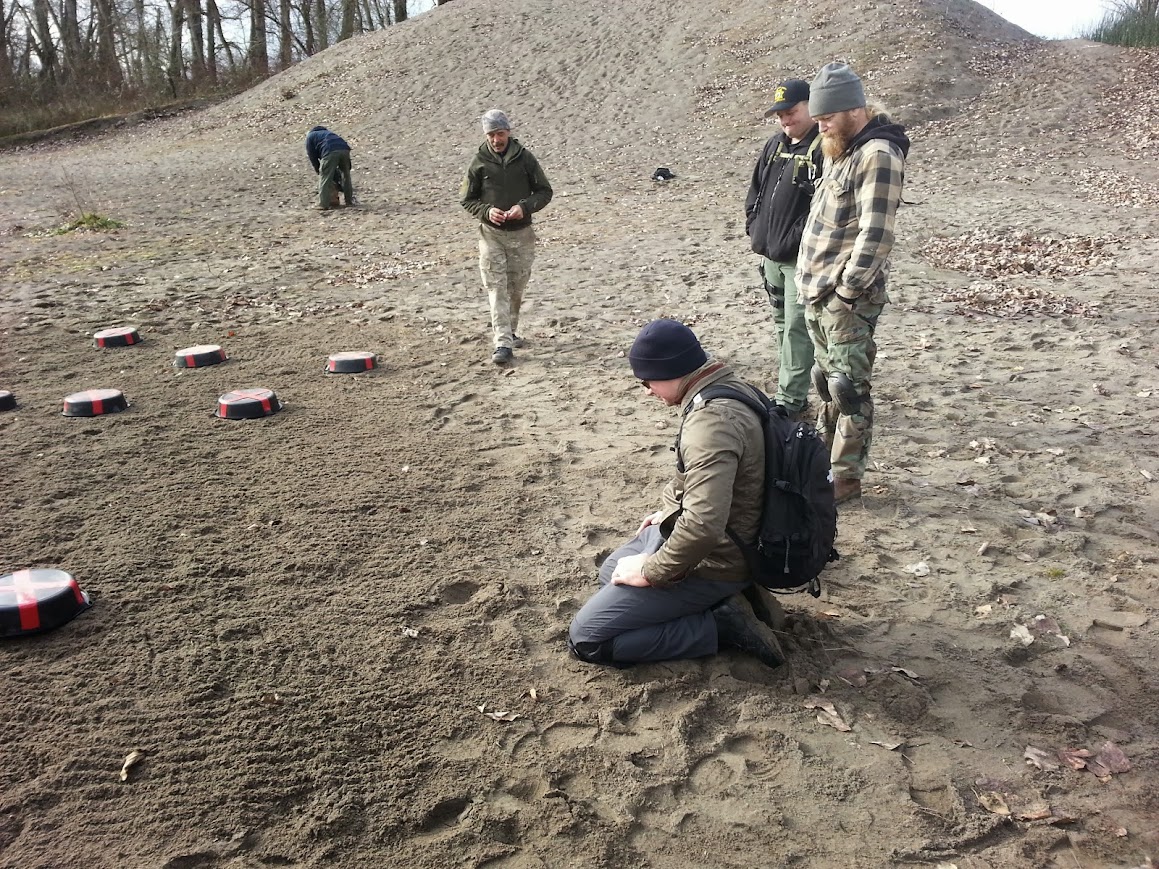
This portion of the class involved tracking movement with many of the footprints erased. We had to use only one track to determine where the direction of travel would place the next track. It was a great drill to truly see how disks released, debris fields pointed to the next track, and how weight distribution on the foot was visible during direction changes, etc. Whomever created this “game” was really on to something for it really got us all on “track” (sorry for the pun) for the rest of the training day.

Looking at the details in a footprint.
Examining the ground

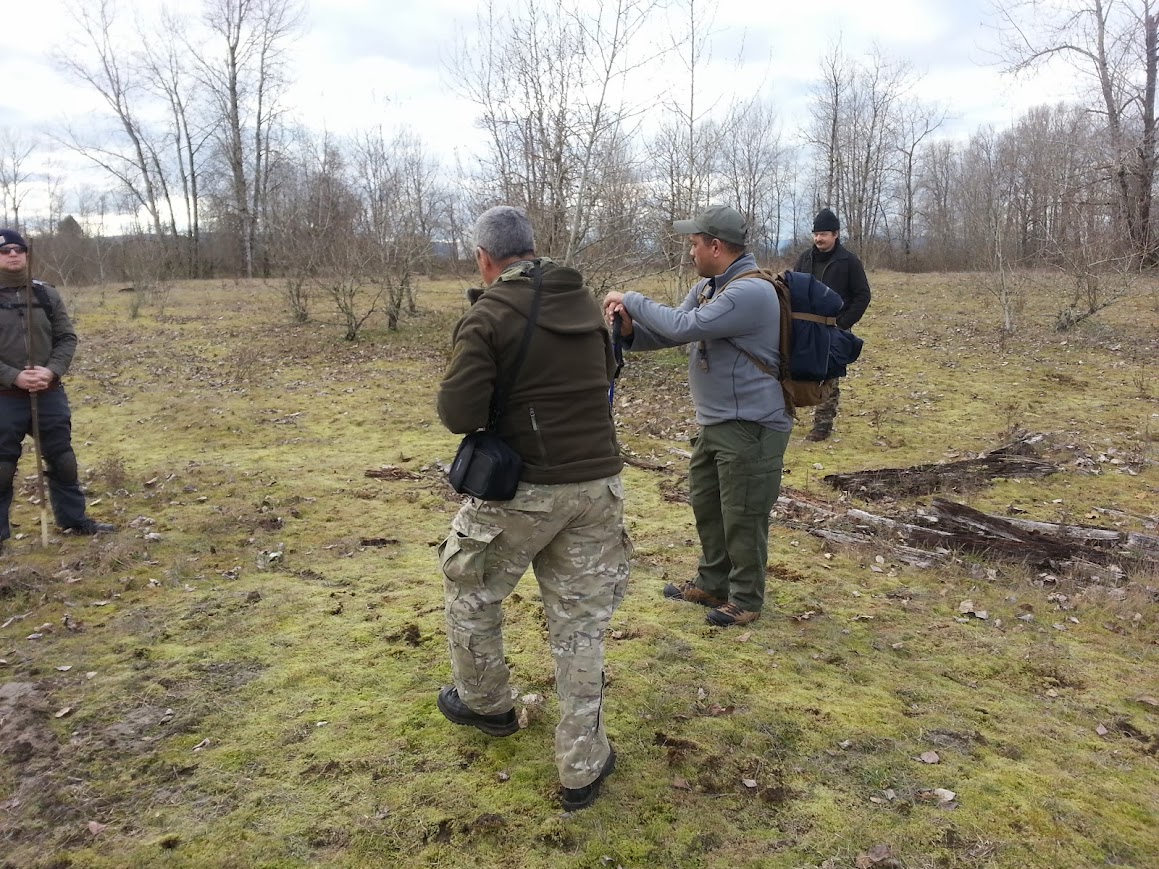
We then moved on to other terrain and worked on various techniques to help us stay on trail. Fernando was like a magician.

Fernado spotting things that no one else could see.
Fernado spotting things that no one else could see….. yet!

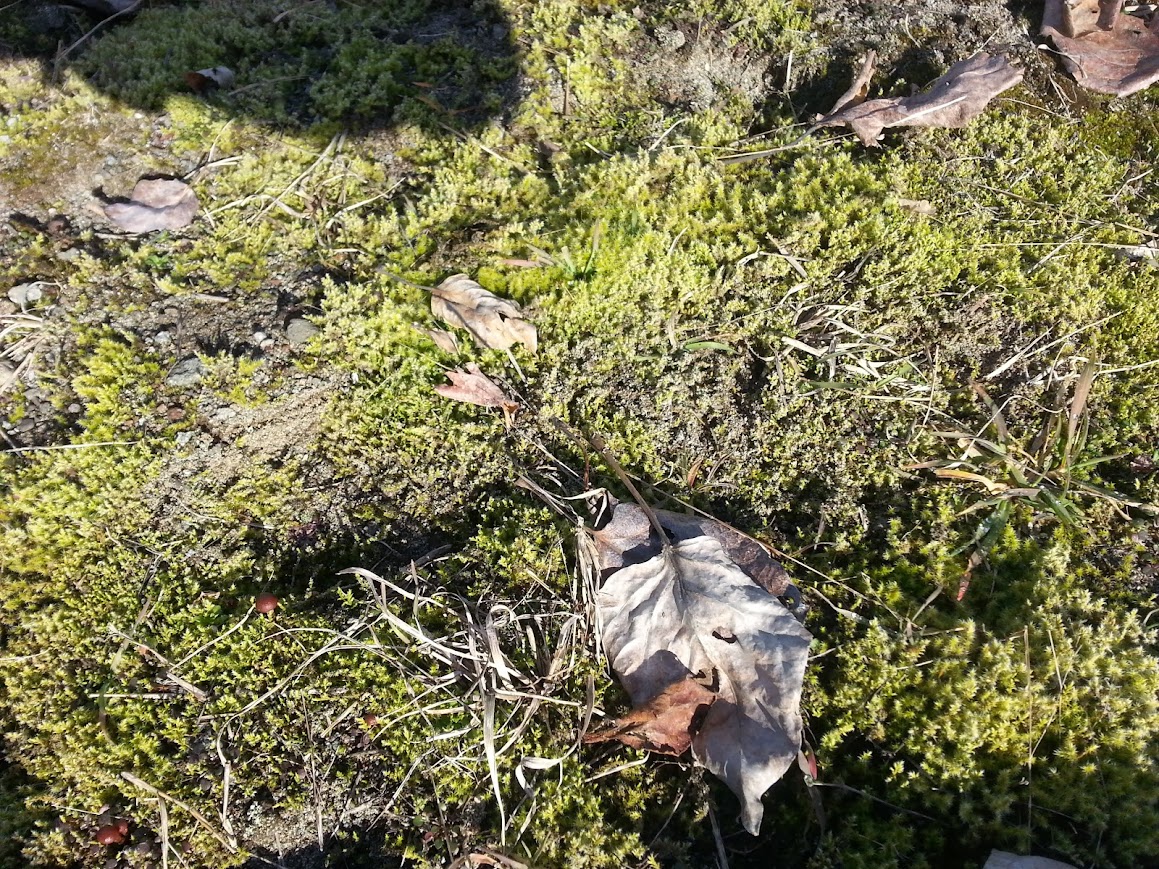
He had us do several other drills and finally had us following each other over varied terrain. By the end of the day, we were becoming fascinated by the smallest thing out of place. We were becoming transformed into trackers. Believe it or not, this was worth at least 15 minutes of examination.

Human track.
Human track.

Here is some transfer as my “prey” stepped on the log and jumped over.

Sand transfer
Sand transfer

After all this, the rest of the class drove to a second location to work on night tracking. This was my son’ birthday weekend, so I had to skip out on this training so that I could be with him. From what I hear, it was incredible training and I definitely missed out.

Our next day started as early as our Saturday did. We were lucky that we got to begin with a warm fire and coffee. The class then moved quickly out to the woods to see how tracks looked in a less forgiving environment. Here is what Fernando called “top sign.” If you look, you can see that the fern branches have been disturbed and are “loaded.” Also, a couple of the leaves are broken. These are the types of things that Fernando pointed out and had us follow.

Some loaded fern branches and top sign.

Some loaded fern branches and top sign.

This is a great picture of transfer, bruising and a broken stick all due to our “prey” walking through.

Leaf bruising, some transfer, and a broken stick.

Leaf bruising, some transfer, and a broken stick.

All being said, it was a great class and worth every penny I spent for it. If you get a chance to attend one of Fernando’s classes, jump all over it. Even with no experience, you will learn to be more track aware and be able to perform basic tracking functions. If you are more advanced, it will help hone your skills all the more. The instruction, my fellow students, and even the weather for January was great. What more could I have asked for?

Fernando Moreira.

Fernando Moreira.


  • Share on Tumblr

Washington Bowhunter Education Class

by Woodsbum

This last weekend we did the first of two Bowhunter Education classes for year 2014. Each year we do two; one in April and one in July. They are a two day course that have one day of lecture and one day in the field. The topics covered are as follows:

  • History of bowhunting
  • Conservation
  • Ethics
  • Archery equipment to include sighting in, form, shot placement, etc
  • Bowhunting safety
  • Treestand safety and how to use one
  • Hunting equipment such as camouflage, scent control, clothing, blinds, packs, etc
  • Animal recovery, field dressing, and processing
  • Methods of bowhunting
  • Outdoor preparedness such as survival, land navigation, first aid

On our field day, we actually set up tree stands and go over the entire process involved with setting them up, how to recover in case you fall, safety harnesses, how to tie off properly, use of a climbing style treestand versus hang on styles and techniques learned through years of use in the field. There is also a section on animal recovery where we follow a blood trail and go over basic tracking techniques. The last main section we cover is how to start a fire with ferro rod and natural materials.

Teaching hang on style treestand usage and safety.

Teaching hang on style treestand usage and safety.

Teaching the use of a climber style treestand.

Teaching the use of a climber style treestand.

The whole course is really a great time. There are always new people in the class for us to teach, but many times we get an experienced hunter that is either needing his Bowhunter Education course to get a license in another state or might be making the transition to bowhunting. Either way, it is always fun and plenty to be learned by all.

So, if you get a chance to take one of these courses it is well worth the time. The cost is $20 and you can check out this Meetup group and they will be listed with contact information.

  • Share on Tumblr