This last weekend, I attended our annual bowhunting instructor’s in service training. It seems that every year there is some subject about bushcrafting that crops up and this year was no different. Amazingly it was all about simple snares and carrying snare wire in your PSK (personal survival kit).
There are many thoughts about this subject, albeit not nearly as debated as batoning your knife or whether the 9 mm, .45 acp or .40 cal is the better defensive round. Many people think that setting snare is all fine and dandy, but a problem arises in the fact that you have to leave your snare up for long periods of time to be effective. The more you visit your snares to check them and the less time you leave them up, the less chance of catching something you have. It also ties you down to a single area of operations because you can’t just leave your snares set and then leave. The good thing that snares do is allow you to expend very little energy in the hopes of gaining a meal. The gear is very lightweight, easy to carry, and are extremely easy to set. These reasons make the use of snares in a survival situation a great resource.
I have included the following video that I found to explain the use and setting of snares out of 24 gauge wire. I personally use the stainless steel wire that comes in a roll that can be purchased at Home Depot. It is great stuff and can also be used as cordage if the need crops up.
Gunguy talked me into reading one of Steven Konkoly’s books called The Jakarta Pandemic. It was actually quite good and got me started on his Perseid Collapse series. Until I got started on this genre from Gunguy, I was mostly a biography and nonfiction reader. This series really surprised me and I found it to be a great distraction from my normally boring selection of reading material. Although informative and educational, my reading selection immediately before Steven’s books was The Adams-Jefferson Letters. Honestly, the letters were not as entertaining.
Come to find out, Steven Konkoly actually has a blog that he runs. On this blog I found out that he opened up his storyline to other authors as a setting for additional stories to be written. I have yet to finish his original Perseid Collapse series (currently on the 4th book), but I must say that I am looking forward to what other authors have done.
On his blog there are also many resources and interviews that you may find interesting. He also has done several blog entries on such things as homesteading, survival, and even writing resources. It contains a broad spectrum of subject matter and his writing style is quite captivating.
Once I finish up with the Perseid Collapse and the associated writings based upon that world, I think I am going to start in on his Black Flagged series. It appears to be a thriller based upon a covert operatives and government conspiracy. It should be quite interesting.
Take some time and poke around his site. I think you will find at least something to catch your interest whether it be homesteading, survival, tactical operations, or just entertainment.
Every once in a while I get roped into doing an off the wall task to help someone out. This time I ended up helping out a friend of mine with her grandfather’s old vest pistol. They did not know anything about this pistol and had found that it would jam up consistently. It appeared that the feed ramp on the barrel was hanging out too far and was catching the lip of the casing when a new round was fed from the magazine. Being the highly motivated and overly DIY type person that I am, I went ahead and volunteered to polish up the feed ramps to get rid of this lip a bit.
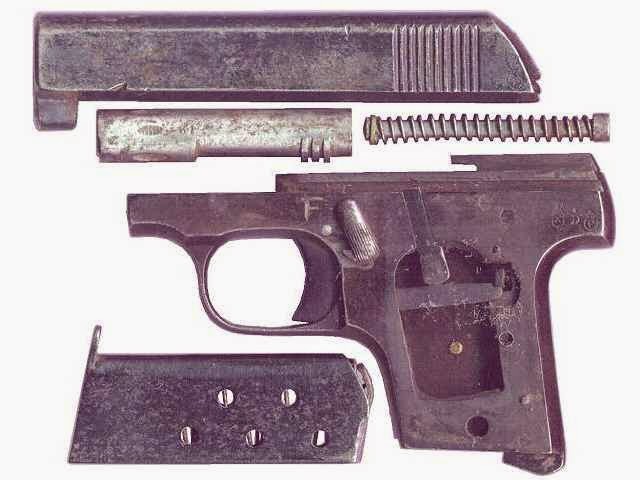
Here is the pistol.
R.K. Vest Pistol
There is not much information available about this pistol, such as how to disassemble it or even what company made it. I finally found something on The Vestpocket Pistol Collector site. It really doesn’t say much:
History:
Gunmaker unknown, but from Spain. Typical Eibar-pattern, proofing code “star over D” indicates this pistol is from 1931.
Technical Data:
SYSTEM: self-cocking pistol with internal hammer CARTRIDGES : 6 CALIBRE : .25 ACP BARREL LENGTH : 57 mm , 6 grooves right hand twist WEIGHT EMPTY : 390 g TOTAL LENGTH : 116 mm TOTAL HEIGHT : 83 mm TOTAL WIDTH : 26 mm TRIGGER : Single Action SIGHT : fix groove SAFETY : safety-lever FINISH : blued GRIPS : hard rubber
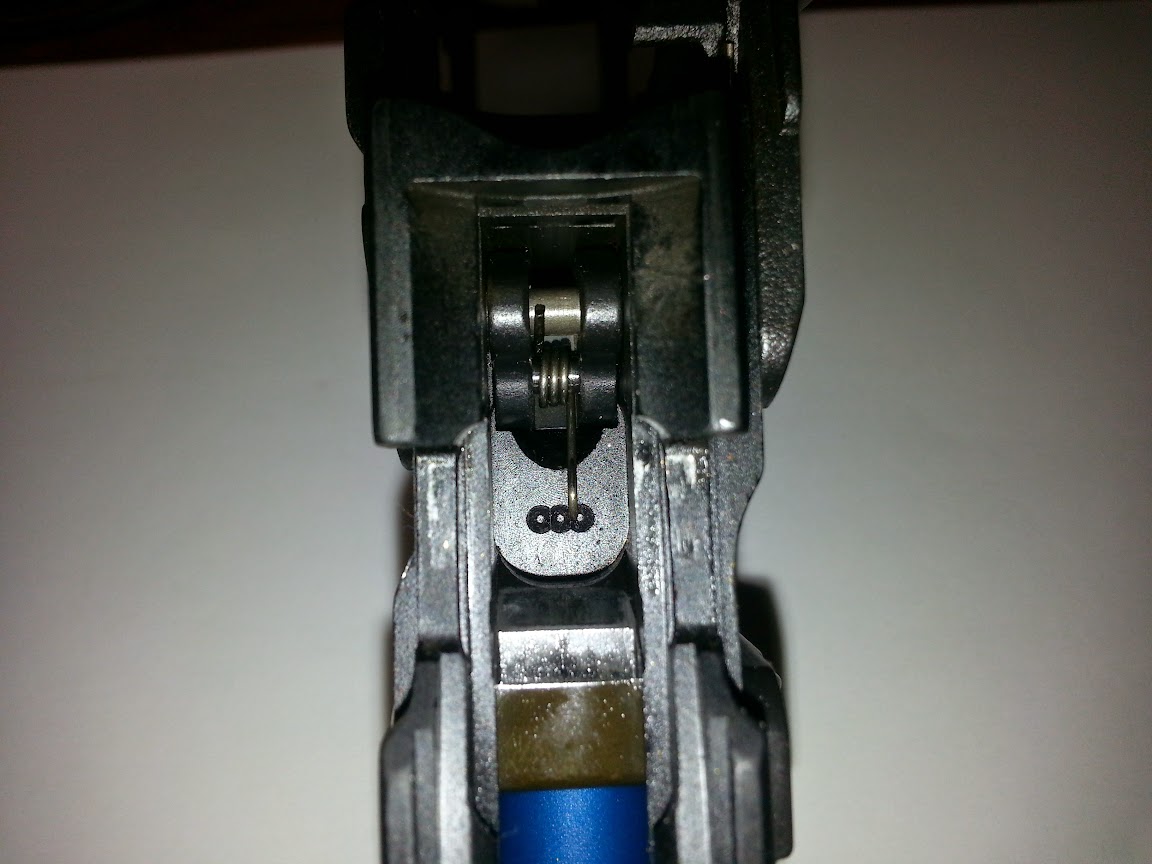
Here is what I see with the feed ramp.
Feed ramp
The way that the barrel comes out is a bit bizarre. If you lock the slide to the rear, the barrel twists on lugs and then slides right out. I have yet to get the whole pistol apart to get a size for new springs. I did polish up the feed ramp for her, though. It would be nice to get the pistol apart to do some work on it with some fine sandpaper to smooth out the action a bit, but this should help it a lot.
Polished up a bit
Here is a bit of information such as schematics and such about the pistol. I still can’t get it disassembled, though. I am working on it and have faith.
Basic disassembly
Full schematic:
Full schematic
This is really a neat little pistol. I have hopes in getting it apart to smooth everything out as well as find a new spring to tighten up the action a bit. If you know anything about these or have any resources for these pistols, please comment and let me know.
When I was in the Navy, I carried the M9 constantly. I qualified Expert with it several times, got really proficient with it, and after discharge I finally settled on version this pistol as a personal firearm. The one gripe I had with it was the lack of steel parts and over use (in my opinion) of plastic and MIM. The first chance I had, I purchased the steel parts kit from Beretta and got to swapping things out.
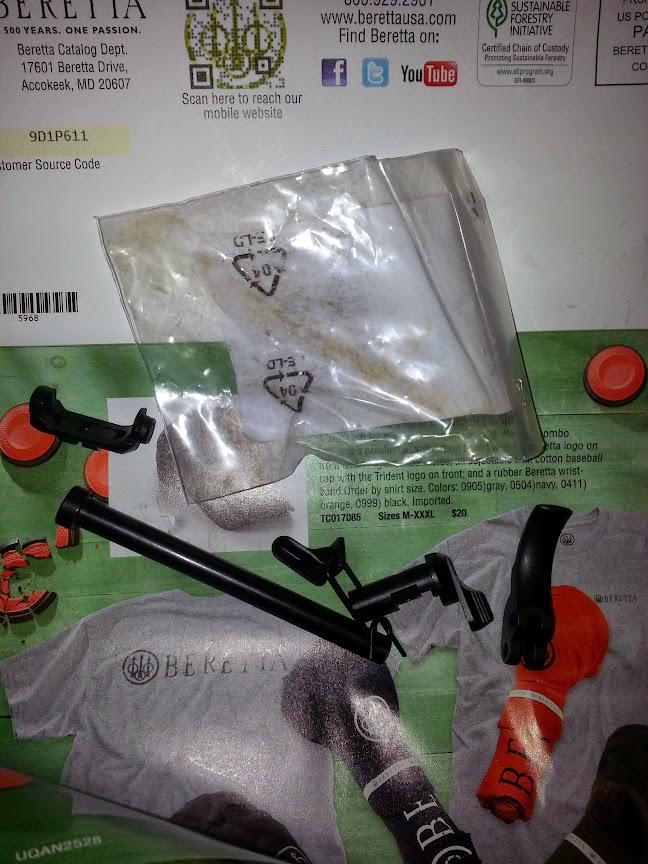
The steel parts kit is about $70 and includes the following:
Trigger
Magazine release
Safety lever assembly
Recoil guide rod
After ordering and installing the recoil guide rod, I see that the website says that the recoil guide rod doesn’t fit the 92a1. It seems fine on mine, but I will have to research and figure out why it “doesn’t fit.”
Now here is the kit. The packaging was a lot to be desired. The parts were just tossed into the box and the plastic bag that you would think should contain the parts was empty. The parts were just bouncing around.
Kit as it was just shoved in a box.
The actual parts themselves do feel much nicer than the MIM and plastic ones. This is especially evident with the trigger and magazine release. The factory originals just feel cheaply made and easily broken. Of course that is probably just conjecture and prejudice on my part, but the steel does feel much nicer. These
Old MIM trigger and magazine release
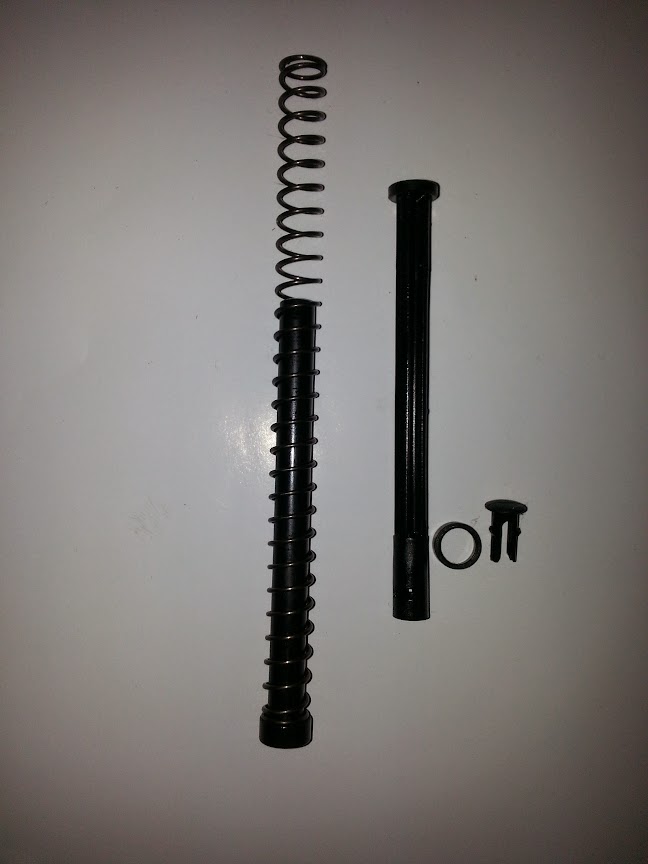
The recoil guide rod from the factory is actually a piece of plastic that holds the compressed spring. The new one is actually like the M9 I carried in the military. It is nice, sturdy and steel. It is kind of tough to get the plastic one apart to get to the spring. There are little tabs that hold the end of the plastic together that need to be pried off with a regular screwdriver. Once that is done, the rod just slips into the spring and you insert it spring first into the slide. The rod slips into place as before. Below are the parts. You can see the way that the plastic rod has the end attached.
Guide rods
Putting the trigger in is a bit odd. The old trigger has an actual spot for the spring to rest where the spring must be moved and rested on the rod that goes through the top of the trigger. Here are a couple pictures. This first one shows how there is an actual spot for the trigger spring on the old trigger.
Old trigger
This is how the trigger assembly looks with the springs removed.
Trigger assembly without springs
Once you get the spring installed and it all put together, it should look like this.
Trigger assembled
There are several companies that make after market trigger springs that make this a lot easier. I think I am going to do some research and pick on up eventually. If I do, I will post up the information here.
The next pain is the installation of the magazine release. There IS a trick to it. Check out this video to see how it works. Once you figure out to put in the correct side first, the rest is easy.
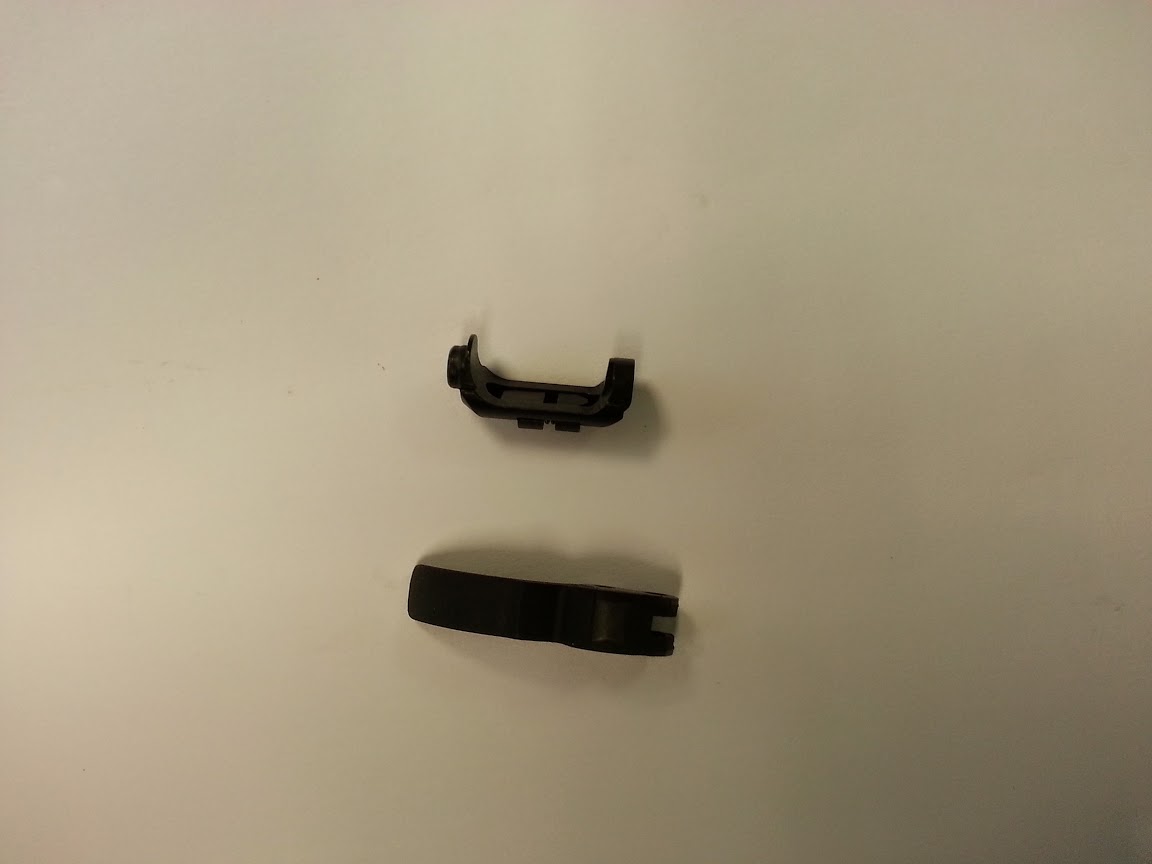
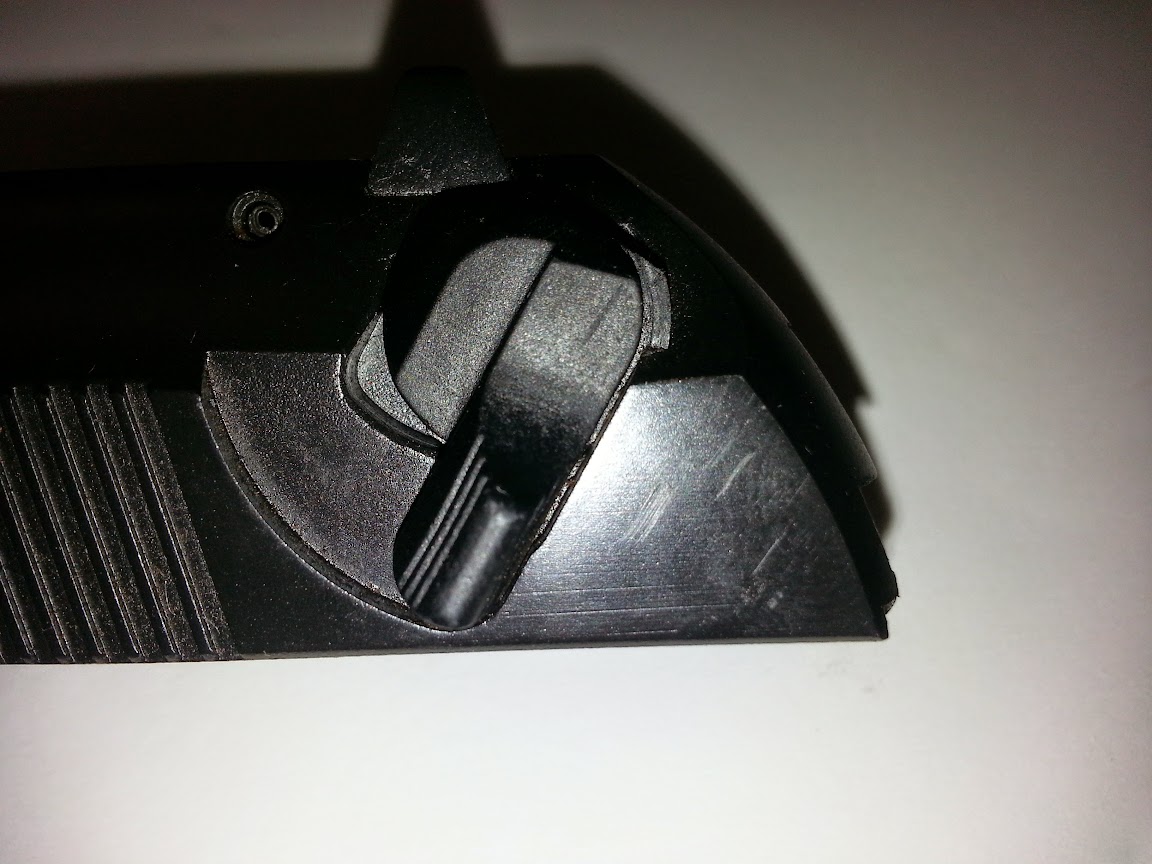
Next comes the REALLY tough part. I have to swap out the decocking mechanism. This is a bit on the rough to do side. As you can see, this is definitely MIM.
Decocking lever
To perform this upgrade I did a Youtube search and found a video about installing a Wilson low profile safety lever. It gave me the information I needed to be able to do this install. I did have to go find really small punches, however. Thankfully there is a Harbor Freight down the road.
Now I only have a few more modifications to make this the way I want it. I will be getting a skeletonized trigger, VZ G10 grips, and a couple Wilson Combat springs to finalize this build.
This last video is a complete (except for the safety lever) upgrade of the Beretta parts. I used this initially, but found that the guy doing the work was almost too good at putting the parts in. He made it look way too easy. It really was much more difficult than he made it seem.
I really love the feel and function of the Beretta 92/96 frame pistols. Many people tend to hate on them for whatever reason. Considering the abuse I put mine through while Active Duty and then still qualified Expert with it at the range on a consistent basis, I feel that these are great systems.
I got into a discussion the other day about natural cordage and 2 strand twists. Now, I am not the best person at natural cordage because I tend to over stress the material and break it. This has led me to practicing with man made cordage. At the end of this post are three videos. Two are about making cordage out of natural materials and one shows how to do the 2 strand twist with man made materials to get the technique down.
In my area, nettles are very common and easy to harvest. Cordage material is in no short supply here, which is lucky for me considering how much I break. Lots of material really are necessary to practice with to become even slightly proficient.
To effectively find cordage materials, just go out and see what is available in your area. Most plant materials that pulls apart into long strands of fiber can usually be twisted and made into a cordage of some sort. The last video gives you a look at how to strip willow bark for use.
Here is the practice video to show you how the whole 2 strand twist works and is done.
This video shows how to use nettles to make cordage. Be sure you are careful when you strip the fibers off the plant. I tend to break them more often than not. Just practice and be careful.
This last video shows you how to strip willow bark for cordage material.
The techniques seen in this video should give you enough of a basic knowledge to go out and do some testing of different materials in your area. Just go out and have some fun!