by Woodsbum
Most people love a good campfire. The problem is that there is an art to the whole “fire building” thing. If you don’t know how to make feather or fuzz sticks, gather tinder and kindling, know the difference between green or dried wood, etc., you can be stuck using one of those fire starter logs on your next camping trip. What I am going to do is start adding a few fire starting techniques and instructions to help you along if you do want to start a fire on your next outing.
The first series of instruction is on the “twig bundle.” It is also known as the “Apache match.” All it really consists of is a gathered bundle of dried twigs that range from the width of a pencil lead to the size of a disposable pen. These puppies get very hot, very quick and burn long enough to get some bigger split wood burning. They are quite effective and I personally use this technique about 1/3 of the time I am out in the woods.
Your first step is to gather as many twigs as you can find. They should be very dry and range in size from pencil lead diameter to the diameter of a disposable pen. When gathering these twigs it is imperative that you only gather those that are very dry. To test to see if they are dry enough you should bend them and see if they snap. If they tend to bend more than snap, the twigs are not dry enough. Gather enough to be able t make a bundle about 8 inches in diameter. To judge this size you can look the length of a United States Dollar. It is about 6 inches long. Get a group of twigs together that create a bundle farther across than the length of that dollar.
Once you get your twigs gathered, break them into 12 – 16 inch chunks then separate them by diameter. The thinner pieces need to be in the middle of the bundle and the thicker pieces need to be towards the outside. This allows the thinner pieces to catch on fire and get the thicker pieces going after it gets hot enough. You pile of twigs should look like this.

Pile of twigs
After you get them sorted and built into a good, organized bundle you should find yourself some sort of cordage to tie the bundle together. Twine, inner tree bark, fresh tree branches, stalks from weeds, blackberry vines, etc., all work well. In this picture I used a fresh bough I cut off a tree that kept poking me as I worked.

Tied twig bundle
As you can see, it doesn’t have to be perfect. All you are going to do is start it on fire, so generalized “organization” is more than perfect. As long as it is relatively “organized” you will be fine.
Once you get your bundle ready to be lit, you then need to decide how you are going to light the bundle. Some common methods include the use of cotton balls, dried cat tails, jute twine, dried grass, inner bark of a dead tree….. The list can go on for days. The important thing to remember is as such: Get some easily combustible material to nestle into one end of the bundle and get a different pile of materials to get your actual flame. You DO NOT want to fight the twig bundle as you are trying to get an actual flame started. Get the flame and then start the bundle on fire. If you pack one end with something like dried grass, the whole end of the bundle will take off in a matter of seconds.
If you are wondering what I use, you might be a little scared. I tend to use flint and steel to get a piece of charcloth going, then blow a “nest” of dried materials into flame. Once I get that going I get the dried material I packed into the end of the bundle started, which in turn make the bundle burst into flames. I use this method because of the extremely wet environment in which I live. You might not have as many issues if you don’t live in a rain forest type environment.
Once your twig bundle takes off, it will get hot and burn quickly. Don’t forget to have yourself some staged firewood ready in various sizes that range from the diameter of a dime to the size of a quarter to begin with. You will take your brightly burning twig bundle and use that as a way to get your other materials going.

Twig bundle burning
These bundles burn for several minutes and get a good set of coals started. It is a great method to start working with as you progress in your fire starting skills. If you look at the next pictures, you can see how setting the bundle on end will get you a fairly high and hot fire going. This helps you get split wood burning quite effectively. Again, make sure you are using dry materials. Green wood and materials do not burn very well.
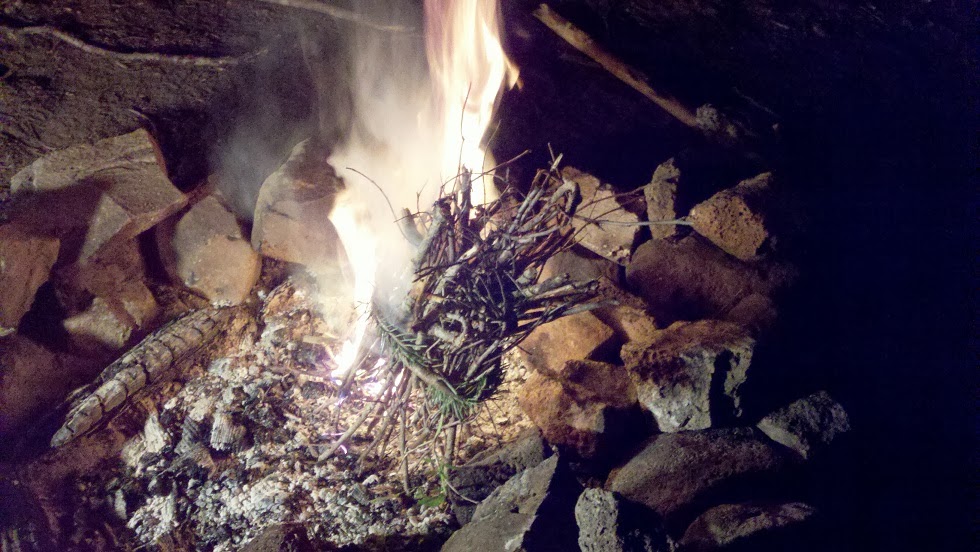
Twig bundle set ablaze
In this next picture you can see how I just added bigger twigs and branches to build a good set of coals with which I could cook. The better the bed of coals you build, the easier and better it is for cooking. It also makes it easier to keep the fire going all night long if you have a solid bed of coals going. We will get into stoking fires for a full night’s burn and the different types of fire lays in another post. Just remember that you need to have a bunch of small pieces of wood burning before you add bigger pieces. Also keep in mind that you need to step up the pieces and not drop an entire tree on a new fire without a coal bed. If you do move up in size too quickly, the fire will go out. Again, this will be touched upon in later posts.

Twig bundle with larger branches in a modified tipi style fire lay
I hope that this helped some of you that are new to building campfires. As I remember to take more pictures, I will show several more fire building methods to include the use of metal matches/firesteels and flint/steel. There will also be posts on making your own charcloth as well, so keep checking back for more fire building tips and instruction.


