by Woodsbum
Recently I was the recipient of all sorts of garage dwelling goodies such wood stain, spray paint, and a rifle painting kit. To ensure that this rifle painting kit did not go to waste or possibly go “stale” I promptly started getting read for a home camo paint job.
What I have done is broken down the process into two parts. The first part will be based around the materials needed, color schemes and the base color I used for my paint job. The second part will be the actual painting process and what it all looked like after I was done. You can find part 2 here.
To precursor this whole project I wanted to establish the basis for my decision to paint my new AR. The reality of the situation is that I am more of a traditionalist when it comes to firearms. It wasn’t until recently that I got into modifying or upgrading any firearms that I own. Even more surprising is that until recently I really wasn’t too into tactical firearms or gear at all. Most of my holsters are leather and most of my backpacks are canvas. Although I have a lot of gear from my time on Active Duty, I really have never been one of those “tactical” guys that owned any high speed gear that you see the “tactical” guys running around wearing. An old LBV (Load Bearing Vest) was actually the most “tactical” thing I owned until recently so camouflaging a rifle to keep it from standing out is truly uncharted territory for me. Thanks to Gunguy for getting me more into this whole world. I thank you, but my bank account and wife probably do not….. Just saying……
Back to the project….. Here are the materials that are needed to complete the paint job:
- A rifle to paint
- Paint. I feel you should get an actual paint kit that is made to adhere to firearm coatings. The one I received was from LBX Tactical.
- Masking tape. The stuff I got was from Home Depot, but I linked to some that is very similar to what I used.
- Stencils. You can use vegetation or homemade cutouts, but I opted to get something a bit nicer. The paint kit from LBX Tactical actually comes with stencils, but they are a digital pattern. All my gear is Multicam. This presents a problem because I don’t want to have color clashing or pattern explosion issues….. The fashion police might come arrest me because EVERYONE knows that being fashionable while tactical is a definite must!
- Heat gun to dry your paint.
- Wire or something to hang your rifle from during painting and drying.
- Beer
- Break parts cleaner or something to prep your rifle.
- Paper of some sort to assist with masking and preventing over spray.
Once you get your materials all consolidated and ready for use, the first step is to drink a beer while you clean the surface of the rifle you are going to paint. I used brake parts cleaner to get rid of the oil and residue that might have been present. Once the brake parts cleaner dried, I wiped the rifle down with a rag to remove any droplets or residue. While it all dried, I finished my beer.
The next step is to get another beer and start masking off your rifle to apply the base coat. I removed the optics from mine so I could get a good coat of paint on the entire upper. I also removed the stock so I could paint the entire buffer tube. The parts that I masked off were:
- Barrel. The barrel gets hot and I didn’t want the paint to end up bubbling or burning off after use. I also like the look of the black barrel sticking out below the keymod rail.
- Charging Handle/Bolt Carrier. I actually removed the BCM charging handle and just taped off the bolt carrier. This way I could paint the back part of the upper with ease as well as keep the nice charging handle looking nice. It gives a nice contrast to the rest of the rifle, in my opinion.
- The controls for the optics.
Once this was all taped off and ready for paint, I did a light and quick first coat of paint. When painting, many people have a tendency to get an overly thick coat on their first pass. This actually is a bad thing because it causes too thick of a layer that has not cured or bonded to the surface properly. Complications such as eventual chipping, runs or curtain potential is all increased due to a thicker coat applied in a single pass. It also helps to keep a beer handy while doing all this.
After several coats of paint, the entire base coat was finished. I also used the drying time between coats as a beer drinking opportunity. This is also vitally important to the project so that you get ample time to relax and enjoy this project.
Once I had completely painted the rifle I hung it up on a wire and used a heat gun to ensure the paint was not only dry, but bonded properly to the rifle’s surface. After inspection I did realize that I needed to repaint some areas, such as the area of the lower that lies beneath the safety. At first I had forgotten to move the selector to “Fire” and paint where the lever masked the lower. I also had to touch up a couple spots around the sling swivels and single point attachment.
Again, don’t forget to apply heat to the rifle after you paint it. Think of this process no different that what is done to a car after painting. It is put in a warm garage to almost “bake” the paint onto the metal. The same concept works here. The paint must truly heat up to adhere to the rifle properly.
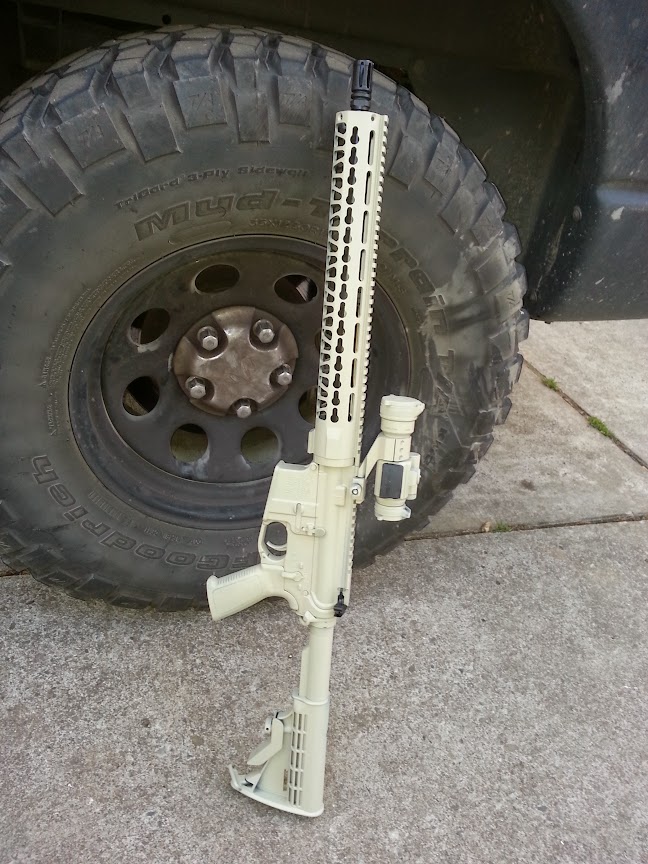
Here is what the rifle looks like with the base coat applied.

AR with base coat
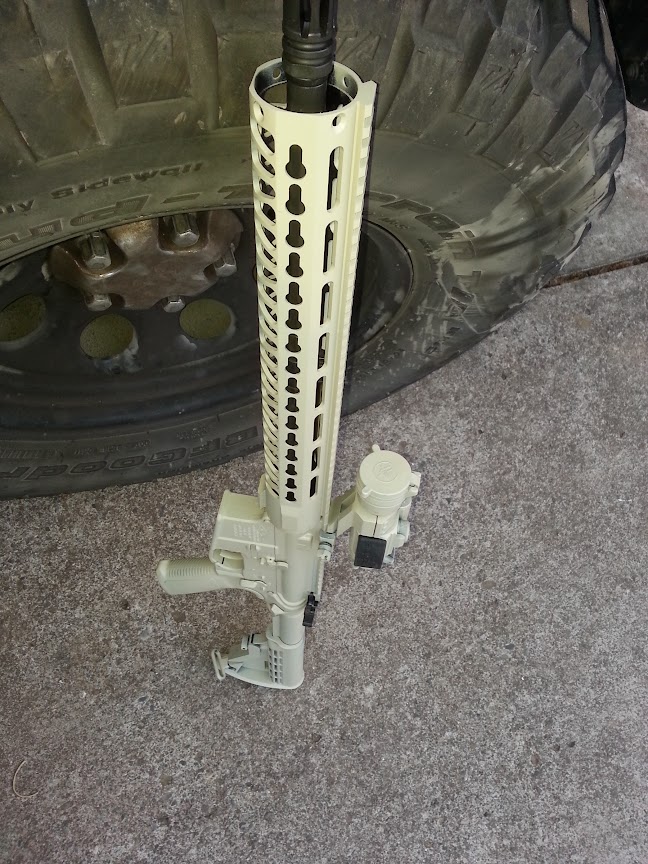
Here is the rifle from a little different angle. Notice how well the color blends into the rifle. This paint did a wonder job of adhering to the rifle to make a solid base for the camo pattern. I was quite impressed with the paint in the kit. The real “hero” here, in my opinion, is the heat gun that I used between coats. I could see the texture of the paint change to really match the texture of the receiver and hand guard when heat was applied. It evened out and really seemed to “melt” into the rifle’s finish much better.
As you can see, I did get some over spray inside the hand guard. I am now sure how I plan on fixing this. I have considered just getting a spacer, but might just mask it and spray on down the barrel to get the inside of the hand guard. So far I have not made any decisions.

AR base coat


