Monthly Archives: April 2016

Understanding Headspace

by Woodsbum

This discussion has come up many times between myself and my friends once we started building ARs and putting old military rifles back together. The fact is that many explanations are just overly complex in the way that they present it or the polar opposite. Somehow there doesn’t seem to be any middle ground on this subject. Luckily, Hornady has put together a long list of videos that cover a multitude of subjects on their YouTube channel. Their hour long video on headspace is really what every reloader should watch to ensure that they fully know what is going on. Even though I grew up reloading there were many things in this video that helped me to make more sense out of the whole process.

ENJOY!!!

  • Share on Tumblr

How I Use a Lanyard Hole

by Woodsbum

Many people have different uses for lanyard holes on a knife. This is how I use a lanyard hole more often than any other.

Especially with bushcraft knives, sheaths are made to cover most of the handle. There is usually just a little bit showing to allow you to pull the knife out. When you have large hands or are wearing gloves, this can be a pain in the rear end to deal with. It is easier than many other retention systems such as snaps, straps or toggles. Here is how the normal bushcraft knife looks in its sheath. This pictures does have a leather lace started in the lanyard hole.

SPL Knife in a Skab Leatherworks sheath

SPL Knife in a Skab Leatherworks sheath

As you can see, there isn’t that much available handle to get bear sized paws on. I build myself a leather “toggle” as I call them. This is what it looks like when I am done.

Ready for use

Ready for use

As you can see in the pictures, I not only have a good deal of leather to use in pulling the knife out of the sheath, but I can also use that leather to allow me to choke down on the handle for chopping. Since it slides to create a larger loop if desired, I have also been known to wrap my wrist so I can loosen my grip when carving or processing firewood. Although many of you see this knot and already know how to tie it, I figured I would give those that don’t a little tutorial.

The first thing I do is pass the lace back in upon itself to make a loop. It should look like this.
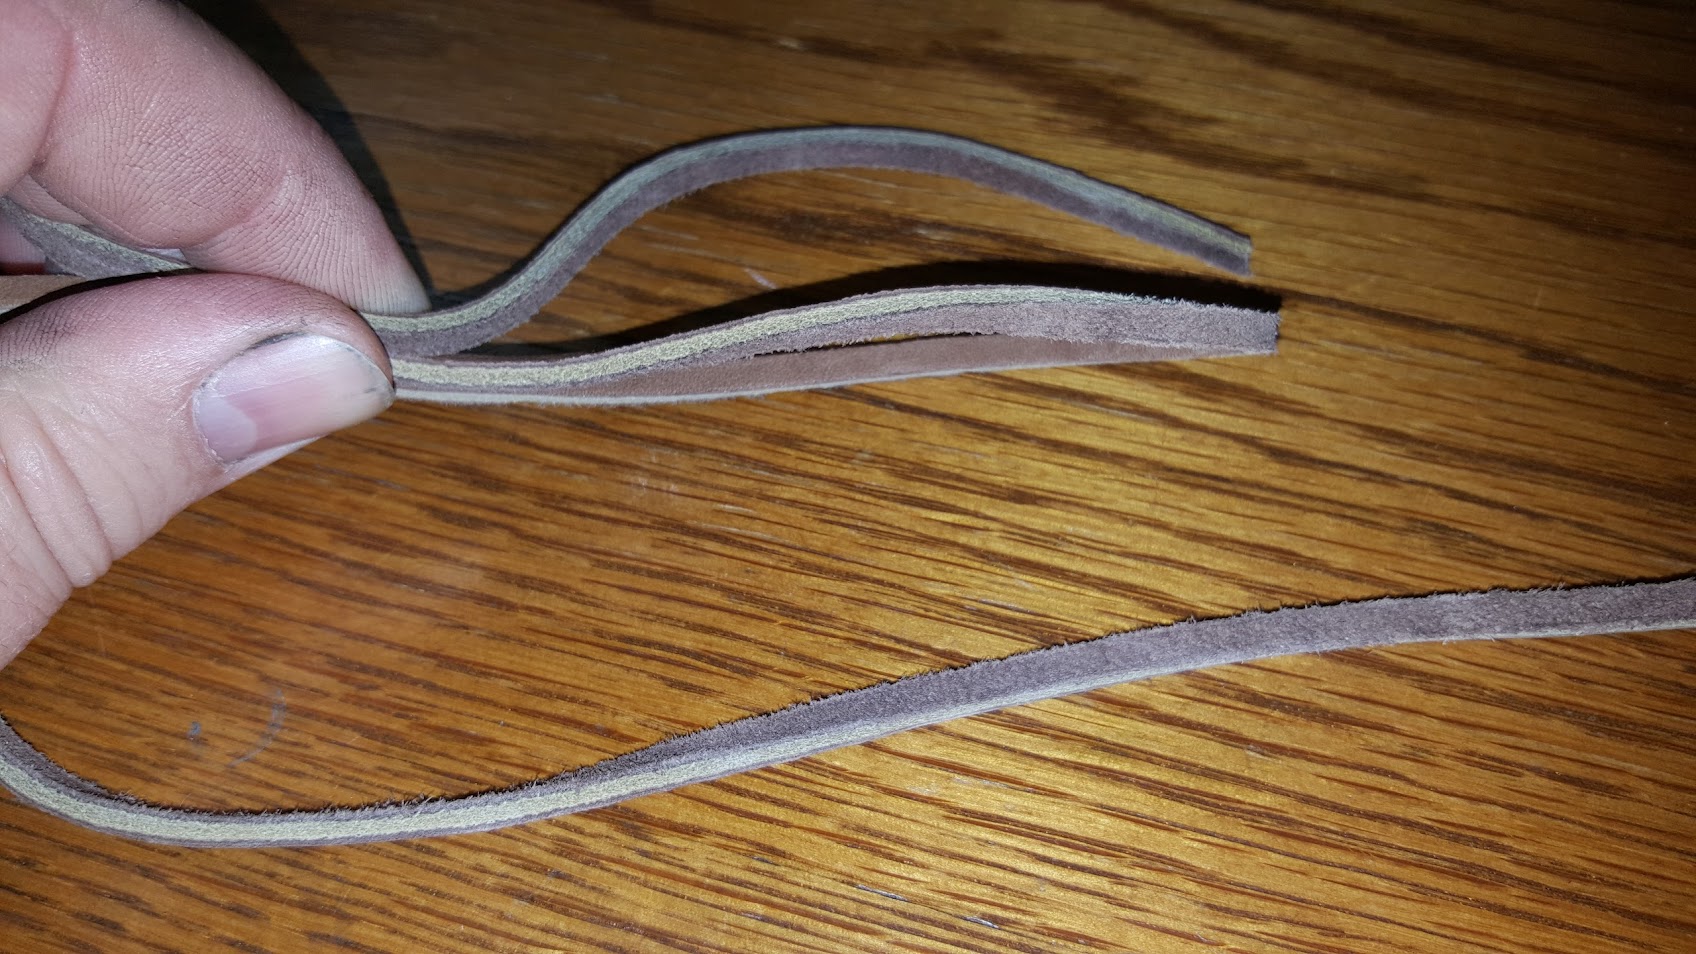
The start

The start

I then wrap the free end around the bottom of the loop to build something similar to a noose. When you get the desired number of wraps just pass the free end back through the top of the loop and slide everything together to make a tight knot.

Start of the wrap

Start of the wrap

Make sure you keep everything tight and slide the free ends down upon itself to make the cleanest knot possible. You don’t want the knot coming loose.

Finished

Finished

I have seen people put epoxy over knots like this, but I don’t recommend it. If you keep everything tight and clean there should be no issue during use. Sometimes knots do slide loose. If that happens to you, then just retie it. It really isn’t a big deal.

Over the years I have seen a multitude of different knots used. It really doesn’t matter how you put this together, in all actuality. The big thing to remember is that the lanyard hole on a knife can be used. So many people just ignore them and complain when they have problems drawing their knife or with their knife slipping while chopping. Remember that these knifes are tools like any other tool. Use them and their features as intended when needed.

Good luck!!

  • Share on Tumblr

SPL Custom

by Woodsbum

A couple of years ago I approached Steven Long about making me a one off custom knife. After we worked together a bit, this was what we came up with.

Original Design

Original Design

Due to time constraints and some issues with life on his side, the project was put on hold for a while. Well, the day has finally come. Steven was able to get to working on my knife and finally pulled off a phenomenal build.

SPL Custom

SPL Custom

The scales are made of ironwood and were shaped to fit nicely in my larger than average hand. When we originally designed this, I wanted some sort of shape to the handle that would help protect me from sliding forward onto the blade. If you notice the shape, Steven really made a pronounced contour to the handle to help keep my forefinger from sliding forward.

SPL Custom

SPL Custom

As an experiment I also had him keep as much of the heat treatment scale on the blade as possible. From what he had read and was told, this scale really helps with cutting down on possible surface rust. Since I live in a very wet and damp climate, I decided that we should give this a try and I would report back to him as to how well this worked.

For decorative purposes, Steven put in a mosaic pin in the middle. I am quite fond of the mosaic pins and think it helped make the handle pop even more than the ironwood already does.

SPL Custom

SPL Custom

The fit and finish of Steven’s builds are just amazing. His artistic eye and attention to detail is just incredible. When he gets caught up and opens his books for orders again, I would highly suggest you jump onto his list. He is quite reasonable with regard to price, but when you add in the quality you receive for that price I would say that he is selling his products way too cheaply.

If you see me on the trail or at a PNW get together make sure to hit me up about this SPL Custom. I am sure you will like it as much as I do.


  • Share on Tumblr