Tag Archives: AR 15

AR 15 Build Field Report

by Woodsbum

Similar to last week’s report, I wanted to follow up and tell you about how my newest AR 15 build faired while out in the field. Again, I don’t really have much in the way of pictures to show you. When I go shooting I do not go to a range. I take off to the hills and shoot clay pidgins, potatoes, or tannerite. Couple that with the fact that only I am out there and you have a very difficult time shooting while taking “selfies” of your firearms in action.

When I break in a new AR, I tend to use steel cased Wolf ammo to wear in the chambers a bit and make other rounds cycle easier. On this outing I blew off the last 90 rounds of steel case I had and then started on factory and reloads. Other than my brother’s reloads which usually have feeding issues, I had no other failures at all. Overall I put about 400 rounds through it.

The Vortex Strikefire 2 optics are just awesome, like always. One of the many things I love about them, aside from how easy it is to get on target and the fact that they just work flawlessly, is how easy it is to sight in with this optic.

Here is a “redneck” guide to sighting in an optic without using paper targets: I usually pick a very soft dirt pile and pop off a couple rounds to see where it is hitting. Then I adjust until I get to where I am on target at 25 yards. I then move it out to 50 and repeat the process. Finally I move to 100 yards and do it one last time with full sized clay pidgins. If I am using only a red/green dot optic I stop here. If I am sighting in a scope I have more to do. To fine tune a scope I move from full sized clays to the broken pieces and repeat the process while slowly moving down target size. This will usually get me down to about a 1″-2″ group at 100 yards.

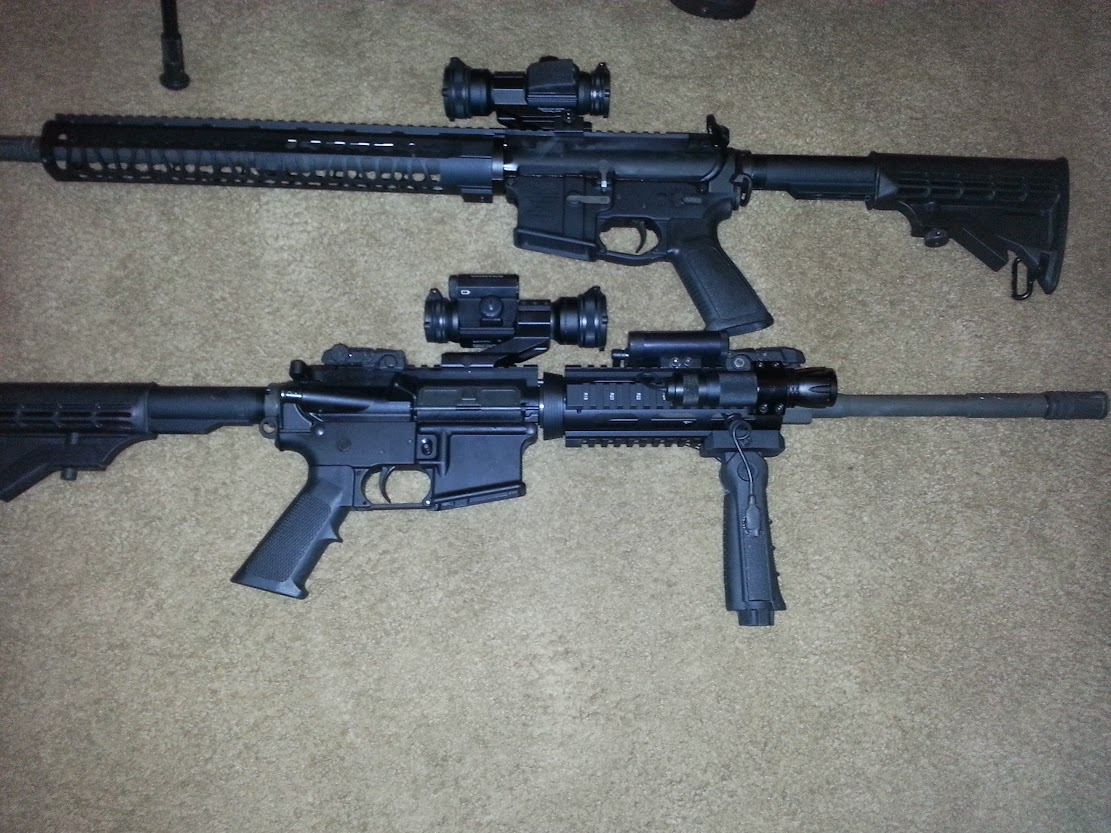
A couple of the things I really loved about my new build are the weight and the handguard. By installing one of the keymod rails, I actually opened up the entire barrel length to allow for better heat dissipation. Although the barrel did get hot while rapid firing (as expected), it cooled off within just a couple minutes rather than having to wait several minutes like any other configuration I have used. It really was nice to have that full handguard covering almost the entire barrel as well. I did not have to worry about melting things into the barrel after shooting or burning myself by being stupid. It truly is a great configuration. And in regard to the weight, it was an absolute pleasure to shoot such a light rifle. I don’t consider the .223/5.56 to have any real recoil, so that was never a consideration with regard to weight. It was just so nice and easy to carry. I truly love this new build.

For those of you who have been skeptical about ordering from Daytona Tactical, I will give you a few tidbits. Their order processing is VERY slow. From the time that I ordered until my parts were delivered was almost 3 weeks. They also ship via USPS, so that does suck a bit. You can’t track your packages like you can with FedEx or UPS. The product is quite good, however. I have absolutely NO complaints about the items I received and the pricing was absolutely amazing. If you are after a quick build that you just want to be able to shoot, then I REALLY and HIGHLY suggest you make an order through Daytona Tactical. You will be happy with the results.

  • Share on Tumblr

Low Cost AR 15 Build

by Woodsbum

A couple of weeks ago I ran across some $50 stripped AR 15 lower receivers. Since I already had one that was set up similar to an SPR, I thought it would be nice to do a low cost AR 15 build with this one. The lower is from Anderson Rifles and I went shopping online for some good parts deals to complete my build.

As a disclaimer, I did have a few parts already. This meant that I did not have to buy a buffer tube, buffer, spring or stock. I also had an old milspec trigger group and handle. Total this saved me about $60-$70, so keep that in mind as I go through this build.

First thing I went looking for was a lower parts kit. This landed me on Red Barn Armory’s website. What I liked about their site was that I had the option to build the parts kit and upgrade or leave out parts as needed. Because of the parts I already had, I got the rest of the lower kit and even upgraded my pins as well as added a Magpul sling attachment point for $27. Total price to complete my lower was $135 with shipping.

I then went looking for some upper parts. Since I was more interested in cost than I was anything else, I investigated some complete upper builds. The best deals I found were on the Daytona Tactical site. I found a complete upper (no BCG or charging handle) deal for $235. With shipping it was around $255. This was an important upgrade for me so that I had a free floating handguard build to increase accuracy. The full length of the handguard also left the rifle with a great look that reminds me of the Star Wars T-21 rifle.

For those keeping track, I have now acquired all the parts needed for an AR 15 except a BCG, charging handle, and some sights. This brought me to Amazon for some good deals. The BCG I got was $100 and seems to be of decent quality and seems to function properly. I did splurge a bit on the charging handle. I got a BCM Gunfighter charging handle. The cost of both of these items was about $145.

Last thing I got was a Vortex Strikefire 2 red/green dot optic. Because I get special pricing through several of my group affiliations I only paid $140 for mine. If you get this one through Amazon, it will cost you right at $179 if you have Prime.

The top rifle is the finished build. The bottom one is my wife’s with all sorts of addons and goodies.

New build on top

New build on top

To summarize my total cost of build – $670:

  • Total lower costs: $135
  • Upper costs for free floating handguard/barrel no BCG or charging handle: $250
  • BCG and charging handle: $145
  • Optic: $140

For anyone building this from scratch it would be an additional $100 for this optic and the other lower receiver parts that I had.

Now as a point that must be addressed, I did find complete lowers for $199 at a local gun shop. This would mean that you could actually get a complete rifle done for $500 to not include your optic. This is how this works:

The costs of this build is actually cheaper than you can get an M&P Sport AR rifle. The Sport doesn’t have a forward assist and has an A2 front sight post. It does come with a flip up rear sight, but the MSRP is $739.00. Again, building the AR like I propose is much less costly and already gives you several upgrades from the onset.

Good luck if you decide to do your own build. It is quite fun and fulfilling to know that you literally built your own rifle from parts!

  • Share on Tumblr