by Woodsbum
For many years I was a cigar smoker. Although I love the taste, feel, and aroma of a good cigar the price really put a damper on the various types and amount that I could afford. Even with the lowered price of bundles or seconds it was way too expensive of a vice for me to really partake that often. That was when a friend of mine gave me an old Savinelli pipe that he no longer used. From then on I found that the price of pipe tobaccos gave me the variety that I craved with the lowered costs that I required.
As years went by and more and more pipes found their way into my collection, I stumbled across a very nice looking Erik Nording. Although I am anything but a pipe snob, I was actually quite proud to have this beautiful piece in my collection. Between the draw, the way the heat maintains an even tobacco burn, and the lack of moisture that builds up this has become my favorite pipe by far.

Erik Nording Rustic finish

Erik Nording Rustic pipe
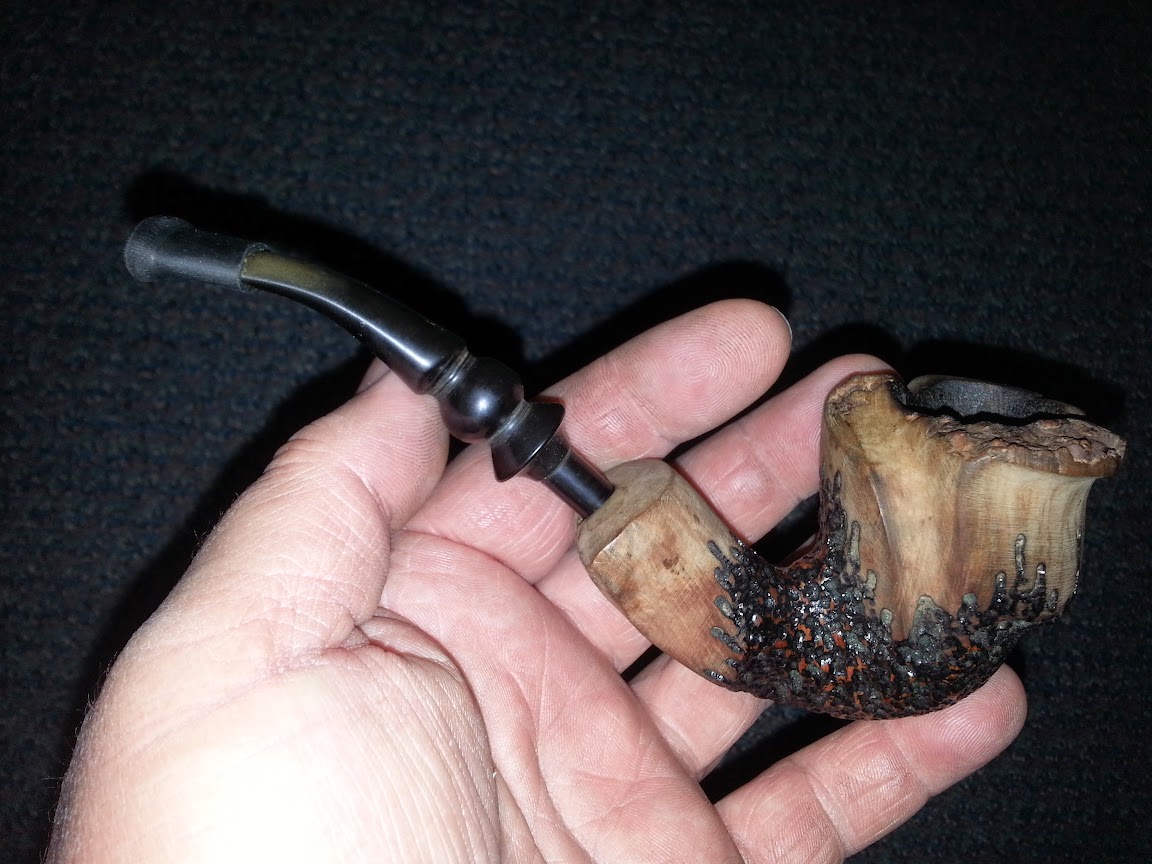
Nording pipe
Again, I am not a pipe expert and am self taught via trial and error. There are many things that I am sure that I am doing wrong, but I don’t care. Smoking a pipe isn’t a status thing for me nor is it something to make me “look cool.” It would take much more than a pipe to make me even remotely close to “cool.” I enjoy the different flavors, aromas, tastes, and relaxation that smoking a pipe provides.
If you are debating on moving over to a pipe my main recommendations for you are as follows:
- Spend some money on a good pipe. A $40 pipe will not give you the experience that a $200 pipe will. I don’t know the physics of it all, but I know from personal experience that any cheap pipes that I have purchased have either been intentionally “lost” or given away. The most expensive pipes give a much more pleasant smoking experience.
- Making your own pipe is a close second to an expensive pipe purchase. Just make sure you make the stem long enough to cool the smoke properly. Otherwise you get a burned taste from the smoke and the flavors of the tobacco are lost.
- Get good tobacco. DON’T BUY PREPACKAGED TOBACCO. Go to a cigar shop and look at the glass containers for your tobacco. It is 200x better tasting and burning.
- Get a good pipe lighter. The cheap Bic lighters seem to be only capable of successfully burning my fingers and can barely light the bowl. Some can make it work, but I can’t. I doubt new pipe smokers can either.
- Don’t think of it as a cigarette. It is more like a cigar. Don’t inhale the smoke. Play with it and taste it. This also adds to the relaxation and enjoyment of the pipe smoking experience.
I hope this helps you out if you decide to try pipe smoking or have been thinking about getting a Nording pipe. Both are highly recommended by me.